|
A Date Stamp can be added to images before printing using the supplied [ImageBrowser EX] image management and editing software.
IMPORTANT
- The operations described here assume that the ImageBrowser EX software from the supplied CD (DIGITAL CAMERA Solution Disk) has been installed, and has been updated over the Internet.
- If [ImageBrowser EX] was not included on the supplied CD, or if a CD did not come bundled with your camera, you can download and install the [ImageBrowser EX] updater from the Canon Web site. Please note that you will need to have your camera ready when you perform the installation.
NOTE
- The following example procedures are shown as performed in Windows 7. Operations and on-screen displays may differ slightly depending on the operating system you are using.
1. 1. Import your images into the computer.
For more information on importing images, refer to:
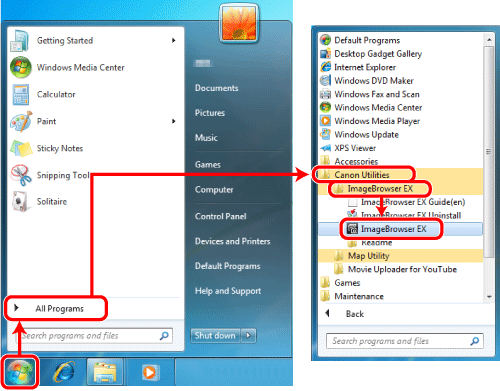
2. Double-click the icon on your desktop to start [ImageBrowser EX].

If you do not find a shortcut icon for [ImageBrowser EX] on your desktop, start [ImageBrowser EX] by clicking [Start] (
 ) > [All Programs] or [Programs] > [Canon Utilities] > [ImageBrowser EX] > [ImageBrowser EX], in that order.
NOTE
On a Mac, click the [ImageBrowser EX] icon on the [Dock]. If no [ImageBrowser EX] icon is found on the [Dock], click [Go] on the menu bar, select [Applications], and then open [Canon Utility] > [ImageBrowser EX], and then select and start [ImageBrowser EX].
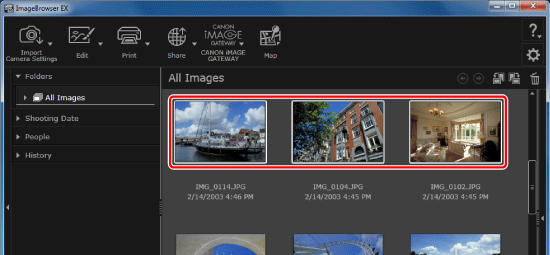
3. Image Browser EX will start. Click the desired images.
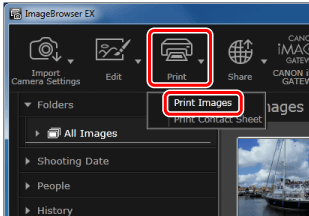
4. Select an image to print, click [Print], and then select [Print Images].
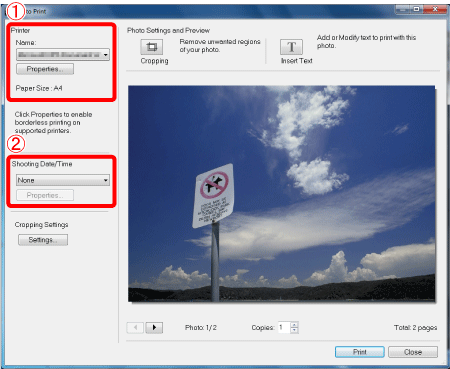
5. When the [Print Photo] screen appears, perform the following settings:
 Set the paper size, desired border option, etc.
 Select the format for the Date Stamp.
In the [Shooting Date/Time], click
 , and then select one of the following options: [Date/Time], [Date], [Time].
Next, click [Properties].
IMPORTANT
If a Date Stamp is added to an image previously appended with an in-camera Date Stamp, the printed image will included two Date Stamps. To prevent this, set [Shooting Date/Time] to [None].
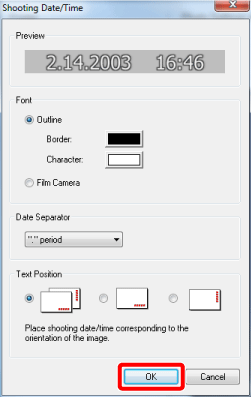
6. When the [Shooting Date/Time] dialogue box is displayed, use the options to select the format for the Date Stamp.
- [Font]: Select the font for the Date Stamp.
- [Date Separator]: Select the symbol used to separate the month, day, and year.
- [Text Position]: Select the location for the Date Stamp.
When finished, click [OK] to close the dialogue box.
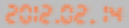
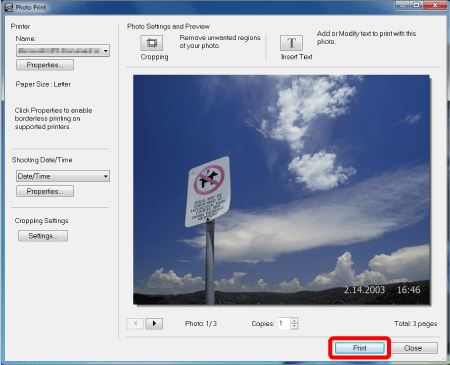
REFERENCE
The below image shows the format when [Font] is set to [Film Camera].
7. Click [Print].
This concludes the procedure for adding a Date Stamp to an image when printing.
|