|
|
Registering the Printer as a Bluetooth Device on a Windows PC - MX532
| Article ID: ART169512 |
| |
Date published: 02/12/2018 |
| |
Date last updated: 04/25/2019 |
Description
Registering the Printer as a Bluetooth Device on a Windows PC - MX532
Solution
Follow the procedure below to register the printer as a Bluetooth device on a Windows PC.
 Note Note
-
Before registering the printer, enable the Bluetooth function of your computer.
For more information, refer to your computer's operation manual.
-
If you want to re-register the printer as a Bluetooth device, first delete the registered printer, and then re-register it.
Deleting the Printer
The procedure to authenticate the computer may vary depending on the computer you are using.
In Windows 8:
In Windows 7 or Windows Vista:
In Windows XP:
In Windows 8:
-
Log into a user account with administrator privileges.
-
Right-click the  Bluetooth Devices icon on the notification area on the desktop, then select Add a Bluetooth Device. Bluetooth Devices icon on the notification area on the desktop, then select Add a Bluetooth Device.
The PC settings screen is displayed.
Note
-
Select Devices > Add a device, then select the device name of the printer from the device list.
Select the same device name as that checked under Checking the Device Name of the Printer.
-
Enter the passcode (passkey), then click Next.
If you do not set a passkey on the printer, click Next without entering any characters.
Printer registration is started.
Note
-
Make sure that the printer is added.
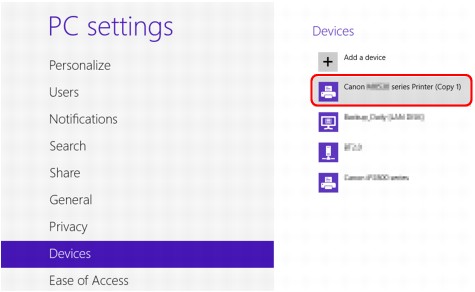
Make sure that the registered printer name is displayed on Devices on the PC settings screen.
Note
-
You can also confirm that the printer is added on a screen. To display the screen, select Control Panel from the Settings charm on Desktop > Hardware and Sound > Devices and Printers.
The registered printer icon and name are displayed.
The computer is ready to communicate with the printer via Bluetooth.
In Windows 7 or Windows Vista:
The following procedure is described using the screens in Windows 7.
-
Log into a user account with administrator privileges.
-
Select items from Control Panel as shown below.
-
In Windows 7, click Control Panel, then Add a Bluetooth Device under Hardware and Sound.
-
In Windows Vista, click Control Panel, Bluetooth Device under Hardware and Sound, then Add Wireless Device.
-
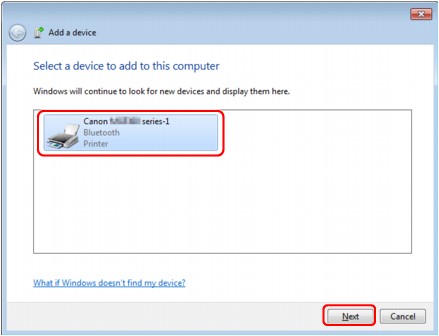
Select the device name of the printer and click Next.
Select the same device name as that checked under Checking the Device Name of the Printer.
-
Select Pair without using a code.
When registering this printer, Connecting with this device (Pairing with this wireless device in Windows Vista) is displayed.
Note
-
If you set a passkey on the printer, select Enter the device's pairing code and input the passkey, then click Next.
For more information about setting a passkey, see Bluetooth settings Screen.
-
Make sure that the printer is added.
-
In Windows 7, when This device has been successfully added to this computer is displayed, click Close.
-
In Windows Vista, when This wireless device is paired with this computer is displayed, click Close.
The computer is ready to communicate with the printer via Bluetooth.
Note
-
In Windows Vista, the Windows needs to install driver software for your Bluetooth Peripheral Device screen may be displayed automatically. In this case, click Don't show this message again for this device.
In Windows XP:
-
Log into a user account with administrator privileges.
-
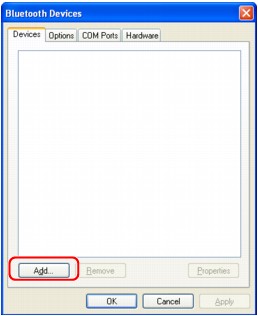
Click Control Panel, Printers and Other Hardware, then Bluetooth Devices.
-
Click Add on the Devices sheet.
Add Bluetooth Device Wizard will start.
-
Make sure that the printer is turned on, check the My device is set up and ready to be found check box and then click Next.
-
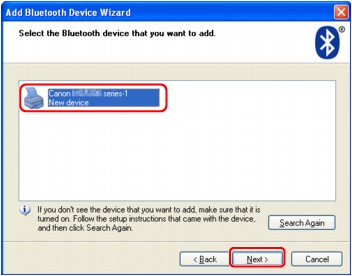
Select the device name of the printer and click Next.
Select the same device name as that checked under Checking the Device Name of the Printer.
-
Select Don't use a passkey, and then Next.
Note
-
If you set a passkey on the printer, select Use the passkey found in the documentation and input the passkey then click Next.
For more information about a passkey, see Bluetooth settings Screen.
-
Click Finish.
-
Check that the device name selected at step 5 is registered on the Devices sheet, and click OK.
The computer is ready to communicate with the printer via Bluetooth.
MX532
Page
|