Compatible Cutter Units Cutter Unit CT-06 Access the menu for cutter unit replacement 1. On the Tab Selection screen of the Control Panel, press  or  to select the Settings/Adj. tab (  ). NOTE - If the Tab Selection screen is not displayed, press the Menu button.
2. Press the OK button. The Set./Adj. Menu is displayed. 3. Press  or  to select Maintenance, and then press the OK button. 4. Press  or  to select Change Cutter, and then press the OK button. The Carriage moves. When it finishes moving, instructions are displayed on the Display Screen. NOTE - If you do not respond within two minutes, cutter cleaner replacement is canceled. In this case, repeat the procedure.
Replacing the Cutter Unit 1. Open the Top Cover.
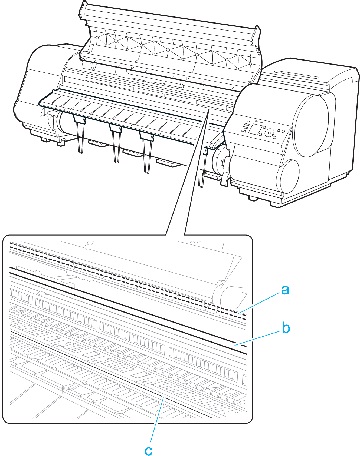
 2. If the Cutter Unit or Carriage Cover is dirty, use a damp cloth that you have wrung out completely to wipe it clean. IMPORTANT - Do not touch the Linear Scale (a), Carriage Shaft (b), or Fixed Blade (c). This may stain your hands and damage the printer.
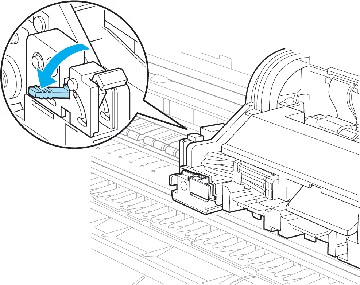
3. Push the Cutter Unit Detachment Lever to the left to unlock it.
 4. Holding the Cutter Unit by the Lock Lever (a) and grip (b), remove it from the Carriage.
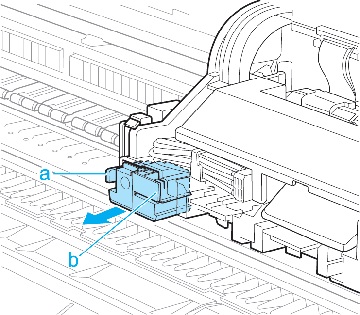 CAUTION - Never touch any part of the Cutter Unit except the Lock Lever (a) and grip (b). This may stain your hands or cause injury. Additionally, this may damage the printer.
- Do not disassemble the Cutter Unit. Touching the blade may cause injury.
NOTE - Dispose of the used Cutter Unit in accordance with local regulations.
5. Holding the new Cutter Unit by the Lock Lever (a) and grip (b), insert it on the Carriage until it clicks into place (c). IMPORTANT - After installing the Cutter Unit, hold it only by the grip (b) and pull the Cutter Unit forward to make sure it does not come off. It may damage the printer if the Cutter Unit comes off.

6. Lift the Cutter Unit Detachment Lever to lock it.
 7. Close the Top Cover.
 8. A confirmation message is displayed about the Cutter Unit lock. Press  or  to select Yes, and then press the OK button. 9. The Carriage is moved, and a confirmation message is displayed about resetting the cut count. To reset the cut counter, press  or  to select Yes, and then press the OK button.
|