Print head alignment on the Photo All-In-One printer.
Solution
Print Head Alignment
If printed ruled lines are misaligned or print results are otherwise unsatisfactory, adjust the print head position.
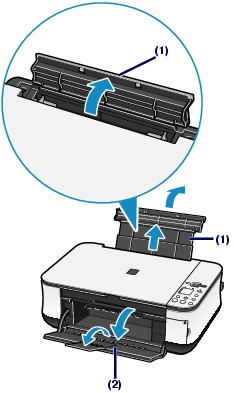
Ensure that the printer is powered on and open the paper output tray.
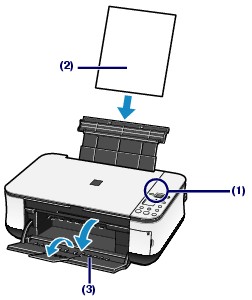
Load a sheet of A4 or Letter-sized plain paper in the auto sheet feeder (or ASF).
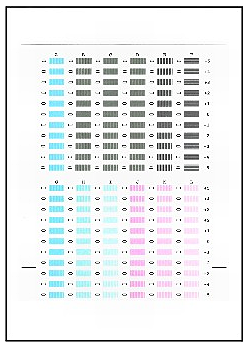
Print the print head alignment sheet.
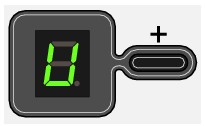
Press the <> (Maintenance) button repeatedly until [u] appears.
Select [L] on the LED to print the current head position adjustment values.
Press the <Black> or <Color> button. The machine prints the head alignment sheet.
Adjust the print head position.
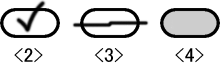
Check the printed patterns, and fill in the corresponding circle with a dark pencil or a black ink pen to select the number of the pattern in column A that has the least noticeable streaks.
< 1 > Good example
< 2 > Bad example: Checkmark < 3 > Bad example: Line only < 4 > Bad example: Not dark enough
Note: If it is difficult to select the best pattern, select the pattern that has the least noticeable white streaks.
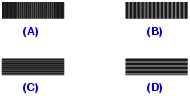
(A) Less noticeable vertical white streaks (B) Noticeable vertical white streaks (C) Less noticeable horizontal white streaks (D) Noticeable horizontal white streaks
Repeat the same procedure until you finish selecting the number of the pattern in column L.
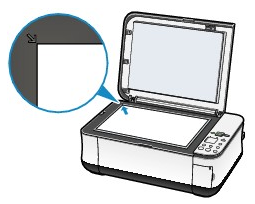
Open the document cover and load the head alignment sheet on the platen glass.
Note: Place the print head alignment sheet with the filled-in side FACING DOWN and align the upper corner of the sheet with the alignment mark as shown below.
Close the document cover gently.
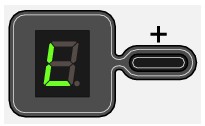
Confirm that U is displayed in the LED. If U is not displayed, press the <Maintenance> button repeatedly until [U] appears.
Press the <Black> or <Color> button.
The machine scans the head alignment sheet and aligns the print head automatically.
Important:
Do not open the Document Cover or move the loaded print head alignment sheet until scanning is completed.

 > (Maintenance) button repeatedly until [u] appears.
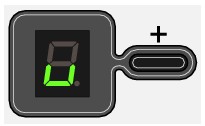

 Important: