imagePROGRAF PRO Series Printers Replacing the Maintenance Cartridge

Article ID: ART173445 | Date published: 01/16/2019 | Date last updated: 01/16/2019
 

Description

See below for instructions on how to replace the imagePROGRAF PRO Series printer's Maintenance Cartridge.

imagePROGRAF PRO-2000
imagePROGRAF PRO-4000
imagePROGRAF PRO-4000S
imagePROGRAF PRO-6000
imagePROGRAF PRO-6000S

Solution

How to Replace a Maintenance Cartridge

If a message indicates you should replace a maintenance cartridge, check the message details and follow the instructions below.

Selecting Maintenance Cartridge Replacement from Menu

  1. Flick Home screen and tap Maintenance.

    The Maintenance screen appears.

  2. Tap Maintenance cartridge info.

    The Maintenance cartridge info screen appears.

  3. Tap Replace.

    Instructions appear on the touch screen.

Replacing Maintenance Cartridge

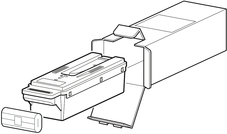
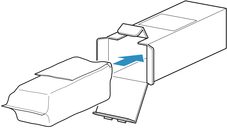
  1. Open box, and remove plastic bag and maintenance cartridge.

    Important

    • Never touch the metal contacts (A). This may damage the maintenance cartridge.

       
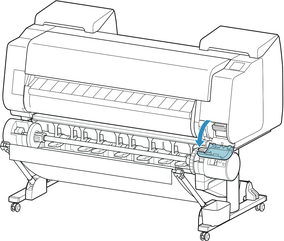
  2. Open maintenance cartridge cover.

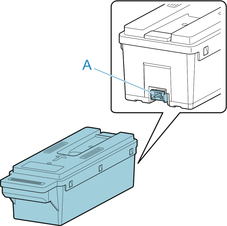
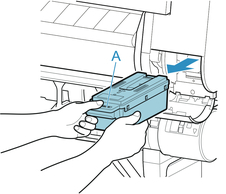
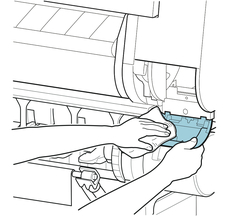
  3. Hold the used maintenance cartridge by the grip (A) with one hand and put your other hand under the maintenance cartridge to hold it firmly on the bottom, keeping it level as you pull it out.

    Important

    • A used maintenance cartridge is heavy. Always grasp the cartridge firmly and keep the cartridge level during removal and storage. If you drop a used maintenance cartridge or store it at an angle, ink may leak and cause stains.

  4. Put used maintenance cartridge in supplied plastic bag and store on flat surface.

  5. Check the top and bottom of the maintenance cartridge, place in the box, and store the box on a flat surface.

    Important

    • Always put the used maintenance cartridge back in the box and store the box on a flat surface.

    Note

    • Dispose of the used maintenance cartridge in accordance with local regulations.

  6. Wipe away any soiling on the maintenance cartridge cover.

    Important

    • Support the maintenance cartridge cover from underneath as you wipe it.

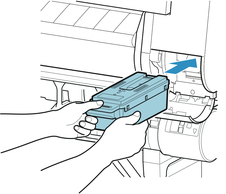
  7. Keeping the new maintenance cartridge level, insert it all the way in.

    The maintenance cartridge is initialized.

    Important

    • Do not remove the maintenance cartridge during initialization immediately after replacing the maintenance cartridge. The maintenance cartridge may become damaged.

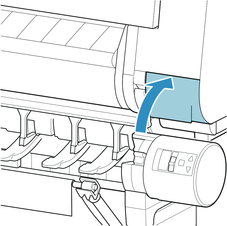
  8. Close maintenance cartridge cover.


Rate this Article
Was this article helpful?
Yes, This document is helpful
No, This document needs a clearer explanation
 
Please provide your comments