Installing the Printer Driver and Connecting the Printer (CP780)
This section describes how to install the printer driver on your computer.
The printer driver is software that is required to connect the printer to a computer.
attention:
- The following instructions are intended for Windows Vista. The screen images and operations may differ slightly in Windows XP.
- When installing / uninstalling the software, please log on to the computer as an Administrator.
- Do not connect the printer to the computer until the installation of the printer driver is finished.
- The printer may not operate correctly if it is connected to a computer via a USB hub.
- If other USB devices (excluding USB mouse devices and USB keyboards) are connected to the computer simultaneously, the driver may not be installed correctly.
- Do not put your computer into the standby mode (or sleep mode) while the printer is connected to the computer's USB port. If you accidentally do so, awaken the computer from the standby mode without disconnecting the USB cable.
- Some of the images that appear on this page contain a specific camera model name, however the actual model name varies depending on the camera used.
- 1. Quit any software that is running.
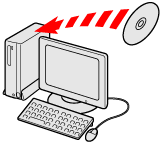
- Place the [Compact Photo Printer Solution Disk] CD-ROM supplied with your printer into the computer.
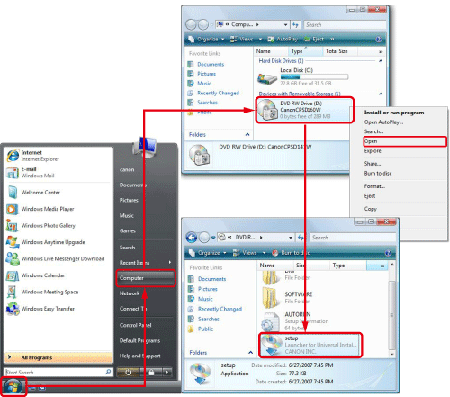
- Click [Run SETUP.EXE] when the following window appears.

If the window above does not appear, click [Start] ( ) > [Computer] or [My Computer] > [CanonCPSD180W] in this order, and double-click [setup].
- If the following window appears, click [Continue].

- The following screen will appear. Select the area in which you live.
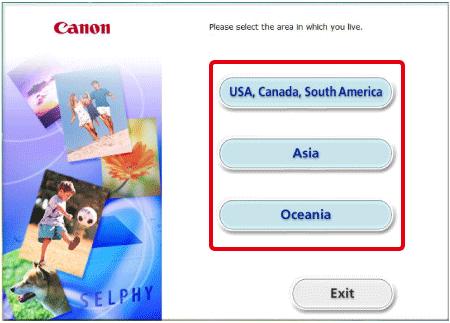
If [Asia] or [Oceania] is chosen, this setup procedure will proceed to Step 8.
- The following screen will appear.

 Select the country where you live.
 Click [Next].
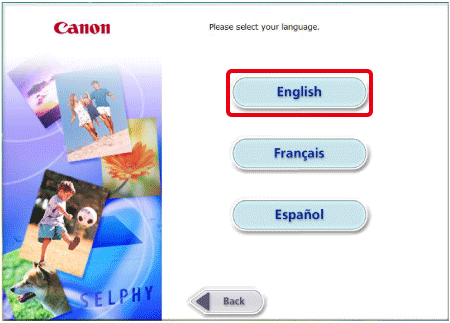
- The following screen will appear. Click [English].
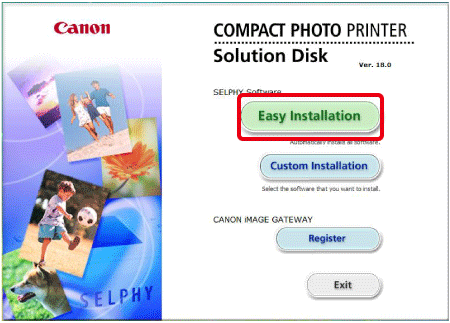
- The following screen will appear. Click [Easy Installation].
- The following screen will appear. Click [OK].

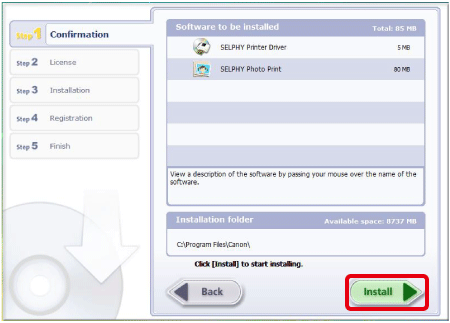
- The following screen will appear. Click [Install].
- The following screen will appear. Click [Yes] after reading the content carefully.

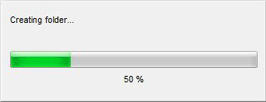
- The following screen appears, and installation starts.

- The following screen will appear. Click [Next].

- The installation of the software will start.
- The following screen appears.

- Install the [Ink Cassette] and [Paper Cassette] to the printer.
For details on how to set up the printer for printing, please refer to the link below.
- Connect the printer to the computer with a commercially available USB cable.
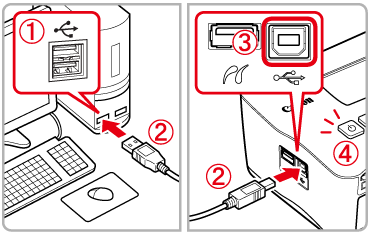
PC's USB terminal
Commercially available USB cable
 Printer's USB terminal
 <ON> button
After connecting, turn on the printer.
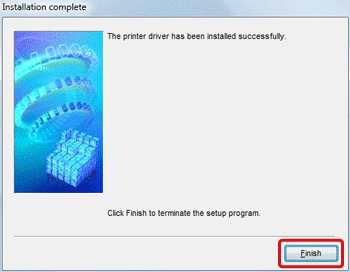
- The following screen will appear. Click [Finish].
- The installation of [SELPHY Photo Print] will start.

- The following screen will appear. Click [Next].

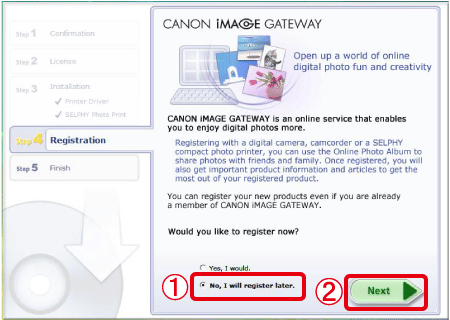
- The following screen will appear. If you want to register later, select
[No, I will register later.], and then click [Next].
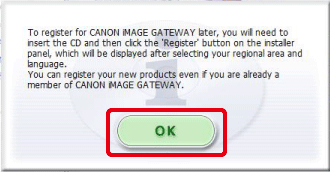
- The following screen will appear. Click [OK].
- The following screen will appear. Click [Restart] to restart the computer and complete the installation.

- The software will start and the following screen will appear when a connection between the printer and the computer is established.
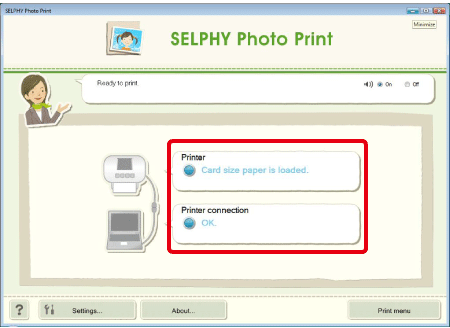
If the [Card size paper is loaded.] (If Card Size is selected) message appears in the [Printer] box, and [OK.] in the [Printer connection] box, the printer and the computer are properly connected, and the printer is ready for printing.
note:
Perform Steps 16 to 17 to automatically start [SELPHY Photo Print] the next time you use it.
If the software does not start automatically, select from the [Start] menu > [All Programs] or [Programs] > [Canon Utilities] > [SELPHY Photo Print] > [SELPHY Photo Print].
