How to install the ink tanks DS700
| Article ID: ART158772 |
| |
Date published: 06/09/2015 |
| |
Date last updated: 12/28/2015 |
Description
How to install the ink tanks DS700
Solution
Install the ink tanks following the procedures below.
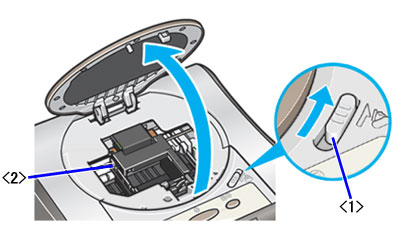
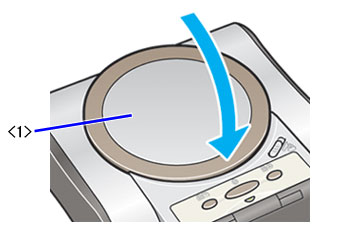
1. Confirm that the printer is powered on, and slide the cover open switch toward the right to open the cover. The print head holder moves to the center.
Note: Before installing the ink tanks, confirm the print head is installed. Click here for instructions.
2. Remove the ink tank (BCI-16 Color) from its package.
As shown in the image, hold the ink tank, and remove the orange protective cap, lifting in the direction of the arrow.
Note: The Ink outlet should not be touched. Ink supply problems may occur.
3. Insert the ink tank at an angle so that the ">"mark on the ink tank faces the "<" mark on the print head lock lever.
<1> Marks of Ink Tank and Print Head Lock Lever
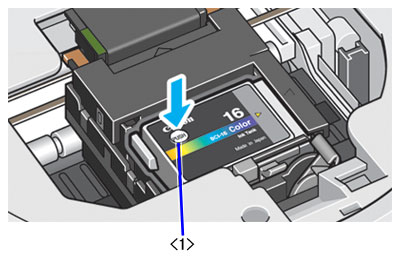
4. Press down on the
PUSH mark on the ink tank until a click sound is heard.