Wireless LAN Setup With Downloaded Drivers for a Mac - PIXMA iP7220
Article ID: ART171019
|
Date published: 07/20/2018
|
Date last updated: 08/18/2022
Description
Learn how to setup your PIXMA iP7220 for use over a wireless network on a Mac with the downloaded drivers.
Solution
You can use drivers downloaded from our website to set up your PIXMA iP7220 for wireless network use with a Mac®. Please view the video or follow the steps below. Please note, the video will guide you to where the drivers are located on our website. For more detailed instructions please follow the written steps below.
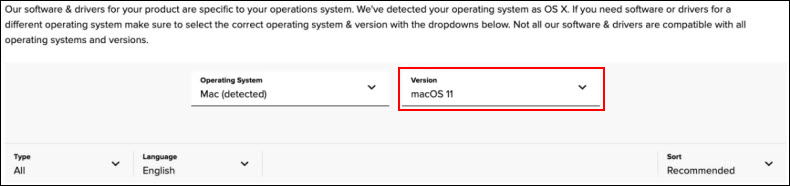
The version of macOS® installed on your computer will be automatically detected. If it is not detected, select it from the dropdown menu.
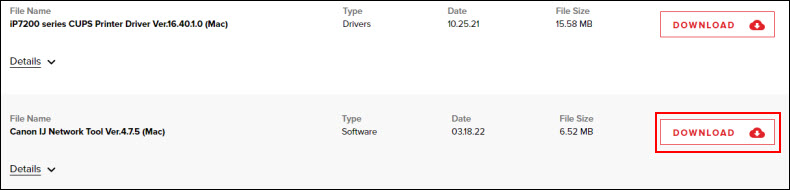
Choose Download.
After the driver is downloaded, download the Canon IJ Network Tool.
After these files have been downloaded, open them. A window will appear with a package file.
Double-click the package file to open it.
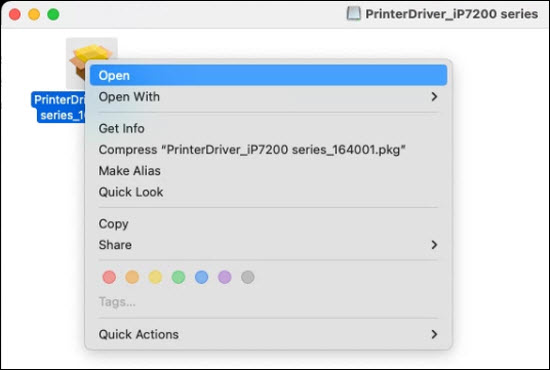
Based on your computer's security settings, you may receive the "you can't open the file because it was not downloaded from the App Store®" message. Control-click or right-click on the package file and select Open.
Follow all on-screen instructions to install the file that you opened. Do this for the two files that you downloaded.
After the network connection has been established.
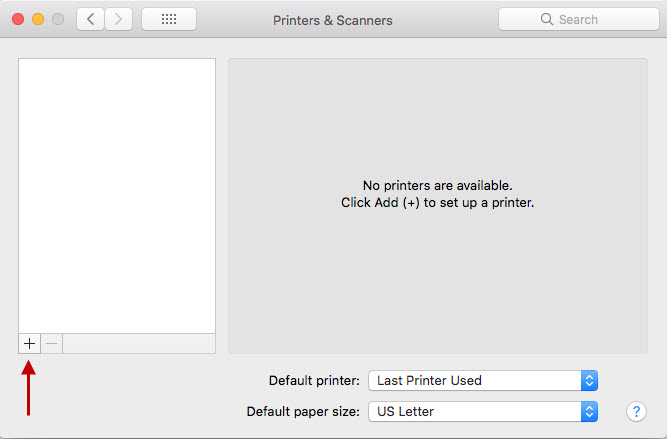
Select the Apple menu and choose System Preferences.
Select Print & Fax / Print & Scan / Printers & Scanners. The name will vary based on the Mac OS on your computer.
Select the plus icon + towards the lower left of the window.
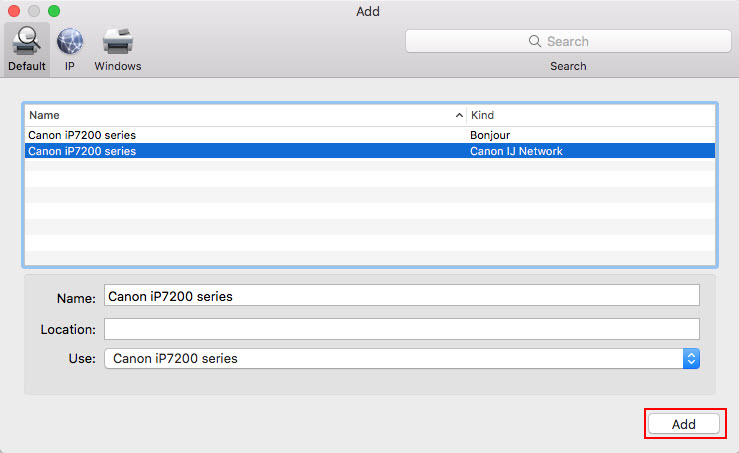
If a list of printers appears directly under the plus icon +, choose Add printer or scanner...
In the Add window, wait a few moments and a listing for the iP7220 will appear as a Canon IJ Network device.
Select this to highlight it. In the Use drop down menu, make sure that Canon iP7200 series is selected.
Choose Add to add the printer to your printer list.
The printer is now ready for use.
Good to know.
If your printer is not currently connected to your wireless network, there are a couple of ways that the connection can be established:
If your product issue was not resolved after following the steps above, or if you require additional help, please create or log in to your Canon Account to see your technical support options.
Or if you still need help, visit our Canon Community by clicking the button below to get answers:


 Based on your computer's security settings, you may receive the "you can't open the file because it was not downloaded from the App Store®" message. Control-click or right-click on the package file and select Open.