|
|
MP760 print head alignment in Windows
| Article ID: ART159992 |
| |
Date published: 06/09/2015 |
| |
Date last updated: 08/18/2015 |
Description
MP760 print head alignment in Windows.
Solution
Print Head Alignment in Windows
If colors mix or streaks appear in the nozzle check pattern, perform the print head alignment.
The print head alignment can be performed either automatically or manually.
If the automatic print head alignment does not resolve the problem, perform the print head alignment manually.
CAUTION: After confirming that the cable is connected and the printer is powered on, perform the following.
- Open the Printers folder.
- Do one of the following.
- Windows 2000/XP: Right-click the printer icon for the machine, then click 'Printing Preferences'.
- Windows 98/Me: Right-click the printer icon for the machine, then click 'Properties'.

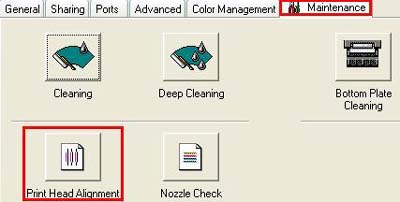
- Click the 'Maintenance' tab and click 'Print Head Alignment'.
- The message below is displayed. After confirming the two points below, click 'Print Head Alignment'.
- Is the printer powered on?
- Is letter sized plain paper set in the printer?

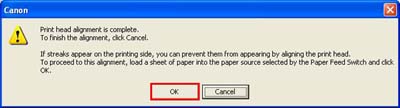
- When the message below is displayed, click 'OK'.

- Confirm the print output. When the nozzle check pattern printing as below has finished, the print head alignment has completed.

- Open the Printers folder.
- Do one of the following.
- Windows 2000/XP: Right-click the printer icon for the machine, then click 'Printing Preferences'.
- Windows 98/Me: Right-click the printer icon for the machine, then click 'Properties'.

- Click the 'Maintenance' tab and click 'Custom Settings'.

- Select 'Align heads manually', and click 'Send'.
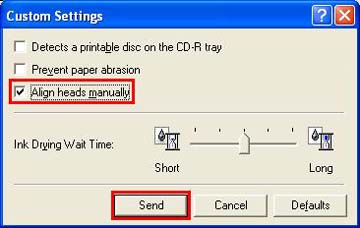
- To write settings into the printer, click 'OK'.

- Click the 'Maintenance' tab and click 'Print Head Alignment'.

- The message below is displayed. After confirming the two points below, click 'Print Head Alignment'.
- Is the printer powered on?
- Is letter sized plain paper set in the printer?

- When the message below is displayed, click 'OK'. Print head cleaning is started. During cleaning operations, other operations should not be performed. After cleaning has finished, the head alignment pattern will be printed.

- The following message is displayed. After printing has finished, click 'Yes'.

- Refer to the printed sheet, and enter the numbers on the next screen.
- Select the pattern with the fewest visible vertical stripes in column A.
- Enter the selected pattern's number in the column A box.
- Similarly, enter the selected numbers in the boxes for column B to L.


<1> Example of highly visible vertical stripes in the pattern.
<2> Example of the fewest visible vertical stripes in the pattern.
- After all numbers have been entered, click 'OK'.
- The following message is displayed. After confirming paper is set, click 'OK'. Another pattern printing will be performed.
- The following message is displayed. To proceed to the next step, click 'OK'.

- Refer to the printed sheet, and enter the numbers on the next screen.
- Select the pattern with the fewest visible horizontal stripes in column M. (When all patterns are viewed as the same print result, leave to the default 0.)
- Enter the selected pattern's number in the column M and N box on the right.

- After numbers have been entered, click 'OK'.
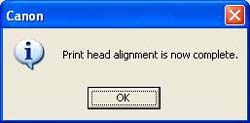
- The following message is displayed. Click 'OK' and the print head alignment is completed. You will return to the 'Maintenance' sheet.
|
