|
|
Move procedure (iPF650/655/750/755)
| Article ID: ART130390 |
| |
Date published: 05/12/2015 |
| |
Date last updated: 08/17/2015 |
Description
To protect the internal parts in transit, always follow these steps before transferring the printer to a new location.
Solution
To protect the parts in transit, always follow these steps before transferring the printer to a new location.

Once you press the [OK] button on the [Prep.Move Printer] screen, the printer immediately begins the move printer procedure. There is no confirmation question for this procedure.
 |
| |
 |
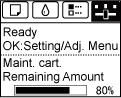
It is not possible to prepare the printer for transfer if the Display Screen requests you to replace the Maintenance Cartridge or check the remaining capacity. Replace the Maintenance Cartridge before transfer preparations. In this case, you will need one new Maintenance Cartridge. |
| |
|
Depending on the state of the printer, part replacement may be necessary when preparing to transfer the printer (that is, when you execute the printer menu item to prepare for transfer). |
- Remove the paper.
- On the [Tab Selection] screen of the Control Panel, press
 to select the Settings/Adj. tab ( to select the Settings/Adj. tab ( ). ).
If the [Tab Selection] screen is not displayed, press the [Menu] button.
- Press the [OK] button.
The Set./Adj. Menu is displayed.
- Press the
 or or  to select [Prep.Move Printer], then press the [OK] button. to select [Prep.Move Printer], then press the [OK] button.
Once you press the [OK] button, the printer immediately begins the move procedure. There is no confirmation question for this procedure.
Once preparations are finished, a message on the Display Screen requests you to open the Ink Tank Cover.
If consumables must be replaced, the message "Consumables must be replaced. Call for service." is shown on the Display Screen and preparation is not possible. If this message is displayed, press the [OK] button and contact your Canon dealer for assistance.
- Open the Ink Tank Covers.
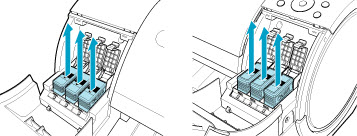
- Pressing the tip of the Ink Tank Lock Lever horizontally, lift the Ink Tank Lock Lever to release the lock.

- Holding the ink tanks by the grips, remove them.

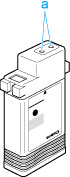
Store the ink tanks you removed with the ink holes (a) facing up. Otherwise, ink may leak and cause stains.
- Repeat steps 2 and 3 to remove all ink tanks.
- Push all ink tank lock levers closed until they click into place.
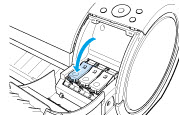
- Close the Ink Tank Cover.
At this point, ink is drawn out from inside the tubes.
Do not remove the Maintenance Cartridge during this process.
When the process is finished, "Completed! Turn Power Off!" is displayed.
- Press the [Power] button and turn off the printer.
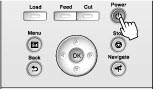
Turn off the printer before you unplug it. It may damage the printer if you unplug it before it is off and transfer it in that state. If you accidentally unplug the printer, plug it in again, reinstall the ink tanks, and follow this procedure again.
- Disconnect the power cord and interface cable.
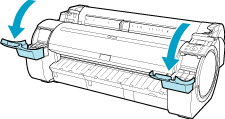
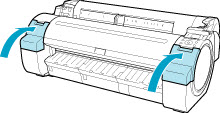
- Tape down printer covers to secure them, in the reverse order of tape removal during installation.
- Remove the Stand by reversing the installation procedure, when it was attached to the printer.
- Disassemble and repackage the Stand by following the installation procedure in reverse.
- Repack the Roll Holder, Holder Stopper, and printer in shipping materials, and then package them in a shipping box.
|
