Learn how to load paper in the rear tray of the PIXMA 6120.
Solution
Watch the video or skip to the written instructions below to learn how to load paper in the rear tray.
Written Instructions
Load the paper
Make sure the paper is flat. If it's curled, gently bend the stack in the opposite direction of the curl.
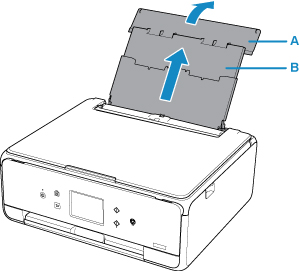
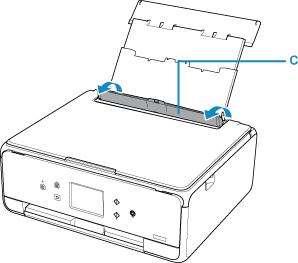
Open the rear tray cover (A) and pull up the paper support (B).
Open the feed slot cover (C).
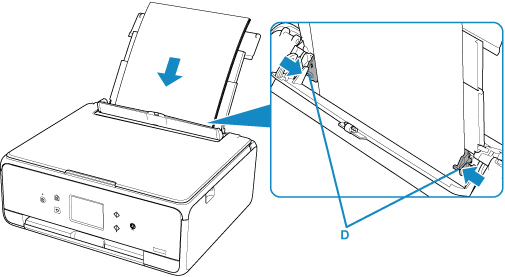
Slide the paper guides to open them, and load the paper in the center of the rear tray with the print side facing up. Load photo paper with the glossy side facing up.
Slide the paper guides (D) to align them with both sides of the paper stack. Be careful not to push the paper guides too hard against the paper.
Always load paper in the portrait orientation (E). Loading paper in the landscape orientation (F) can cause jams.
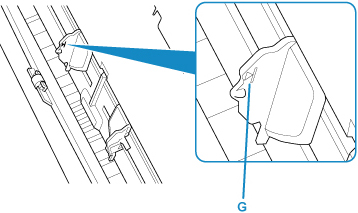
Be careful not to load sheets of paper higher than the load limit mark (G).
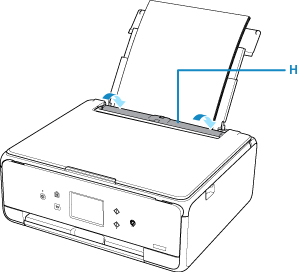
Slowly close the feed slot cover (H). If the feed slot cover is open, the paper won't fed.
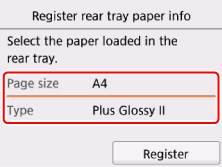
After closing the feed slot cover, the paper information screen displays. Select your loaded paper Page size and Type, then select Register.
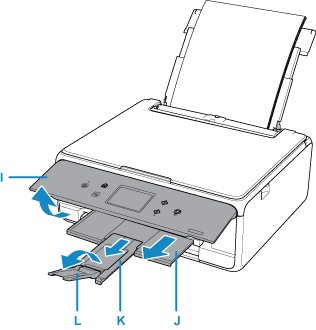
Open the operation panel (I), pull out the paper output tray (J) the paper output support (K), and the output tray extension (L).
Be sure to open the operation panel before printing. If the operation panel is closed, the printer won't start.
Notes about paper
You can use general copy paper or Canon Red Label Superior WOP111/Canon Océ Office Colour Paper SAT213.
We recommend Canon genuine photo paper for printing photos. For details, see supported media types.

 Watch the video or skip to the written instructions below to learn how to load paper in the rear tray.
.jpg)
 Always load paper in the portrait orientation (E). Loading paper in the landscape orientation (F) can cause jams.
 If the feed slot cover is open, the paper won't fed.