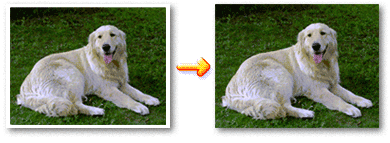
The borderless printing allows you to print images without margins by enlarging the data so it extends slightly off the paper.
Open the printer driver through the application software
-
Select command you normally use to start a print task. In general, select Print on the File menu to open the Print dialog box.
-
Select your model name and select Preferences (or Properties). The printer driver setup window appears.
 Depending on the application software you use, command names or menu names may vary and there may be more steps. For details, refer to the user's manual of your application software.
Open the printer driver from the Start menu
-
Select items from the Start menu as shown below:
-
Windows 7, select the Start menu > Devices and Printers.
-
Windows Vista, select the Start menu > Control Panel > Hardware and Sound > Printers.
-
Windows XP, select the Start Menu > Control Panel > Printers and Other Hardware > Printers and Faxes.
-
Right-click on your model name icon, then select Printing Preferences from the menu. The printer driver setup window appears.
When you open the printer driver setup window through Printer properties (Windows 7) or Properties (Windows Vista, Windows XP) some tabs don't appear. For more information, refer to the user's manual for Windows.
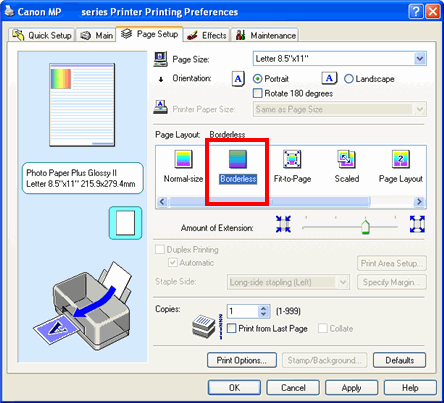
Begin borderless printing
-
Open the printer driver setup window.
-
Select Borderless Printing in Page Layout on the Page Setup tab.
-
Select OK when the confirmation message appears.
-
When a message prompts you to change the paper type, select a media type from the list, then select OK.
-
Check the Page Size list. If you want to change the size, select another size from the list. The list displays only the sizes that can be used for borderless printing.
-
Adjust the amount of extension using the Amount of Extension slider as necessary.
-
Move the slider to the right to enlarge the image, and to the left to shrink the image.
-
If you set the slider all the way to the right, the back side of the paper may smudge.
-
We recommend that you set the slider at the second position from the right (in most cases).

- Select OK, and the data prints without margins.
Expand the range of the document to print
-
You can select a large amount of extension and it will allow you to perform borderless printing with no problems. However, the part of the document that's outside of the paper range won't print. Subjects around the perimeter of a photo may not print.
-
Try borderless printing once. If you're not satisfied with the result of borderless printing, reduce the amount of extension. The extension amount becomes shorter as the Amount of Extension slider moves to the left.
- If Preview before printing is checked on the Main tab, you can confirm that there will be no border.
Good to know
When a page size that can't be used for borderless printing is selected, the size automatically changes to a valid page size for borderless printing.
When you select High Resolution Paper, T-Shirt Transfers, or Envelope from the Media Type list on the Main tab, you can't perform borderless printing.
When you select Borderless, the Printer Paper Size, Duplex Printing, Staple Side settings, and the Stamp/Background... (Stamp...) button on the Page Setup tab appear grayed out and aren't unavailable.
Depending on the type of the media used during borderless printing, the print quality may deteriorate at the top and bottom of the sheet or stains may form.
When the ratio of the height to the width differs from the image data, a portion of the image may not print depending on the size of the media you use. If this happens, use a software app to crop the image data according to the paper size.
When you select Plain Paper for Media Type on the Main tab, borderless printing isn't recommended, and the dialog box for media selection appears. If you use plain paper for test printing, select Plain Paper, then OK
If your product issue was not resolved after following the steps above, or if you require additional help, please create or log in to your Canon Account to see your technical support options.
Or if you still need help, visit our Canon Community by clicking the button below to get answers:

____________________________________________________________________________________________
