Set Duplex Printing (Windows) Pro9000
| Article ID: ART127360 |
| |
Date published: 05/12/2015 |
| |
Date last updated: 08/14/2015 |
Solution
Set Duplex Printing (Windows)
For details on how to set duplex printing, see below:
- Select the command you use to perform printing from the program you are using. (In general, select 'Print' on the File menu to open the Print dialog box.)
- Select your model name and click 'Preferences' (or 'Properties'). The printer driver setup window appears.
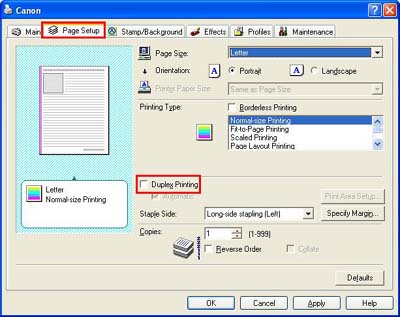
- Click the Page Setup tab.
- In the Printing Type section, select 'Normal-size Printing', 'Fit-to-Page Printing', 'Scaled Printing', or 'Page Layout Printing'.
- Select 'Duplex Printing'.
Note: When a media type other than Plain Paper, Photo Paper Plus Double Sided, or Postcard is selected in the Media Type menu, duplex printing cannot be performed.
- Select the 'Staple Side'. The printer analyzes the 'Orientation' and 'Page Layout' settings, and automatically selects the best staple position. Check the 'Staple Side' setting. If you want to change the setting, select another value from the list.
Note: If the 'Staple Side' is set incorrectly, back pages of the document may appear to be printed upside-down.
- When the setting is completed, click the OK button at the bottom of the window.

- Setting duplex printing is completed.
