Procedures of Importing Movie Clips to Final Cut Pro X Using Final Cut Pro7
07/01/2011
This document contains information about how to use Final Cut Pro 7 to import movie clips captured by the XF305/XF300 and the XF105/XF100 to Final Cut Pro X.
The information here is based on the assumption that Final Cut Pro X and Final Cut Pro 7 are installed on the same Macintosh computer. Also, Canon XF Plugin for Final Cut Pro must be installed.
- Start Final Cut Pro 7, and use the [Log and Transfer] function to import movie clips to the project bin. Confirm the name of the project you imported the clips to. For the detailed information about how to import movie clips, see the instruction manual for Canon XF Plugin for Final Cut Pro.
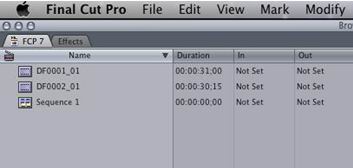
Figure 1. Importing Movie Clips to Final Cut Pro7
In the example above, two movie clips, DF0001and DF0002, have been imported to the project bin "FCP7", and these movie clips are displayed as "DF0001_01" and "DF0002_01" in the bin.
- Save the project and quit Final Cut Pro 7.
- Start Final Cut Pro X.
- In the File menu of Final Cut Pro X, select Import and then Files. The Import Files dialog appears.
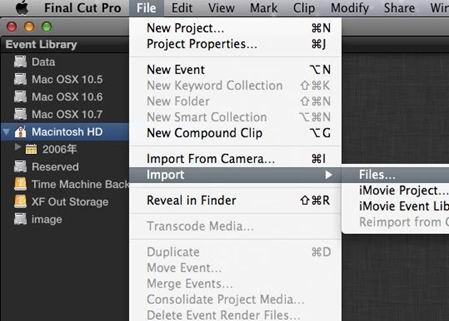
Figure 2. Selecting Import Files
- Select the movies clips imported by Final Cut Pro 7. The movie clips are located in the following folder with the extension ".MOV".
<Home Directory>/Documents/Final Cut Pro Documents/Capture Scratch/<Project name in Final Cut Pro 7>/
The names of MOV files are the same as the names of the movie clips that appeared in the bin when they were imported by Final Cut Pro 7.
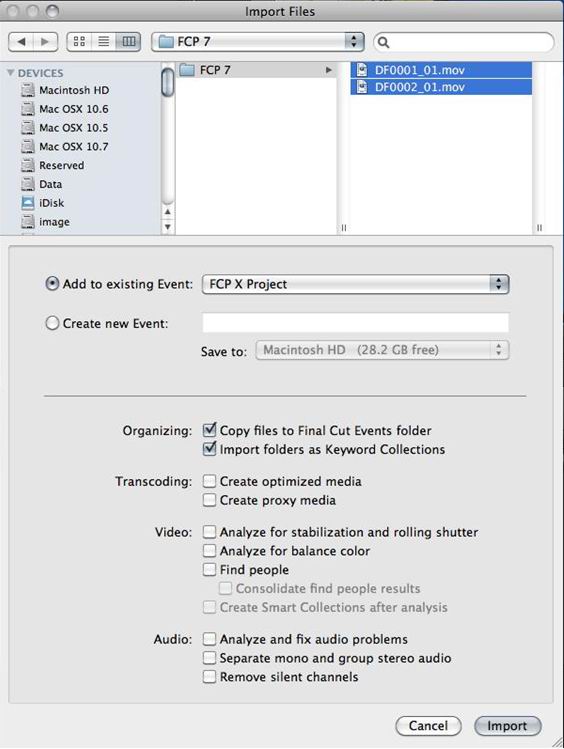
Figure 3. Setting Window of Import Files
In the previous example, we have used Final Cut Pro7 to import movies clips to the bin named "FCP7". Therefore, the files are located in the <Home Directory>/Documents/Final Cut Pro Documents/Capture Scratch/FCP7 folder.
There are two MOV files, DF0001_01.mov and DF0002_02.mov, which have been imported in the previous step. Select these files.
- Make the event setting or other settings for the destination to add movie clips, and then click the [Import] button.
- The imported movies clips appear in the Event Library.
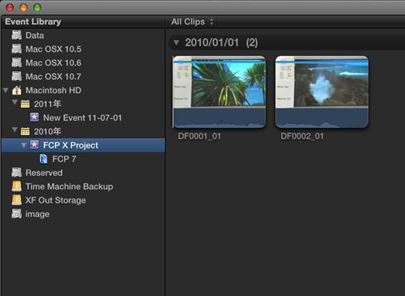
Figure 4. Import completed
Example: Two movie clips, "DF0001_01" and "DF0002_01" have been imported to the event.
