Connecting to a Specified Access Point

This procedure describes the operation by following the on-screen instructions of the Wireless Connection Setup Tool's Easy Setup.
To connect the scanner to a computer via an access point that does not support WPS, select the access point for wireless connection from a list.

- If the access point is using security settings (such as MAC address filtering), change the settings to allow connection to this scanner.
- To ensure good Wi-Fi communications, perform this procedure with the scanner initially located close to the access point.
- Computers running Windows XP (64-bit edition) cannot be connected to the scanner using the following procedure. Configure the settings necessary for connecting to the scanner in [Custom Setup].
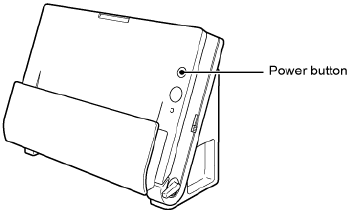
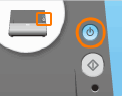
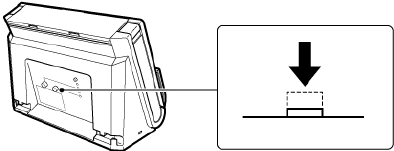
1. If the scanner is on, turn it off.
Press and hold the power button unitl the indicator goes out.
2. Enable the wireless LAN function of the computer.
This step is not necessary if the wireless LAN function is already enabled.
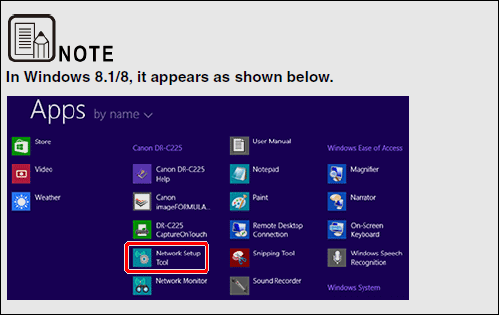
3. Start the Wireless Connection Setup Tool.

If the Wireless Connection Setup Tool is not yet installed on the computer, see the Setup Guide to install it.

Click [Start] - [All Programs] - [Canon DR-C225] - [Network Setup Tool].

From the Finder, double click [Applications] - [Wireless Connection Setup Tool].
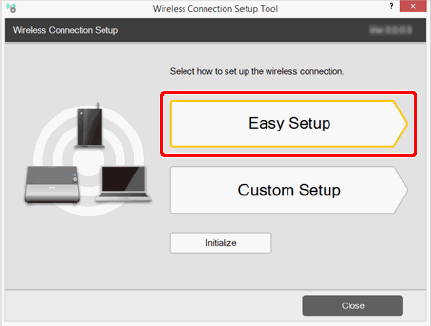
4. Click [Easy Setup].
5. Click [Next].

6. Perform steps 1 to 3 as shown on the screen.
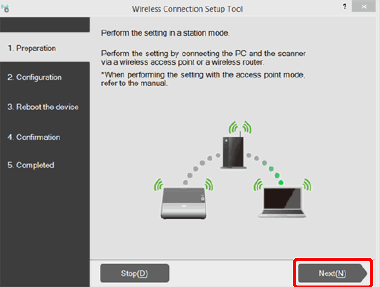
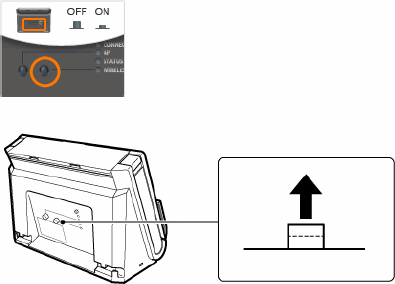
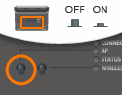
(1) Turn off the WIRELESS switch on the rear of the scanner.
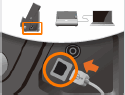
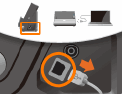
(2) Connect the scanner to a computer via USB cable.
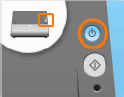
(3) Turn on the scanner.
7. Click [Next].
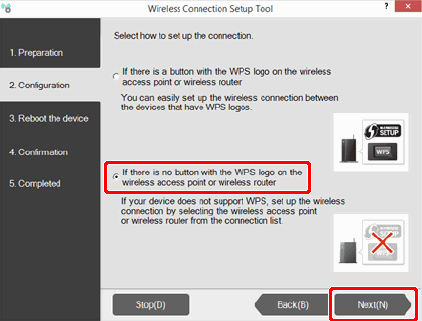
8. Select [If there is no button with the WPS logo on the wireless access point or wireless router], and click [Next].
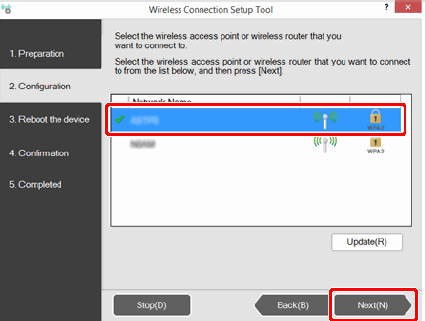
A list of access points detected by the computer is displayed.
9. Select the SSID of the wireless access point or wireless router from the list, and click [Next].
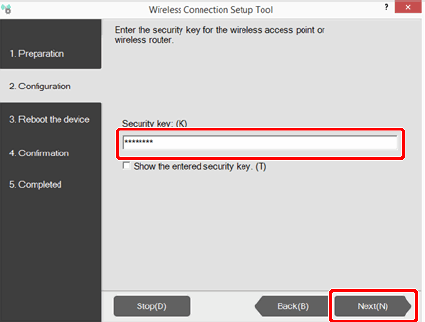
10. Enter the security key of the wireless access point or wireless router and click [Next].
11. Perform steps 1 to 3 as shown on the screen.

(1) Turn off the scanner.
(2) Remove the USB cable.
(3) Turn off the AP switch on the rear of the scanner.

12. Click [Next].
13. Perform steps 4 and 5 as shown on the screen.
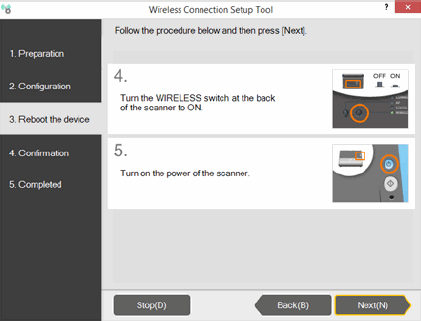
(4) Turn on the WIRELESS switch on the rear of the scanner.

(5) Turn on the scanner.

14. The connection is verified.
The connection is verfied.
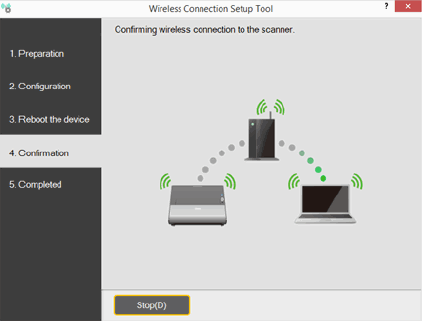
"Wireless connection to the scanner is completed." is displayed when the connection is verified. Setup is completed.

