Paper Is Jammed
When a paper jam occurs during printing, the printing is interrupted and the Status Monitor will display an error message such as “Paper jam #****” (**** represents numbers). Remove the paper jam according to the following steps:
 IMPORTANT:
- Do not pull out the printed paper from the ejection slot. It will cause printing problems.
- Use the dedicated paper. When paper that is not dedicated is used, blurring or bleeding may occur and it may adversely affect the printer, causing malfunctions.
- If the paper leading edge of the paper is bent, it may cause paper jams.
- Pull the transport unit out of the printer.
1. Raise the transport unit lever.

2. Pull this lever while holding the printer with one hand so that it does not move.
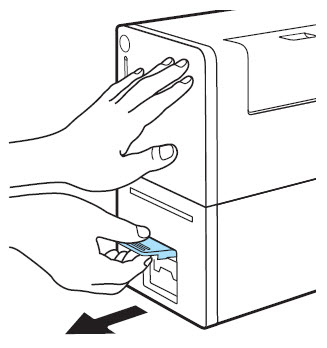
3. Pull the transport unit out with both hands as shown in the figure.
 CAUTION:
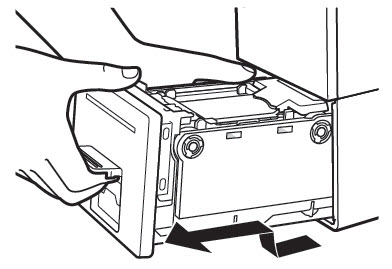
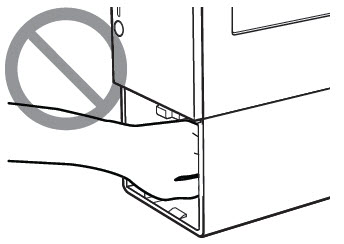
• When pulling the transport unit out of the printer, hold it securely with both hands so that it does not fall down.
• Do not put your hands inside the printer. Failures or physical injury could result. Ink adhered inside of the printer could stain clothes or hands.
IMPORTANT:
When pulling the transport unit out of the printer or inserting it in the printer, be careful not to hit it strongly against the table or shelf. The surface of the table or shelf could be damaged.
- Remove the jammed paper
1. Open the paper set lever.
When the ejection slot area is clogged, remove the paper retainer (A) and confirm that labels or other matter is not stuck to it. If there are any labels or scraps, remove them all.

2. Remove the jammed paper and cleanly cut the paper leading edge.

Cut the paper's separator (mount) part.
The paper has the mark, cut the center of the The paper has the mark, cut the center of the mark.
3. Remove the jammed paper from the roll holder side.

4. If the paper retainer (A) was removed in Step 1, attach the Paper Retainer back.

Align the arrow  of the Paper Retainer (A) and the attachment position
  .
.
- Set the paper. (Loading Paper)
When the paper is set, cleaning will be performed and printing will resume. To cancel the printing, click on [Cancel Print Job] on the Status Monitor.
For support and service options, sign into (or create) your Canon Account from the link below.
My Canon Account
