EOS R7: Connecting to a Computer via Wi-Fi
| Article ID: ART182595 |
| |
Date published: 05/11/2023 |
| |
Date last updated: 09/13/2023 |
Description
Connecting to a Computer via Wi-Fi
Solution
|
Connecting to a Computer via Wi-Fi
This section describes how to connect the camera to a computer via Wi-Fi and perform camera operations using EOS software or other dedicated software. Install the latest version of software on the computer before setting up a Wi-Fi connection.
For computer operating instructions, refer to the computer user manual.
Operating the Camera Using EOS Utility
Using EOS Utility (EOS software), you can import images from the camera, control the camera, and perform other operations.
Steps on the camera (1)
-
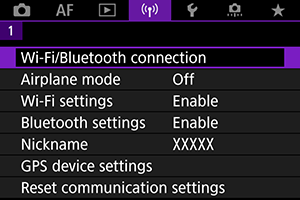
Select [ : Wi-Fi/Bluetooth connection]. : Wi-Fi/Bluetooth connection].
-
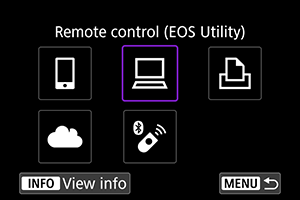
Select [ Remote control (EOS Utility)]. Remote control (EOS Utility)].
- If past connections () are listed, turn the
 dial to switch screens. dial to switch screens.
-
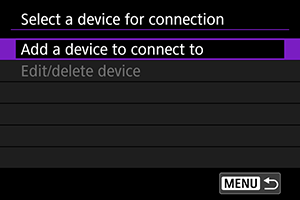
Select [Add a device to connect to].
-
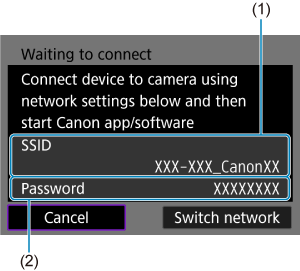
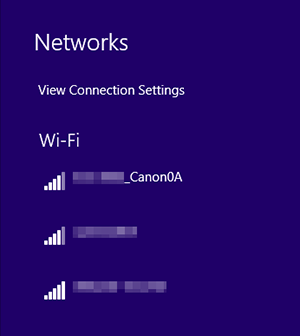
Check the SSID (network name) and password.
- Check the SSID (1) and Password (2) displayed on the camera screen.
Steps on the computer (1)
-
Select the SSID, then enter the password.
Computer's screen (sample)
Steps on the camera (2)
-
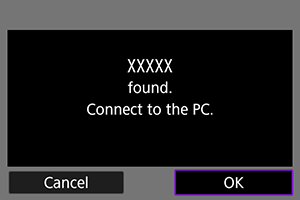
Select [OK].
Steps on the computer (2)
-
Start EOS Utility.
-
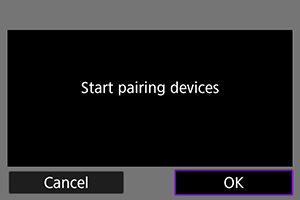
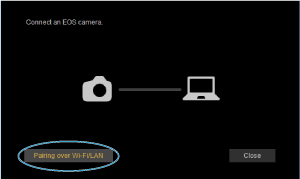
In EOS Utility, click [Pairing over Wi-Fi/LAN].
- If a firewall-related message is displayed, select [Yes].
-
Click [Connect].
- Select the camera to connect to, then click [Connect].
Steps on the camera (3)
-
Establish a Wi-Fi connection.
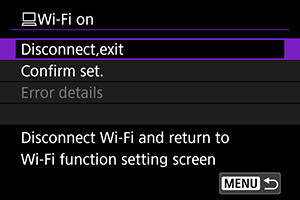
[ Wi-Fi on] screen Wi-Fi on] screen
-
Disconnect,exit
- Terminates the Wi-Fi connection.
-
Confirm set.
- You can check the settings.
-
Error details
- When a Wi-Fi connection error occurs, you can check the details of the error.
The Wi-Fi connection to a computer is now complete.
|
SIMS Doc Id
1679066371509701464