Installing the Printer Driver
Note: The display resolution needs to be set to 1,024 x 768 pixels or more during installation.
Windows
Macintosh
Windows
-
Place the supplied Compact Photo Printer Solution Disk into the computer's CD-ROM drive.
-
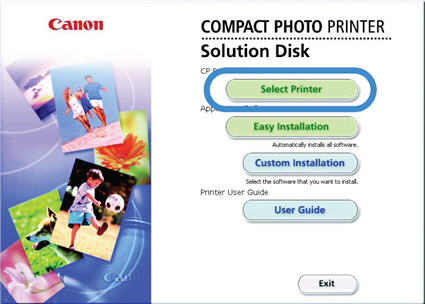
Click [Select Printer] in the printer driver window, followed by the name of your printer model.
-
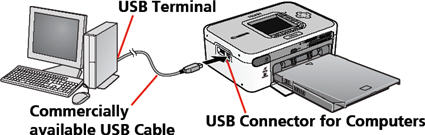
Follow the onscreen instructions. When you are prompted to attach the printer partway through, attach the printer to the computer and turn the printer on.
-
Click the [Finished] or [Restart] button when it appears.
Macintosh
-
Place the supplied Compact Photo Printer Solution Disk into the computer's CD-ROM drive and double-click the  (CPSD Installer) icon in the CD-ROM window.
-
Click [Select Printer] in the printer driver window and select your printer. Click [Agree], select [Easy Install], followed by [Install]
-
Follow the onscreen instructions. Restart the computer when prompted.
-
Attach the printer to the computer and turn the printer on.
-
Open the [Utilities] folder on the start-up disk and double-click the [Printer Settings Utility] icon.
-
Click [Add (Printer)] and select [USB] followed by your printer. Finish by clicking the [Add] button and closing the window.
