Loading and Printing on Rolls(iPF8000S/iPF8100)
These are the basic steps for loading and printing on rolls.
Follow the steps below to switch to a new roll or a roll of a different type or width before printing.
- <Note>
- If you are not using the optional Media Take-up Unit when printing long documents such as banners, spread a clean cloth or paper on the floor. Use the Output Stacker to prevent the floor from soiling printed documents after they are printed.
- If you prefer to wait for the ink to dry after printing and simply eject the document, you can deactivate automatic cutting and cut the paper manually.
- Turn the printer on.

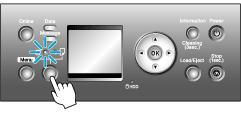
- Select a roll as the paper source.
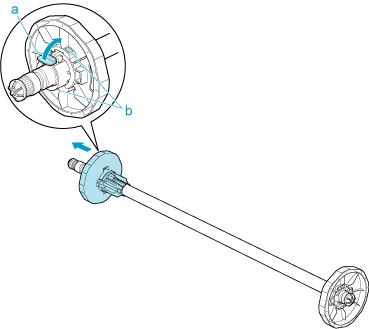
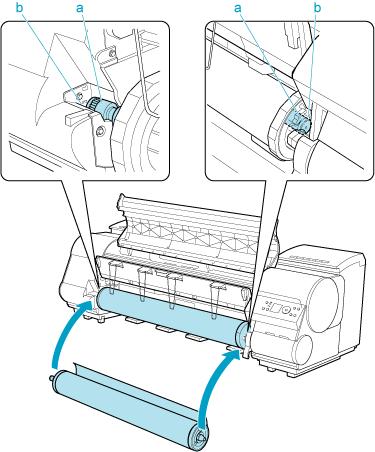
- Lift the Holder Stopper lever (a) from the shaft side to unlock it. Holding the Holder Stopper at the position indicated (b), remove it from the Roll Holder .
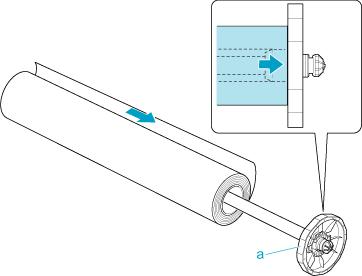
- With the edge of the roll paper facing forward as shown, insert the roll in the Roll Holder from the left. Insert the roll firmly until it touches the flange (a) of the Roll Holder .
- Insert the Holder Stopper from the left in the Roll Holder as shown. Holding it at the position shown (b), push it firmly in until the flange (a) of the Holder Stopper touches the roll. Lock the Holder Stopper lever (c) by pushing it down toward the shaft side.

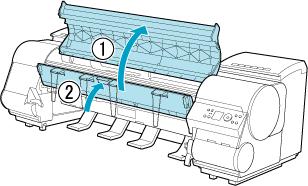
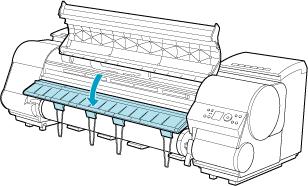
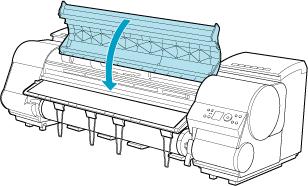
- Open the Top Cover and lift the Ejection Guide .
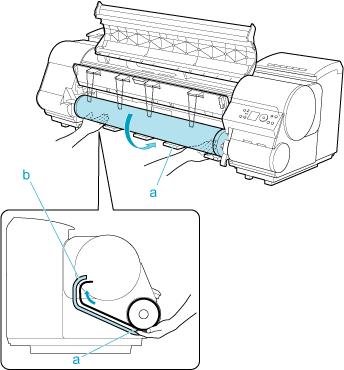
- With the edge of the roll paper facing forward as shown, insert the Roll Holder shaft (a) into the guide grooves (b) of the Roll Holder Slot on sides.
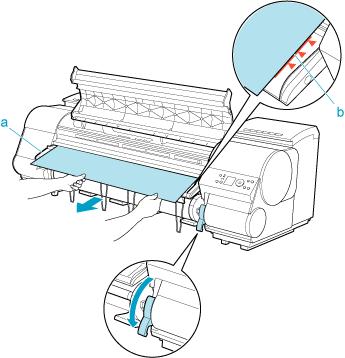
- Pull out the roll paper evenly on ends, insert the roll paper in the Paper Feed Slot (a), and advance the roll paper until the roll paper touches the Paper Retainer .
After the paper reaches the Paper Retainer , it is automatically advanced over the Platen .
- Lower the Ejection Guide .
- While holding the edge of the roll paper, lift the Release Lever .
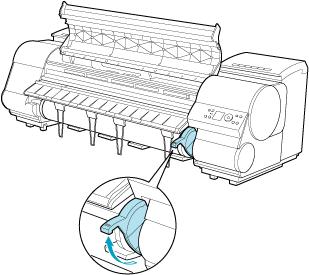
- Hold the roll edge as you gently pull it evenly to the position of the Ejection Guide (a) using the hands. Align the right side of the roll paper with the Paper Alignment Line (b) so that the paper side is parallel to the line and lower the Release Lever .
<Note>
* You can adjust the strength of vacuum holding paper against the Platen when the Release Lever is open. If it is difficult to load paper, press the  or
or  button on the Control Panel to adjust the strength. Set vacuum stronger by pressing the button or weaker with the button. Three settings are available.
- Close the Top Cover .
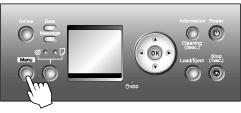
- Select the paper type.

- Select the paper length.
- Complete settings in the printer driver for the type of paper and other details.
- Start printing
<Note>
- You can skip steps 13 and 14 if a barcode has been printed on the roll paper and you have activated automatic detection of the remaining roll. The paper type and amount of paper left are automatically detected. The barcode will automatically be cut off after it has been read.
- You can skip step 14 if you have deactivated automatic detection of the remaining roll paper.
- If you have deactivated width detection, you will need to enter the roll width after choosing the paper type in step 13.
- When printing on rolls after printing on sheets, if the lit paper selection lamp does not switch from the Cut Sheet lamp to the Roll Media lamp , press the Feeder Selection button.
