Replace the Ink Tanks
Instructions to replace the ink tanks for printers only using the BCI-15 ink tanks.
Important Notes:
- When an ink tank is replaced, the ink counter must be reset.
- To maintain optimal print quality, use an ink tank within six months of its first use.
- Once an ink tank has been used, do not remove it from the printer and leave it out in the open. This will cause the ink tank to dry out and the printer may not function properly if it is reinstalled.
- Color ink consumption may occur even when black-and-white or grayscale printing is specified.
- Color ink is consumed in the head cleaning and deep cleaning, which are necessary to maintain the printer's capabilities.
- When an ink tank runs out of ink, replace the ink tank with a new one immediately. If printing is continued with no ink in the ink tank, a problem may occur. And, the Low Ink Warning dialog which tells the exchange time of an ink tank cannot be indicated properly.
- Handle ink tanks carefully to avoid staining clothing or the surrounding area.
- Discard empty ink tanks according to the local laws and regulations regarding disposal of consumables.
Suitable Ink Tanks::
- Black Ink Tank BCI-15 Black
- Color Ink Tank BCI-15 Color
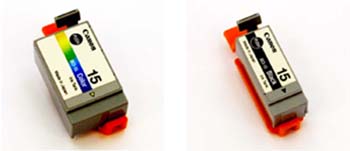
Color Ink Tank BCI-15 Color (left), Black Ink Tank BCI-15 Black (right)
To replace the empty ink tank(s), follow this procedure:
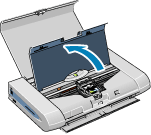
- Check that the printer is powered on, and open the printer cover. (The print head moves from the right to the center.)
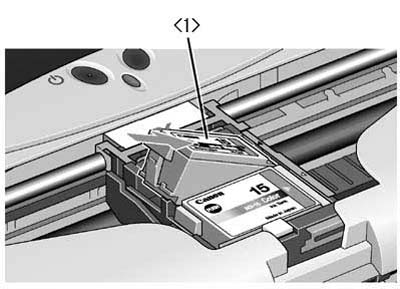
- Push in the tab on the empty ink tank.
Note: Use caution so that the print head is not removed during this operation.
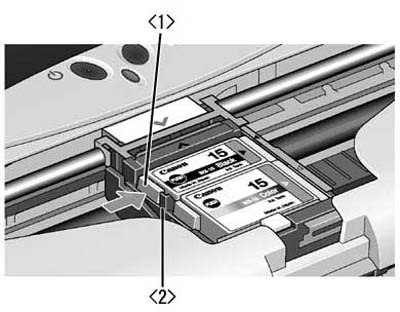
<1> Tab on the empty Ink Tank
<2> Print Head
- Remove the empty ink tank.

Note: When replacing multiple ink tanks, it is recommended to replace them one at a time to avoid inserting them into the wrong slots.
- Remove the new ink tank from its package.
- Remove the orange protective cap.
Caution: Do not reset the protective cap after it is removed. Discard them in accordance with the local recycling rules. Do not touch the ink port which is accessible when the protective cap is removed, to prevent ink feeding problems.
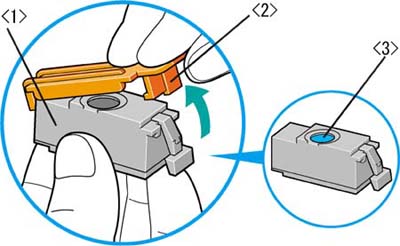
<1> Ink Tank
<2> Protective Cap
<3> Ink Supply Filter
- Insert the new ink tank into the print head by holding it at a slight angle.
<1> New Ink Tank
- Press down on the PUSH mark on the ink tank to set it into place.
Note: Press firmly until a click sound is made.

<1> Push mark on the Ink Tank
- Close the printer cover. (The print head will move to the right.)
