Install the Print Head and Ink Tanks
Install the Print Head
1. Lift the Scanning Unit (Printer Cover) until it locks into place. The Paper Output Tray will open automatically and the Print Head Holder moves to the center. Then open the Output Tray Extension.
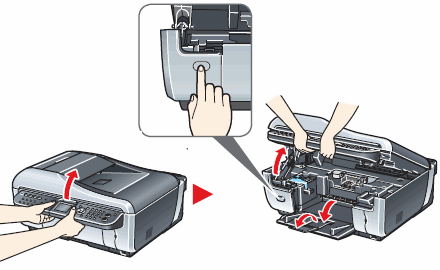
If the Paper Output Tray does not open automatically, press the Open button to open it.
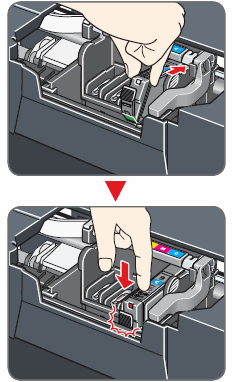
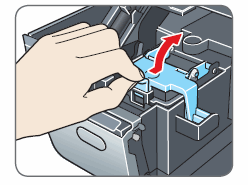
2. Firmly raise the Print Head Lock Lever until it stops. The Print Head Lock Lever may feel heavy.

Important
- Make sure that the machine is turned on and the COPY button lights green.
- Make sure that the Print Head Holder has moved to the center.
3. Remove the Print Head from its package.
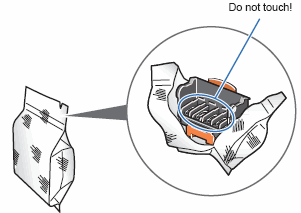
Caution : There may be some transparent or light blue ink on the inside of the bag the print head comes in, or the inside of the protective cap - this has no effect on print quality. Be careful not to get ink on yourself when handling these items.
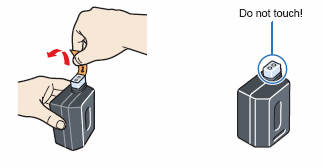
4. Remove the orange protective cap from the Print Head and discard it.
.
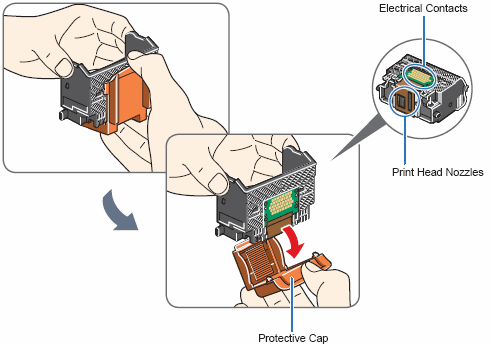
Caution : Do not touch the print head nozzles or the electrical contacts.
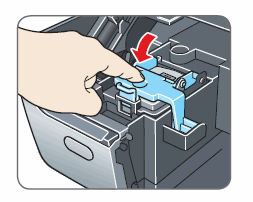
5. Insert the Print Head.
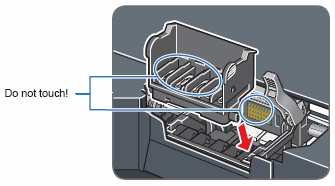
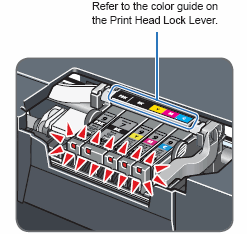
6. Push the Print Head to hold it in place, and lower the Print Head Lock Lever.

Important : If the Scanning Unit (Printer Cover) is left open for more than 10 minutes, the Print Head Holder moves to the right. Close and reopen the Scanning Unit (Printer Cover) to return the Holder to the center.
Install the Ink Tanks
1. Remove and discard the orange protective cap located on the bottom of the ink tank.

2. Insert the ink tank into the right-hand slot and press the  mark on the ink tank until it clicks into place.
3. Make sure the ink lamp lights red.
Install the Clear Ink Tank
1. Remove the orange tape in the direction of the arrow to peel off the protective film from the clear ink tank.
2. Push the tab and open the Clear Ink Tank Locking Cover.
3. Be sure that the clear ink tank is properly aligned when inserting.

4. Close and press the round, indented portion on the Clear Ink Tank Locking Cover until it snaps firmly into place, locking the ink tank.
5. Close the Scanning Unit (Printer Cover).

Caution : For your safety, always firmly grip the areas illustrated when closing the Scanning Unit (Printer Cover).
Important : The machine starts the preparatory operation. It takes about 2 minutes. Do not start another operation until the machine has stopped making operating noises.
Note : If the Alarm lamp lights and an error message is displayed on the LCD, refer to "An Error Message Is Displayed on the LCD" in the Quick Start Guide.
