A probable cause of stripes appearing in scanned images or dirt appearing on scanned documents is dirt on the scanning glasses or rollers. Clean scanning glasses and rollers regularly.
- Press the power switch to turn the scanner OFF, and unplug the power cord from the power outlet.
- Close the document eject tray if it is open.
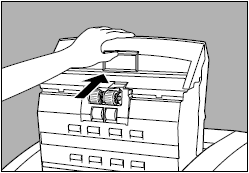
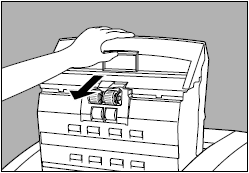
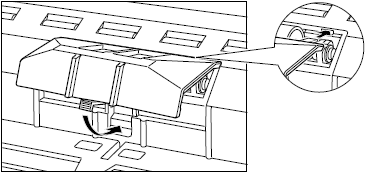
- Open the upper unit. Press the open/close button and raise the top of the upper unit gently until it locks in the open position.
- Use a clean, soft cloth to wipe the scanning glasses. Be sure to clean scanning glasses, the one below and one above.

Never spray mild detergent or water directly on the scanning glasses. The spray could penetrate below the glass and contaminate the light source and lenses.
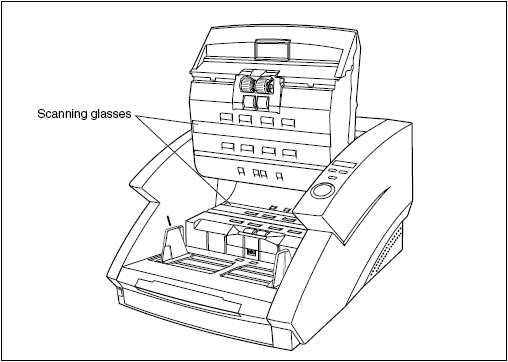
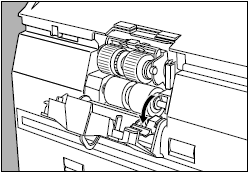
- Wipe the rollers with a firmly wrung cloth moistened with water or mild detergents. Rollers are located at the positions indicated in the figure below.

- Remove the pickup roller, feed roller, and retard roller.

Remove the pickup roller, retard roller, and feed roller to clean them off.
- Use cloth from which all the water has been wrung to wipe off the rollers.

- Replace the rollers that you removed.
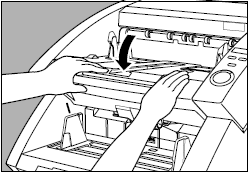
- Carefully close the upper unit.
- Press the upper unit down firmly on sides to close it. If you press the upper unit down only on one side, the opposite side will not be fully closed. Make sure that you hear it click into place.
If paper jams or double-feed (feeding of two or more document pages) occurs frequently in spite of your having cleaned the rollers, a probably cause is roller friction. In this case, replace the rollers.
Installing and removing the Pickup Roller:

 Turn OFF the power to the scanner and unplug the power cord from the outlet when you remove or install the rollers. Leaving the power turned on may result in an electrical shock.
When removing or replacing rollers be careful not to use too much force. Forcing the rollers into position may damage them.
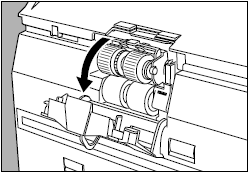
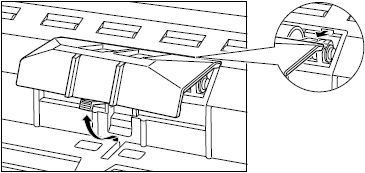
- Open the upper unit.
- Open the roller cover.
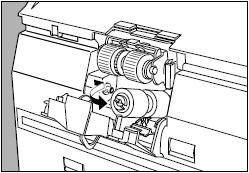
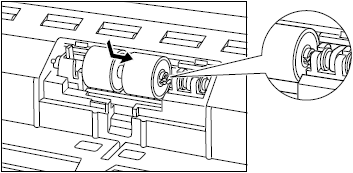
- Open the roller holder and remove the pickup roller.
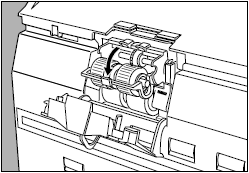
- Position the square axle of the pickup roller on the left and insert the pickup roller.

- Firmly close the roller holder until you hear it click.
- Firmly close the roller cover until you hear it click..
- Carefully close the upper unit.
If the roller holder and roller cover are not firmly closed it will cause a feed error. Always be sure to check that the roller holder and roller cover are closed.
Installing and removing the Feed Roller:
Turn OFF the power to the scanner and unplug the power cord from the outlet when you remove or install the rollers. Leaving the power turned on may result in an electrical shock.
When removing or replacing rollers be careful not to use too much force. Forcing the rollers into position may damage them.
- Open the upper unit.
- Open the roller cover.
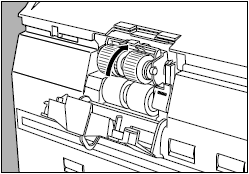
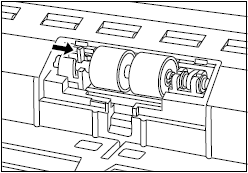
- Pull the lever locking the feed roller in place towards you.
- Slide the feed roller to the right, and then pull it towards you.
- Remove the feed roller.

- Place the feed roller on the pin.

- Set the feed roller in place (1), and align the notch in the roller's axle with the shaft of the scanner (2).

- Lock the lever.

- Firmly close the roller cover until you hear it click..
- Carefully close the upper unit.
If the roller holder and roller cover are not firmly closed it will cause a feed error. Always be sure to check that the roller holder and roller cover are closed.
Installing and removing the retard rollers:
Turn OFF the power to the scanner and unplug the power cord from the outlet when you remove or install the rollers. Leaving the power turned on may result in an electrical shock.
When removing or replacing rollers be careful not to use too much force. Forcing the rollers into position may damage them.
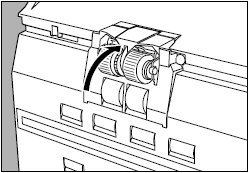
- Open the upper unit.
- Press the hook upwards and remove the roller cover.
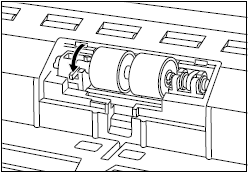
- Lift the roller clamp lever (1) and slide it to the left (2).
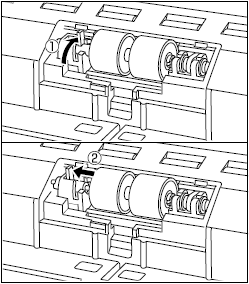
- Move the retard roller to the left and remove it.

- Set the retard roller in place, and align the notch in the roller's axle with the shaft on the scanner.
- Slide the roller clamp lever to the right, and push it into the hole in the retard roller.
- Pull the lever towards you to clamp the retard roller in place.
- Put back the roller cover.
- Carefully close the upper unit.
Be sure that the hooks are completely latched and the roller covers are not loose. If the roller covers are loose, the document tray will catch on them causing the scanner to not operate correctly.
Never clean the scanner with any kind of organic solvent such as alcohol, benzene and paint thinner. Doing so might cause fire and electrical shock, or cause the exterior to disfigure or discolor.
