Install the LK-51 Battery Kit to the Printer - iP90 / iP90v
Article ID: ART102401
|
Date published: 05/11/2015
|
Date last updated: 08/15/2015
Solution
Attach the LK-51 Battery Kit to the Printer
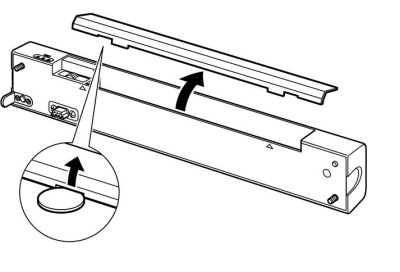
Open the battery charger's cover by using a coin or a similar object to remove the cover.
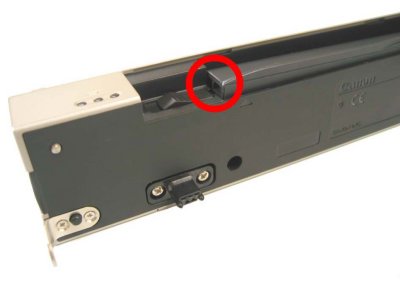
Confirm that the battery pack is correctly installed. If set incorrectly, set the battery pack firmly in place by pushing the area shown in the image below until a click sound is made.
Installed correctly:
Installed incorrectly:
Align the cover's claws with the holes of the battery charger.
Pressing near the center claw, insert the center claw into the battery charger.
Similarly, insert the other claws into the battery charger.
Confirm that all claws are inserted and the cover is set correctly.
Set correctly:
Set incorrectly:
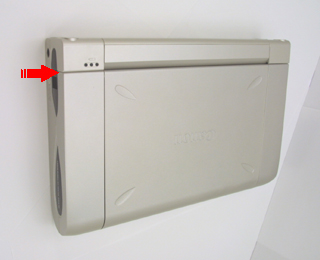
Align the printer connector of the battery charger with the charger connector of the printer and align the locking screw with the screw hole.
Confirm that there are no gaps between the battery charger and printer.
Correctly installed (no gaps):
Incorrectly installed (with gaps):
Confirm that the battery charger's screws are fully tightened.