Current Date/Time Settings NOTE The current Date and Time settings cannot be imported or exported via the Remote UI.
Specify date and time settings, including the date format and the 12- or 24-hour clock display setting. The date and time that are printed on each fax document, report, and list are determined by these settings. 1. Press [  ] (Menu). 2. Select <Timer Settings> using [  ] or [  ] and press [  ].
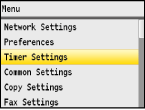
3. Select <Date/Time Settings> using [ ] or [ ] and press [ ]. 4. Select <Current Date/Time Settings> using [ ] or [ ] and press [ ]. 5. Use [  ]/[  ] to move the cursor, and [ ]/[ ] to specify the date and time or switch between <AM>/<PM>. IMPORTANT Set <Time Zone> before setting the current date and time. If the <Time Zone> setting is changed, the current date and time are also changed accordingly.
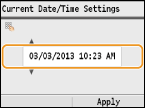
6. To register the settings, press <Apply>. 7. Press [ ] (Menu) to close the menu screen. Registering the Fax Number and Unit Name Register the fax number and unit name of your machine. This information is printed at the top of each page sent from the machine.

1. Press [  ]. 2. Use [ ] / [ ] to select <Set Up Now>, and press [ ].

NOTE: If you select <Set Up Later>, the receive mode is set to <Auto>. Later, when you want to configure the fax settings, display the fax setup screen by pressing [ ]  <Fax Settings> <Fax Setup Guide>. 3. Press <Next>.

4. Enter the fax number using the numeric keys, and press <Apply>.

5. Press <Next>.

6. Enter the unit name (such as a user name or company name), and press <Apply>. - Enter up to 24 alphanumeric characters.

| 