Use the Canon PRINT app to set up the MAXIFY Printer to the Wireless Network - iOS devices
Article ID: ART172637
|
Date published: 12/17/2018
|
Date last updated: 10/21/2019
Description
Set Up The Printer For Use On A Wireless Network Using The Canon PRINT Inkjet/SELPHY Mobile App For iOS Smartphones And Tablets
Solution
You can use the Canon PRINT Inkjet / SELPHY application to set up your MAXIFY printer to the wireless network. The app itself can be used for scanning and printing from your iOS device and for making copy settings. Prior to setup you will need to have the Canon PRINT Inkjet / SELPHY app installed on your tablet or Smartphone (Get the Application) and power on the printer
Start Cableless Setup on the printer.
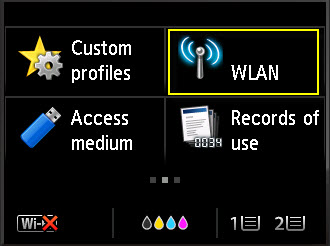
From the Home screen, swipe over to WLAN and tap it..
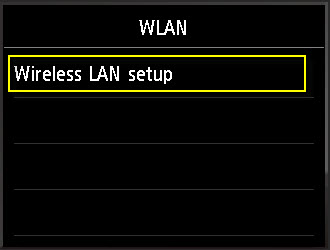
Tap Wireless LAN setup..
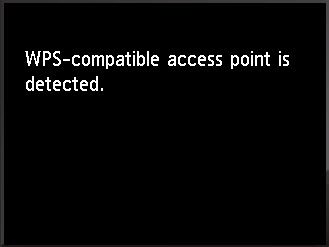
NOTE: The printer may detect WPS capable routers nearby.
You will be prompted to press the WPS button on the router.
On this screen, press the Stop button. Then, proceed to the next step.
Select Other setup and press OK.
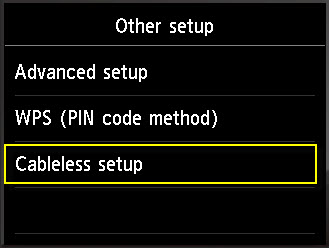
Select Cableless setup and press OK.
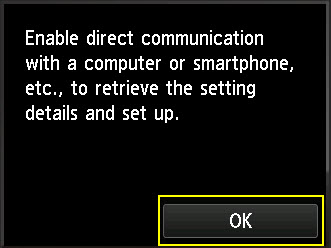
Tap OK.
When the screen below appears, continue with the setup on your mobile device using the mobile app . Follow any onscreen instructions.
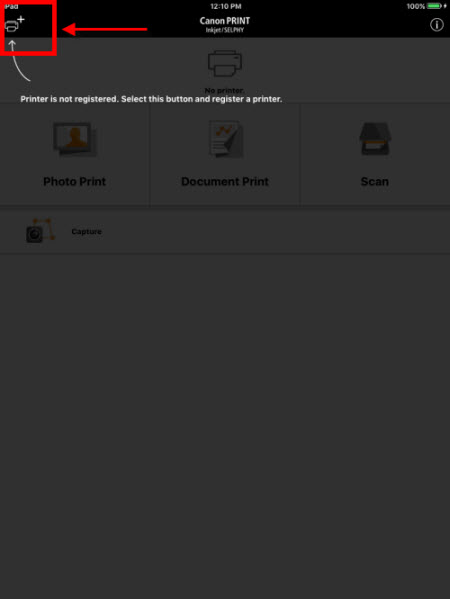
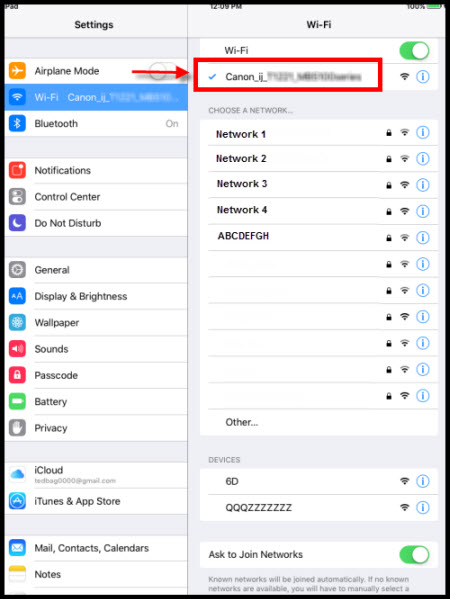
In your device's Settings screen, connect to the Wi-Fi network that begins with "Canon_ij_", then open the Canon PRINT Inkjet / SELPHY app.
Tap the + (Plus) icon
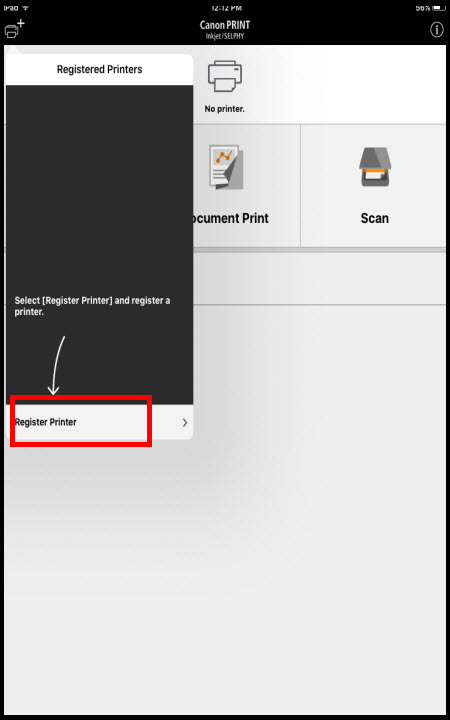
Tap Register Printer.
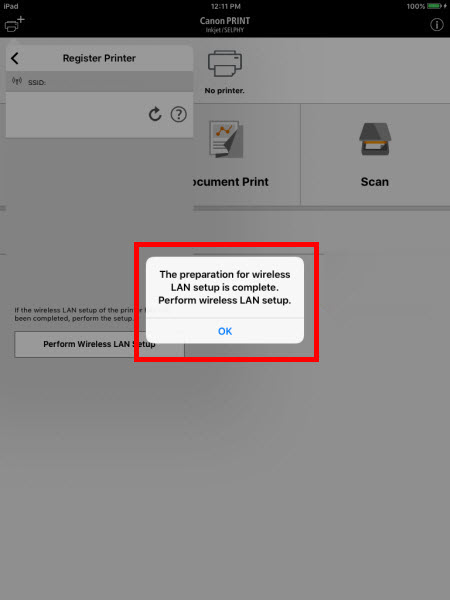
Tap OK on the preparation complete message.
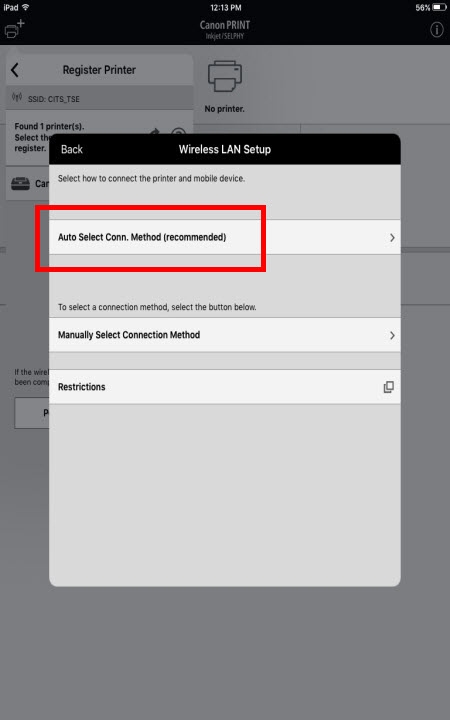
Tap Auto Select Conn. Method (recommended).
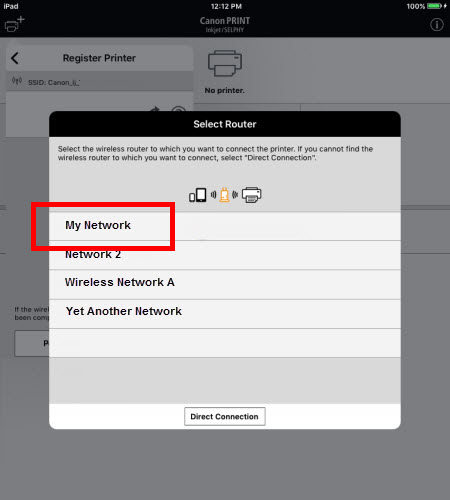
Tap the name of the router (Network name) which will be used.
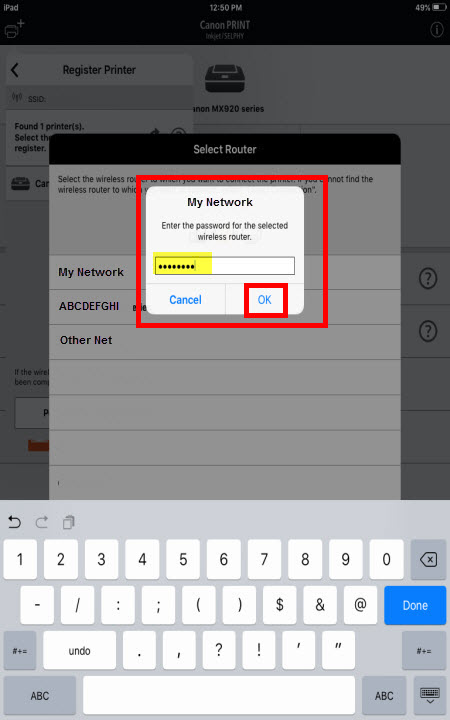
Enter the password for the wireless router and tap OK.
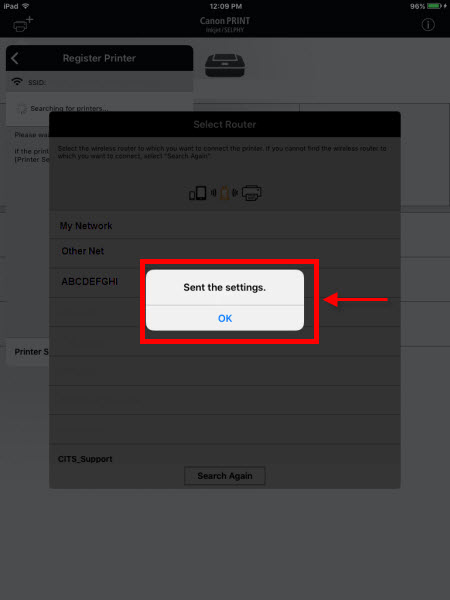
Tap OK on the Sent the settings message.
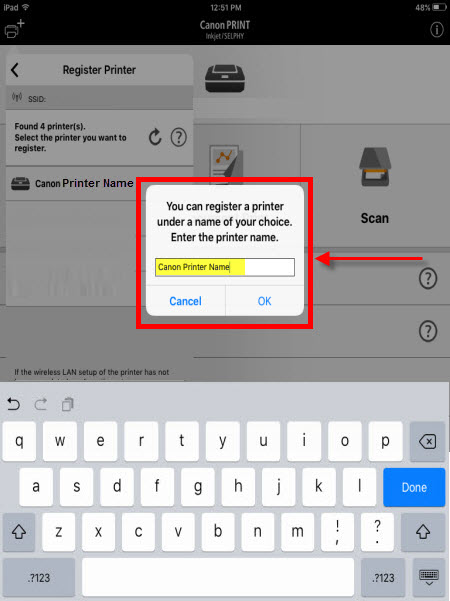
Tap your printer name in the found printer list. Canon Printer Name is shown in the example. Actual printer name listed varies by model.
Type a name for the printer, then tap OK.
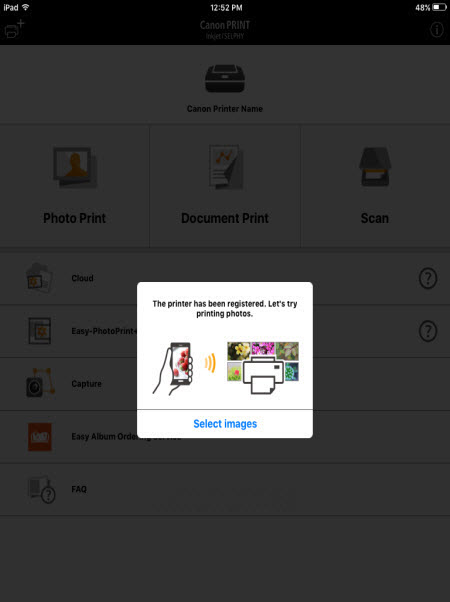
Printer registration is now finished. Printer is ready to print.

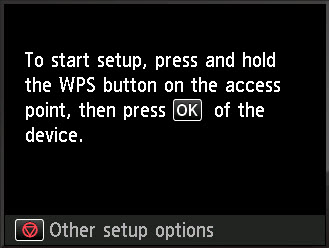
 button. Then, proceed to the next step.
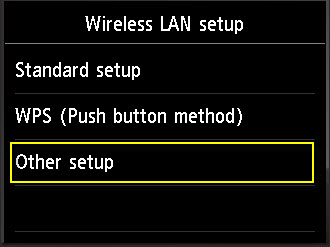
 icon
icon