Process overview
To download or transfer images from your camera to your computer, you will need to:
- Install software
- Set the camera power timer
- Connect the camera to your computer
- Performing the transfer.
Install Canon software
You can use the software on the EOS DIGITAL Solution Disk that came with your camera or download the latest software from
Drivers & Downloads.
- Insert the EOS DIGITAL Solution Disk (CD-ROM) into the computer or locate the installation file you downloaded from the Canon website.
- Depending on your operating system, you may need to start the installation by double-clicking the .exe or .dmg file.
- Follow the prompts to choose your region, country, language, and software to install.
- Close any other applications, and then select OK.
- Select Install.
- Select Yes to agree to the license agreement.
- If prompted, select Yes to agree to automatic updates.
- Some operating systems ask if the Canon software should be allowed to make changes to your computer. Select Yes.
- The installation begins and a screen displays the progress. You may be asked to agree to the installation of one or more plug-in applications. If so, select Yes.
- Select Next once installation is complete.
- Choose to register for Canon iMAGE GATEWAY now or later.
- Yes - Follow the instructions to complete registration.
- No - Select Next and then OK.
- Eject the CD-ROM if you used it.
- If prompted, click Restart.
Set the auto power timer
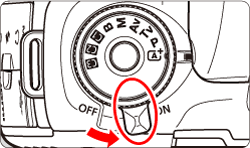
- Confirm that the camera is not connected to the computer.
- Turn <ON> the camera.
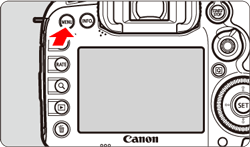
- Press the <MENU> button.
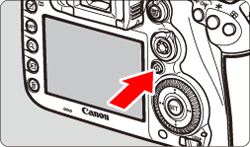
- Press the <
 > button and select the [
  ] tab.
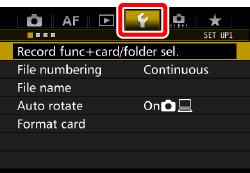
- Turn the <
 > dial to select the [
  ] tab.

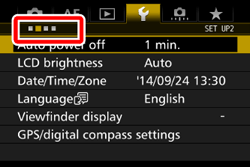
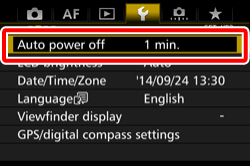
- Turn the <
 > dial to select [Auto power off], then press <
 >.
>.
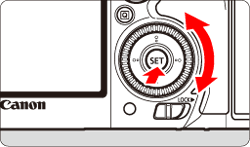
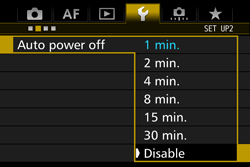
- Turn the <> dial to select [Disable], then press <>.
- Press the <MENU> button to turn off the LCD monitor, and then turn off the camera.
Connect the camera to the computer
- Remove the clamp (A) from the cable protector.
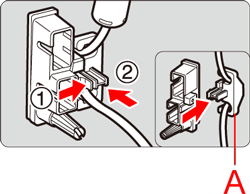
- Open the terminal cover and attach the cable protector (B) to the interface area.
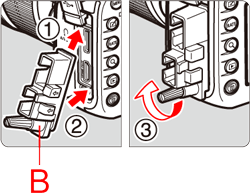
- Attach the clamp you removed earlier.
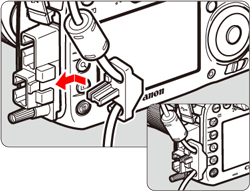
- Connect the cable to the digital terminal with the plugs <
 > icon (C) facing the back of the camera.
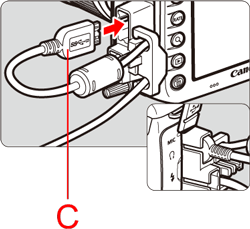
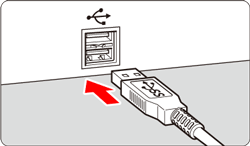
- Connect the other side of the interface cable to an available USB port on your computer.
Download Images to the computer
- Turn <ON> the camera.
- Once the computer recognizes the camera, communication begins.
- Windows - You may need to select [
 ] in the taskbar to launch the EOS Utility, and then select Download images from EOS camera.
- Macintosh - The EOS utility starts automatically.
- The main window for EOS Utility appears. To download all images saved in the memory card, select Starts to download images. By default, the downloaded images are sorted and saved into folders by their shooting date.
- When all the images have been downloaded, Digital Photo Professional starts and the downloaded images are displayed.
- Confirm that the new images appear in Digital Photo Professional or ImageBrowser EX.
Note: If you have trouble getting your computer to recognize your camera, try removing the memory card and use a card reader connected to the computer.
