Cropping (trimming) images for printing (SELPHY CP910)
| Article ID: ART151270 |
| |
Date published: 05/22/2015 |
| |
Date last updated: 12/29/2015 |
Description
Cropping (trimming) images for printing (SELPHY CP910)
Solution
| Cropping (trimming) images for printing (SELPHY CP910)
ID : 8201961600 _ EN _ 3
|
| Solution |
You can crop and print part of an image.
IMPORTANT
- Images may not be displayed or printed correctly depending on their size or if they have been edited on a computer.
- JPEG images conforming to the Exif standard can be printed with SELPHY.
1. Choose the image you want to crop.
2.  Press the <EDIT> button,and then  press the <OK> button.
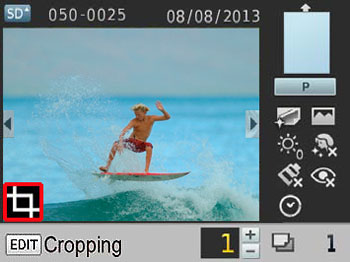
3. A crop frame is displayed, showing the image area that will be cropped.
4. Adjust the image area to crop.
NOTE
- To switch the crop frame between portrait and landscape orientation, press the <EDIT> button.
- To move the crop frame, press the
 buttons. buttons.
- To enlarge the crop frame, press the <
 > button, and to reduce it, press the < > button, and to reduce it, press the < > button. > button.
5. To confirm the cropping area and return to the image display screen, press the <OK> button. (  ) is now shown in the lower left.
NOTE
- To crop other images for printing with the first one, repeat steps 1 5.
- If you want to change the cropping range after setting it, press the <EDIT> button in the image display screen, select [Adjust Cropping], and press the <OK> button to repeat Steps 4 to 5.
- If you want to cancel the cropping range after setting it, press the <EDIT> button in the image display screen, select [Reset Cropping], press the <OK> button to display the reset cropping screen, and then press the <OK> button again.
- Cropping areas you have set are cleared if you turn off SELPHY or remove the memory card before printing.
- You can specify cropping for up to 99 images at once.
- Cropping is not available when printing with [Print All Images] or [DPOF Print] or when [Page Layout] is set to [Index] or [Shuffle].
- The cropping aspect ratio indicated by the frame displayed on images cannot be adjusted.
- To change the number of prints, press the <
 >< >< > buttons on the image display screen in step 5. Note that specifying zero prints will not clear cropping settings. > buttons on the image display screen in step 5. Note that specifying zero prints will not clear cropping settings.
6. Press the <  > button to start printing.
|
