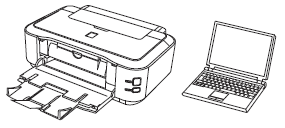
Setting up the PIXMA iP4920
To perform setup, place the printer near the computer.
Check the included items.
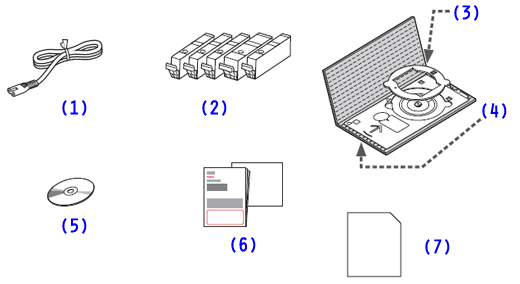
(1) Power cord
(2) Ink tanks (BK, M, C, PGBK, Y)
(3) 3.15 inches (8 cm) disc adapter
(4) Disc tray
(5) Setup CD-ROM
(6) Manuals and other documents
(7) Matte Photo Paper MP-101 (for Automatic Print Head Alignment)
reference:
- A USB cable (not included) is required.
- The print head is pre-installed in this printer.
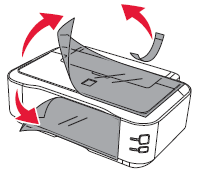
Remove the protective sheets and tape.
Preparation
important:
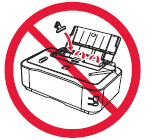
Do not allow objects to fall inside the printer. These could cause malfunction.
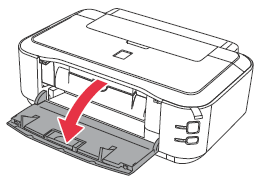
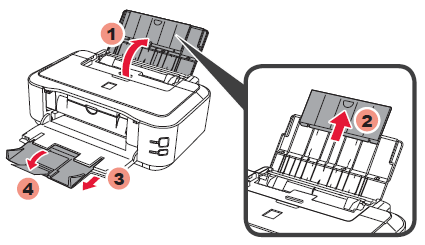
1. Open the Paper Output Tray.
2. Lift the Top Cover, then remove the orange tape and protective material.
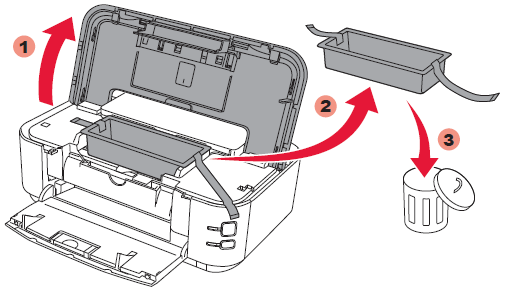
3. Close the Top Cover.

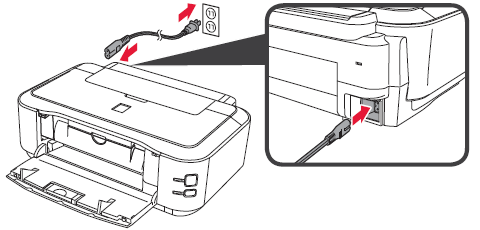
4. Connect the power cord.
important:
Do not connect the USB cable yet.
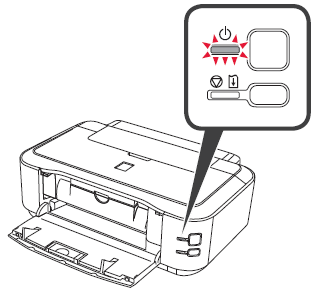
5. Press the ON button.

6. Check that the POWER lamp lights green.
important:
If the Alarm lamp flashes orange, press the ON button to turn OFF the printer, then redo from step 2.
Install the Ink Tanks
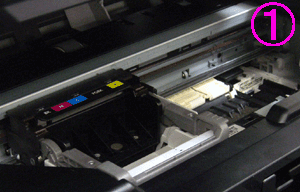
1. Open the Top Cover.
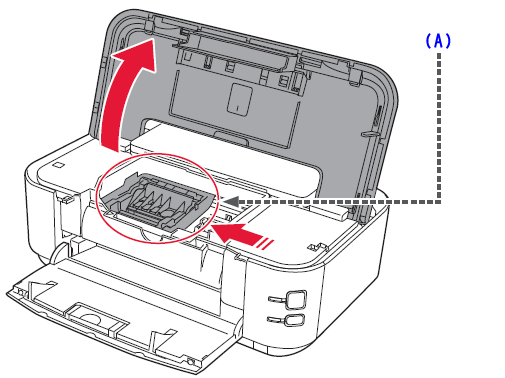
(A) This is where the ink tanks are to be installed.
 Do not touch it until it stops.
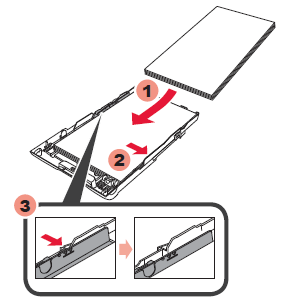
2. Remove the protective wrap.
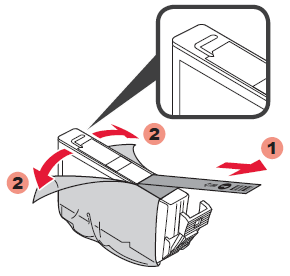

important:
Remove the orange tape completely.
3. Twist and remove the orange cap.
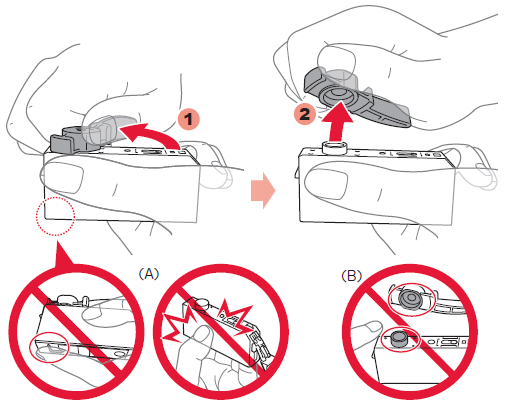
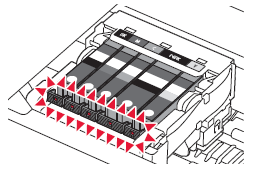
 (A) Do not press the sides when the L-shaped groove is blocked.
(B) Do not touch!
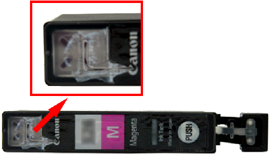
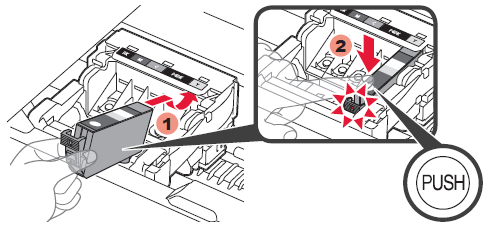
4. Insert and push down the ink tank into the matching color slot.
Check that the ink lamp is lit, then install the next ink tank.
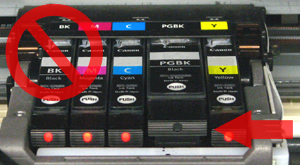
5. Check that all lamps are lit.
6. Check that the Inner Cover is closed, then close the Top Cover.
Wait for about 4 minutes until the POWER lamp flashes and stays lit green, then proceed.
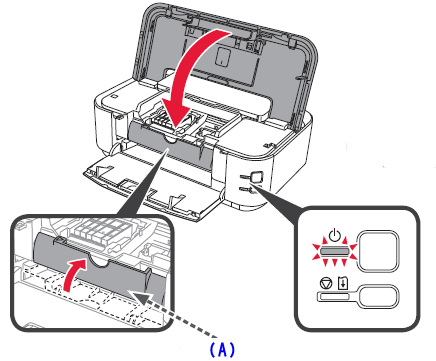
(A) Inner Cover
important:
If the Alarm lamp flashes orange, check that the ink tank is installed correctly.
reference:
If the Inner Cover is opened, close the Inner Cover and press the RESUME/CANCEL button on the printer.

Aligning the Print Head
Perform the Print Head Alignment.
1. Open and extend the Paper Support.
Draw out and open the Output Tray Extension.
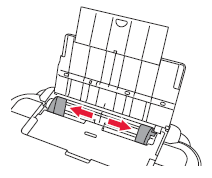
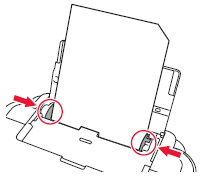
2. Slide the Paper Guide to ends.
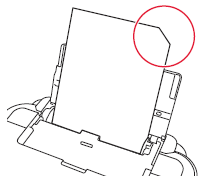
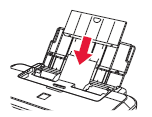
3. Load the supplied MP-101 paper in the Rear Tray.
4. Adjust the Paper Guide to fit the paper width.
5. Press the RESUME/CANCEL button.
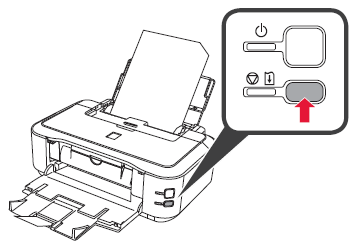
6. In about 5 to 6 minutes, the blueblack pattern is printed. Print Head Alignment is complete.

important:
If the Alarm lamp flashes orange, press the RESUME/CANCEL button, then proceed to Chapter 4.
-> [ ].
reference:
After installation is complete, refer to [ ] to redo Print Head Alignment.
Load Paper
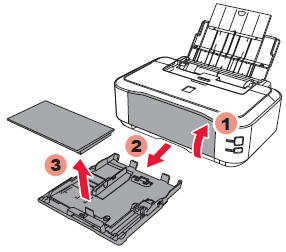
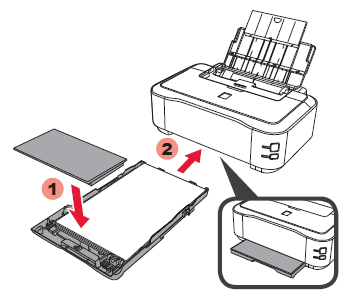
1. Close the Output Tray Extension and the Paper Output Tray, thenpull out the Cassette and remove its cover.
2. Pull the lever in the direction of the arrow and extend the Cassette.
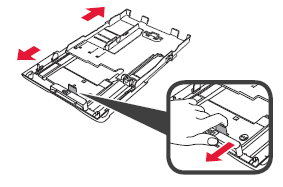
3. Slide the Paper Guide to the sides, then adjust the front guide to thepaper size.

4. Place paper on the right side and adjust the left guide to fit the paper size used.
5. Attach the Cassette Cover.
Slide the Cassette back in until it clicks into place.
reference:
For information about paper, refer to the [ ] which will be installed later.
Load photo paper in the Rear Tray only. When using photo paper, printer settings for media type and size should be adjusted.
