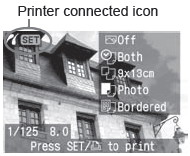
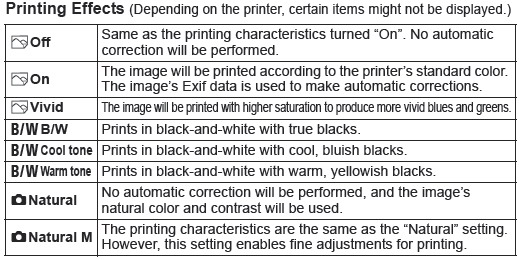
 Printing with PictBridge
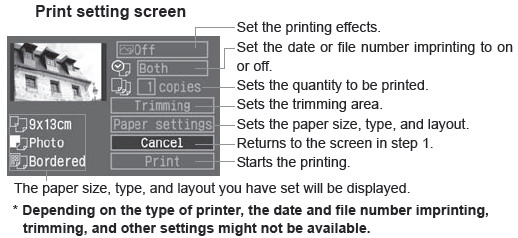
The setting options will differ depending on the printer. Some settings might be disabled. For details, refer to your printer's instruction manual.
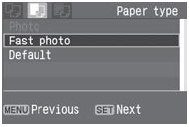
About the Paper Types
If you are using a Canon PIXMA/DS/BJ printer with Canon paper, set the respective paper type as follows:
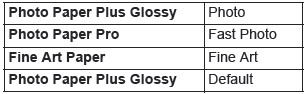
If you are using a non-Canon printer, refer to the printer's instruction manual
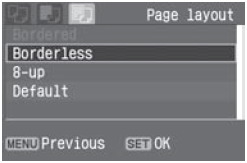 |
Turn the  dial to select the layout, then press <SET>. dial to select the layout, then press <SET>.
- The Print setting screen will reappear.
|
 |
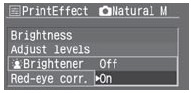
4 Set the printing effects.
- Set as desired. If you need not set any printing effects, go to step 5 listed below
- Turn the dial to select the item on the upper right (see left figure), then press <SET
- Next, turn the dial to select the desired printing effect, then press <SET>.
|
 |
- With step 4, select the item. When is displayed, press the <
 > button. You can then set the parameters for fine adjustments. The parameters that can be adjusted for the selected item are shown in the table below. > button. You can then set the parameters for fine adjustments. The parameters that can be adjusted for the selected item are shown in the table below.
- Turn the dial to select the item to be adjusted, then press <SET>.
|

After making fine adjustments for the printing effect, if you do step 4 again to change the printing effect's setting, the adjustments will all revert to the default.
When [Default] is selected, the printing adjustments can not be adjusted.
|
Brightness

|
- Turn the dial to make the adjustment, then press <SET>.
|
|
Adjust Levels

|
- Turn the dial to select the item to be adjusted, then press <SET>.
- Select [Manual] and press <SET>. The Adjust levels screen will then appear.
- Turn the dial to adjust the shadows (black) within 0 to 127.
- Press the <JUMP> button.
- Turn the dial to adjust the highlights (white) within 128 to 255.
- Press <SET> to exit. The previous screen will reappear.
|
|
Brightener / Red-eye Corr
|
- Turn the dial, select either [Off] or [On], then press <SET>.
|
|
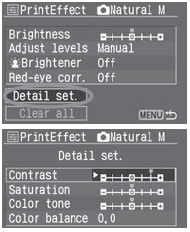
Detail Settings of Printing Effects
|
- Select [Detail set.], then press <SET>. The Detail set. screen will then appear.
- Turn the dial to select the item to be adjusted, then press <SET>.
- Turn the dial to adjust the level, then press <SET>.
|
|
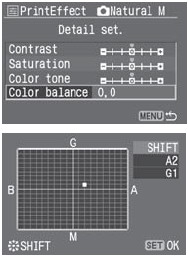
Color Balance
|
- Press the <
 > up, down, left or right to move the dot " " on the screen to the desired position. > up, down, left or right to move the dot " " on the screen to the desired position.
- B is for blue, A is amber, M is magenta, and G is green. The color balance will shift in the respective direction.
- On the upper left, "SHIFT" indicates the color balance direction and correction amount.
- Press <SET> to exit. The previous screen will reappear.
- After completing the detail settings of printing effects, press the <MENU> button, then go to step 5.
|
 |
5 Setting the date and file number imprinting.
- Set as necessary.
- Turn the dial to select the field next to the <
 > icon, then press <SET>. > icon, then press <SET>.
- Turn the dial to select the desired setting, then press <SET>.
6 Set the number of copies.
- Set as necessary.
- Turn the dial to select the field next to the <
 > icon, then press <SET>. > icon, then press <SET>.
- Turn the dial to set the number of copies, then press <SET>.
|
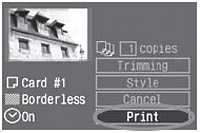 |
Start printing.
- Turn the dial to select [Print], then press <SET>.
- The printing will start.
- During the printing, the <
 > button lamp will blink in blue. > button lamp will blink in blue.
- When the printing ends, the screen will return to step 1.
- To stop the printing, press <SET> while [Stop] is displayed, then turn the dial to select [OK] and press <SET>.
|