Printing ID Photos (SELHPY ES40)
attention:
- To select items that are displayed on the printer's LCD monitor, press the bottom at the
 to the left, right, top, or bottom. Then press the < SET > button
  to finalize the selection.
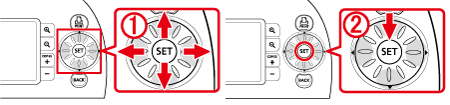
- You can rotate the < Easy-Scroll Wheel > instead of pressing the printer's < Up, Down, Left, Right > buttons to select an item that is displayed.
- Only images taken with a Canon Compact Digital Camera with the recording pixels set to L (large) can be printed as ID photos.
If an image taken with a non-Canon brand digital camera has roughly the same recording pixels as an L (large) image taken with a Canon digital camera, it can also be printed as an ID photo. However, depending on the camera, the message [Incompatible image] may appear in Step 2, and the image cannot be printed as an ID photo.
- When a cartridge is replaced mid-way through printing, automatic adjustments (trimming frames, image placement, etc.) will be made depending on the paper size of the new cartridge. However, if settings incompatible with the new cartridge have been selected, the printer will restore the [Creative Print] screen.
- When printing from the memory card, please make sure that no cameras or PCs are connected.
- The ID photo may not be accepted officially, depending on the institution the ID photo is required for. Please contact the appropriate institution for details.
- When a gold or silver cartridge is installed, ID photos cannot be printed.
1. Turn on the printer and insert the memory card into the printer.

Turn on the printer.
Insert the memory card.
Insert a memory card fully into the [appropriate slot].
2. Press the < CREATIVE > button ( ).
).

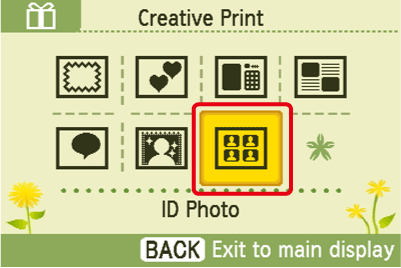
3. The following screen appears. Select [ID Photo] ( ) and press the < SET > button (
 ).
).
4. The following screen appears. Select the image that you want to print, and press the < SET > button ().

5. The following screen appears.
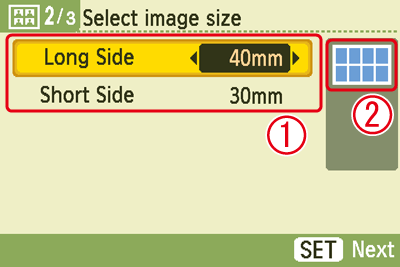
Specify the image size.
Preview of the layout. This screen shows that 8 [ID photos] will be printed per sheet of paper (The preview of the layout is a guideline).
Press the < SET > button () after checking the size and layout of the image.
6. The following screen appears. The green frame on the screen shows the area that will be printed.
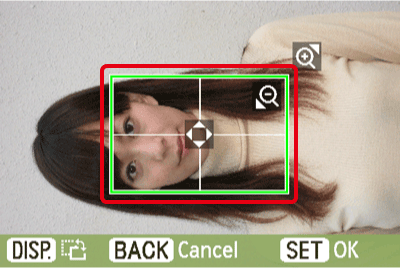
7. Set the print range.

Press the printer's < Up, Down, Left, Right > buttons to move the green frame over the print area.
To widen or narrow the green frame, press the < Enlarge, Reduce > buttons ( ) for adjustment.
 When pressing the < DISP. > button (
 )or turning the < Easy-Scroll Wheel >, the green frame will rotate 90 degrees with each press or turn.
 Press the < SET > ()button after you have determined the print area.
8. The following screen appears.

The area inside of the White border will be printed.
Specify the number of copies by pressing the < COPIES > buttons ( ). Please note that multiple ID photos will be printed on a sheet of the paper. You can check how many ID photos will be printed on a sheet of the paper in section of Step 5.
Press < Print > ( ) after specifying the number of copies.
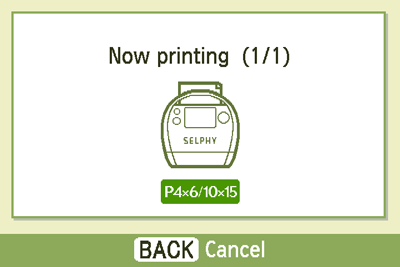
9. The following screen appears and printing starts.
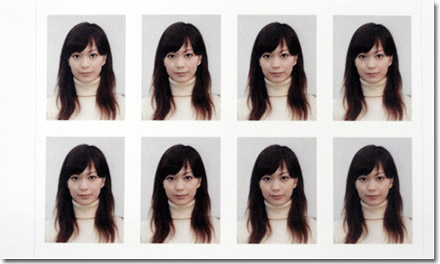
10. The finished image will look like the one shown below (It will differ depending on the type of paper and the size of the ID photos).