Removing the Protective Material
| Article ID: ART142403 |
| |
Date published: 05/13/2015 |
| |
Date last updated: 10/05/2018 |
Description
Removing the Protective Material
Solution
| Removing the Protective Material
ID : 8201517500 _ EN _ 10
|
| Solution |
Cancel printing, turn off the machine. Then clear the jammed paper or protective material that is preventing the FINE Cartridge Holder from moving, and turn on the machine again.
When this error code is displayed at the initial setup, confirm that all the protective tapes and the white fixing material have been removed.
[ Protective tapes and white fixing material ]
CAUTION
When the protective tapes and the white fixing material cannot be removed since the FINE Cartridge Holder is behind the Head Cover, follow the procedures below to remove the protective tapes and the white fixing material.
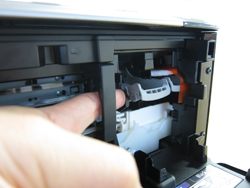
1. Turn OFF this product.
2. Push the left side of the FINE Cartridge Holder, then move it until it hits the right inner side of the printer.
On this occasion, do not touch the other parts.
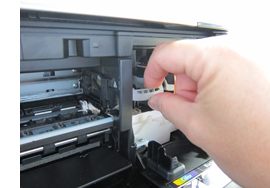
3. When the Head Cover opens, move the FINE Cartridge Holder to the position that the Ink Cartridge Lock Lever can be seen.
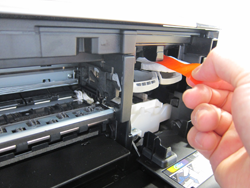
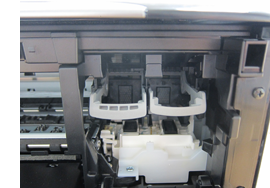
4. Remove the protective tape and the white fixing material attached to the FINE Cartridge Holder to confirm that the FINE Cartridge Holder is situated as shown below right.
5. Close the Head Cover and turn ON the printer, then confirm that the Head Cover opens automatically.
IMPORTANT
- Be careful not to touch the components inside the machine. The machine may not print out properly if you touch it.
|