<Cause>
The toner cartridge is not installed or installed improperly.
<Solution>
Install the toner cartridge properly.
Follow the procedure below to replace the toner cartridge.
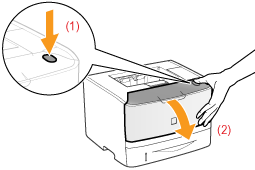
1. Open the front cover while pressing the open button.
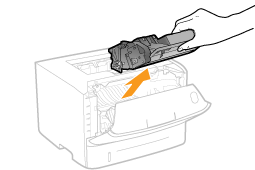
2. Remove the toner cartridge.
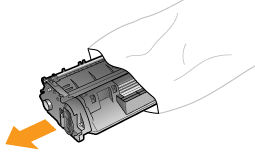
3. Take out the new toner cartridge from the protective bag.
You can open the protective bag with your hands from the notch.
 Keep the protective bag. Do not discard it. You will need it when you remove the toner cartridge for printer maintenance or other purposes.
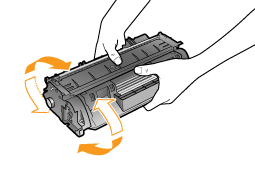
4. Shake the toner cartridge five or six times as shown in the figure to evenly distribute the toner inside the cartridge.
5. Place the toner cartridge on a flat surface.
6. Fold the tab, and then pull out the sealing tape (approx. 19 in. (48cm)).
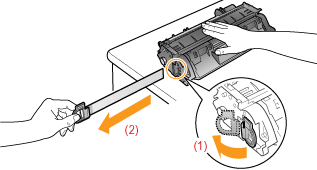
IMPORTANT
Precautions when pulling out the sealing tape
- Do not pull the sealing tape diagonally, upward, or downward. If the tape is severed, this may become difficult to pull out completely.

- If the sealing tape stops at midpoint, pull it out of the toner cartridge completely. If any tape remains in the toner cartridge, this may result in poor print quality.
- Dispose of the removed sealing taper according to local regulations.
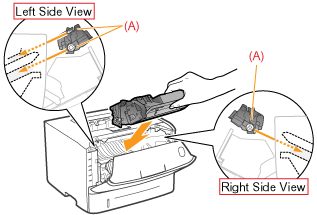
7, Install the toner cartridge.
Push the toner cartridge into the printer firmly until it touches the back of the printer while aligning (A) on sides of the toner cartridge with the toner cartridge guides inside the printer.
8. Close the front cover.
If you cannot close the front cover
Make sure that the toner cartridge is installed in the printer properly. Do not try to forcefully close the front cover, as this may damage the printer.
