Cleaning the Scanning Glass and the Rollers
If your scanned images contain lines or smudges, or if the scanned documents
are dirty, then the scanning glass or the rollers inside the scanner may be dirty.
Clean them periodically.
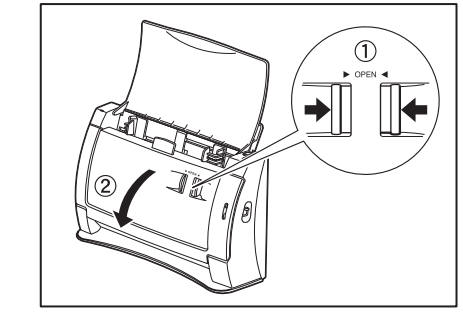
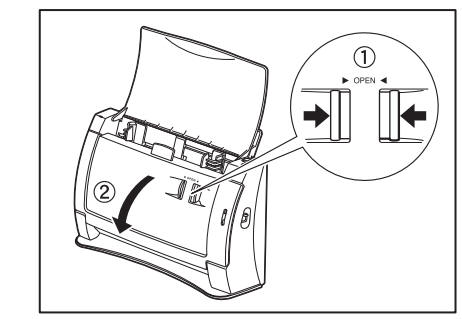
1. Open the document feed tray.
Pressing the OPEN knob from sides (a), pull the front unit forward to
open it (b).
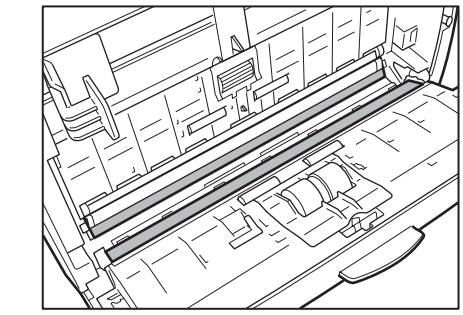
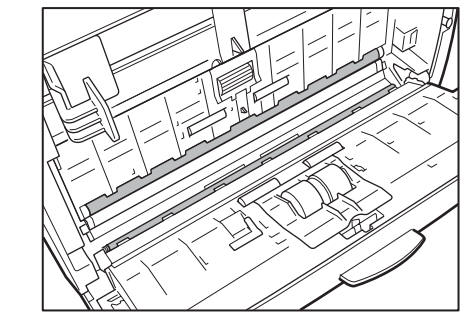
3. Use a blower to keep the interior of the scanner free of dust and paper particles.
Use a clean dry cloth to wipe dirt off the scanning glass.
Wipe the top and bottom scanning glasses.
CAUTION
Do not use spray type cleaners to clean the scanner. Precision
mechanisms, such as the light source, may get wet which will
cause a malfunction.
IMPORTANT
Scratches on the scanning glass may cause marks on the images and could
cause feeding errors. If there are scratches on the scanning glass, contact your
local authorized Canon dealer or service representative.
5.Rotate the rollers (a) and (b) as you clean them. Moisten a cloth with plain
water, wring out excess water, wipe the rollers and then dry it with a clean dry
cloth.
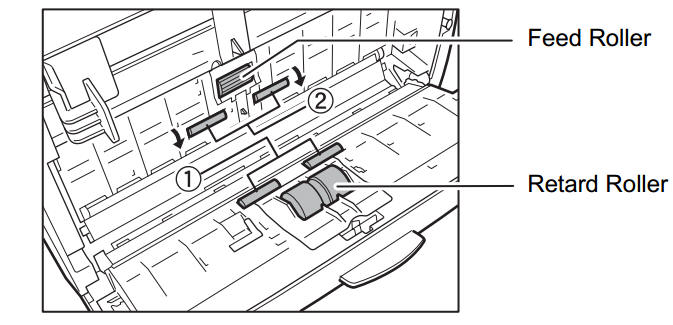
6.Remove the feed roller and retard roller.
IMPORTANT
After removing the feed roller and retard roller, clean them and then return
them to the scanner.
Wipe the removed rollers with a firmly wrung cloth moistened with water.

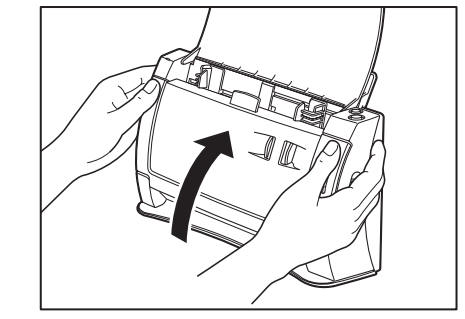
- 8. Attach the rollers that were removed.
Gently press the left and right sides of the top of the front unit. Return the unit
fully to its original position until you hear
Cleaning the Metal Rollers
1. Turn on the scanner.
2. Open the document feed tray.
Pressing the OPEN knob from sides (a), pull the front unit forward to
open it (b).
Use a clean dry cloth to wipe the metal rollers ( parts in the illustration).
Press the Scan button and Stop button at the same time to rotate the metal
rollers in small increments.
CAUTION
• There are two metal rollers, one for the Front Unit and one for the
scanner. Be sure to wipe of them. Do not spray water or
neutral detergent directly on the metal rollers. Doing so can
damage precision mechanisms, such as the light source.
Moisture on the scanner or your hands also creates the risk of
electric shock.
• Scanner power needs to be turned on when cleaning the metal
Because of this, you need to exercise extra caution when
cleaning them
- Removing and Attaching the Rollers
Follow the relevant procedure to remove and attach the feed roller and retard
roller when you clean or replace them.
IMPORTANT
Feed rollers are consumable parts. When the rollers start to wear out, paper
jams and misfeeds may occur more often. When this happens, buy an exchange
roller kit, and replace the feed roller and the retard roller.
CAUTION
Do not use excessive force when removing or attaching the
Doing so may damage them.
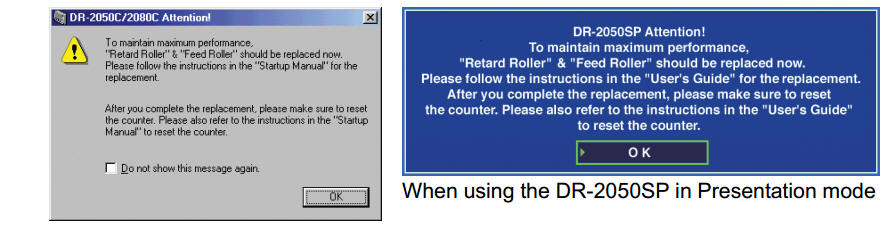
- Roller Replacement Cycle
When the number of pages scanned exceeds 30,000, a roller replacement
message will appear when the computer is started. When you are using the
DR-2050SP in the Presentation mode, a message prompting you to change the
rollers is displayed after the opening screen when the scanner’s power is turned
Buy an exchange roller kit, and replace the feed roller and the retard
roller.
IMPORTANT
• If misfeeds happen often, check the rollers for wear, and replace them if
necessary before the message is displayed.
• Be sure to reset the counter after replacing the rollers. (See “Resetting the
Counter,”
• Contact your local authorized Canon dealer or service representative for
information about the exchange roller kit (feed roller and retard roller)
