Onscreen Markers and Zebra Patterns
| Article ID: ART133285 |
| |
Date published: 05/12/2015 |
| |
Date last updated: 10/22/2015 |
Description
Onscreen Markers and Zebra Patterns
Solution
Using onscreen markers allows you to make sure your subject is correctly framed and is within the appropriate safe area. The zebra patterns help you identify areas that are overexposed. The onscreen markers and zebra pattern will not affect your recordings.

Displaying Onscreen Markers
The camcorder offers 5 types of onscreen markers. You can display multiple onscreen markers simultaneously.
1 Open the [Markers] submenu.
[
 ] > [Markers]
2 Select a marker you wish to display, select [White] or [Gray] and then press SET.
Select [Off] to turn off the selected marker.
You can display multiple markers simultaneously. Repeat this step as necessary.
If you selected [Safety Zone] or [Aspect Marker], continue to step 3. Otherwise, you can skip to step 4.
3 Select [Safety Zone Area] or [Aspect Ratio], select the desired option and then press SET.
4 Select [Enable], select [On] and then press SET to enable the onscreen markers.
Options
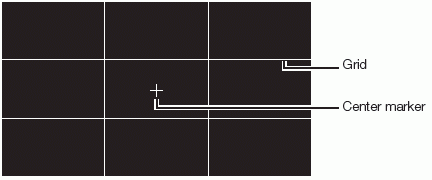
[Center]: Displays a small marker that indicates the center of the screen.
[Horizontal]: Displays a horizontal line to help you compose level shots.
[Grid]: Displays a grid that allows you to frame your shots correctly (horizontally and vertically).
[Safety Zone]: Displays indicators that show various safe areas, such as the action safe area and text safe area. Available options for [Safety Zone Area] are [95%], [92.5%], [90%] and [80%].
[Aspect Marker]: Displays markers that indicate various aspect ratios to help you keep your shot within that area. Available options for [Aspect Ratio] are [2.35:1], [1.85:1], [1.75:1], [1.66:1], [14:9], [13:9] and [4:3].

NOTES
Displaying Zebra Patterns
The camcorder has a zebra pattern feature that shows black and white diagonal stripes over areas that are overexposed. This is displayed only on the screen and will not affect your recordings. There are two types of zebra patterns and you can display simultaneously. Zebra 1 lets you identify areas within a certain range (±5% of a specified level) while zebra 2 lets you identify areas that are over a specified level. When you display simultaneously and they overlap, only zebra 1 will be displayed in those areas.

1 Open the zebra pattern [Select] submenu.
[
 ] > [Select] (under [Zebra])
2 Select [Zebra 1], [Zebra 2] or [Zebra 1&2] and then press SET.
3 Open the zebra level submenu.
[
 ] > [Zebra 1 Level] or [Zebra 2 Level]
4 Select a zebra level and then press SET.
5 Press the ZEBRA button to activate the selected zebra pattern.
Alternatively, before closing the menu, you can also select [Zebra], select [On] and then press SET.
NOTES
You can use the [
 ] > [HD Output] setting to display the zebra pattern on an external monitor connected to the HD/SD SDI terminal (HD output only), SYNC OUT terminal (HD-Y signal output only) or HDMI OUT terminal (HD output only).
