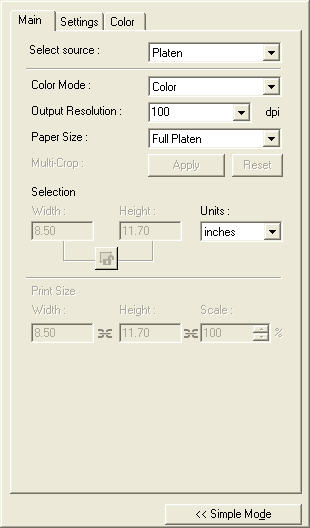
Color mode and output (scan) resolution are key areas that can affect the scan quality.
This setting determines whether the scanned image is reproduced as a Black and White, Grayscale, Color, Color (48bit) or Text Enhanced.
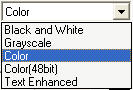
Select a
Color mode that corresponds to the scanned item.
| Color mode |
Details |
|
Black and White
|
Select this mode when out is photos and other items to a monochrome printer. It expresses images in two colors, black and white. It uses a particular threshold value at which image data is either expressed as black or white, according to the brightness level. The threshold value can be adjusted.
|
|
Grayscale
|
Select this mode to scan black and white photos or monochrome images. It expresses images in 254 shades of gray (grayscale) and black and white, making a total of 256 shades.
|
|
Color
|
Select this mode to scan color photos. It expresses images in 256 colors (8 bits) for each R(ed), G(reen) and B(lue) color channel.
|
|
Color (48bit)
|
Select this mode to scan color photos in greater detail. It expresses images in 65,536 colors (16 bits) for each R(ed), G(reen) and B(lue) color channel.
|
|
Text Enhanced
|
Select this mode to scan text more crisply, particularly to process it in an OCR program. It expresses images in two colors only, black and white.
This mode is not available in the Macintosh version.
|
The Text Enhanced mode scans the item in grayscale and then converts the results to black and white, which takes longer to process than the Black and White mode.
The Color (48 bit) option will not display unless the Enable 48/16 bit Output option has a checkmark in the Scan tab, to display select Preferences in Advanced Mode.
 Learn about the enable 48/16 bit output option for the CanoScan 3200F.
Learn about the enable 48/16 bit output option for the CanoScan 4200F.
Before you begin
The data in the image you have scanned is a collection of dots carrying information about brightness and color. The density of these dots is called "resolution", and "dpi" (dots per inch) refers to the number of dots in one inch.
Resolution will determine the amount of detail your image contains. The higher the resolution (number), the more detail in your image; the lower the resolution (number), the less detail.
As a general rule, you should select a scanning resolution that corresponds to your final output device such as a monitor or printer.
This setting selects the output resolution for the scan.
Available resolution options are: 50, 75, 100, 150, 200, 300, 400, 600, 800, 1200, 1600.
The following values can be input directly: 25 to 3200 (in 1 dpi increments), 6400, 9600, or 19200.
Determine the best scan resolution setting
 You can specify the desired scanning resolution within the scanner driver.
| Type of Scan |
Resolution |
|
Images for display on a monitor
|
Should generally be scanned at a resolution of 75 dpi.
|
|
Images for printing
|
Should be scanned at a resolution that corresponds to that of the printer. For example, if you are using a 600 dpi black and white printer, you should scan your document at 600 dpi.
|
|
With a color printer, scanning your document at half the resolution of the printer should be fine. For example, if you are using a 600 dpi color printer, you should scan your document at 300 dpi.
|
|
Printing to scale
|
Which is twice the size vertically and horizontally, the resolution of your document will be reduced by half. If
the resolution of the original document is 300 dpi, the resolution of the enlarged document will be 150 dpi. If you print the document with a 600 dpi color printer, the lack of detail in the image may be obvious. In such a case, if you scan at a resolution of 600 dpi, resolution will be 300 dpi even if you double the size of the document and you can print the document with sufficient quality. Conversely, if you want to print a document at a reduced size, it should be sufficient to scan at half the resolution.
|
|
Resolution and data size
|
If you double the resolution, the image data will be four times greater. If the data is too large, processing speed will slow down significantly, and you may
experience malfunctions such as lack of memory. Make sure to set the lowest level possible for your intended use.
|
If your product issue was not resolved after following the steps above, or if you require additional help, please create or log in to your Canon Account to see your technical support options.
Or if you still need help, visit our Canon Community by clicking the button below to get answers:

____________________________________________________________________________________________
