Languages
This article is available in the following languages:
|
Wireless LAN Connection with the Canon PRINT App on an iOS Device
| Article ID: ART162563 |
| |
Date published: 09/29/2015 |
| |
Date last updated: 02/29/2024 |
Description
Learn how to set up a printer on a wireless LAN connection using the Canon PRINT app on an iOS device.
Solution
Canon PRINT is a free application that allows iPad ®, iPhone ® or iPod ® touch users to enjoy a variety of PIXMA, MAXIFY and SELPHY print capabilities.
|
PIXMA iP / iX
|
PIXMA TS
|
PIXMA TR
|
MAXIFY
|
PIXMA G
|
PIXMA MX
|
PIXMA MG
|
Pro
|
This app allows you to set up a wireless capable printer on the network through a cableless setup. To use this setup, follow the steps below.
Cableless setup
- Go to the Apple Store® to download Canon PRINT.
- If you have not already done so, set your printer into cableless setup mode, also referred to as Easy Wireless Connect. For help or instructions, select your printer model from the drop-down list above.
 Be sure to start Easy Wireless Connect before you start the app. If you have already initiated Easy Wireless Connect on your printer, please proceed to step 3. Be sure to start Easy Wireless Connect before you start the app. If you have already initiated Easy Wireless Connect on your printer, please proceed to step 3.
- Open the Canon PRINT app.
- When you first open the app, a message titled For using services related to Canon product appears. Read the information and tap Agree or Do not agree. You will be able to use the app regardless of which option you select.
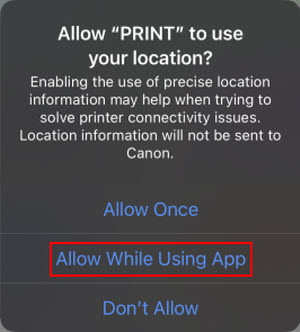
- If asked whether you want to allow this app to access your location, tap Allow While Using App.
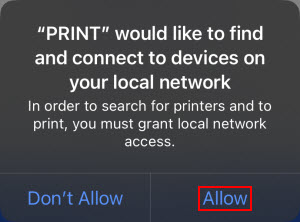
- When this message appears, tap Allow.
- Tap Search.
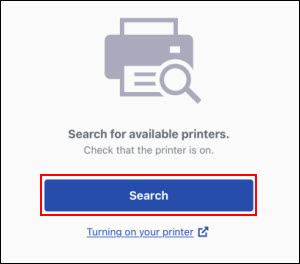
The phone will begin searching for printers.

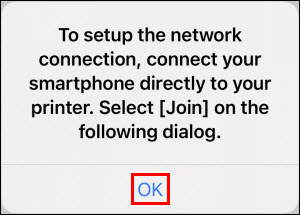
- Tap OK.
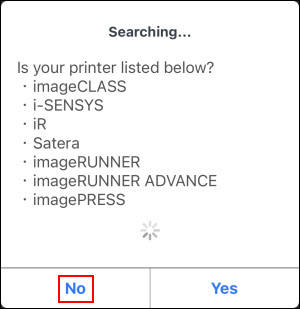
- When the following message appears, tap No, or wait for a few moments.
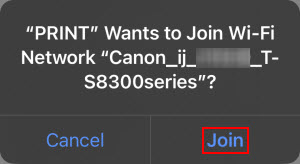
- You'll be asked to join the printer's Wi-Fi connection. When prompted, tap Join.
This message may appear on top of the message shown in step 9. You may not need to tap No in step 9 before this message appears.
If you have used this app to set up another printer on your network, you may see a prompt similar to this one:
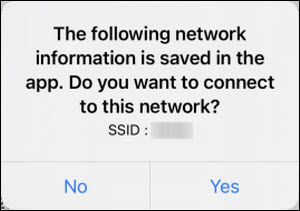
To connect to the network saved in Canon PRINT, tap Yes and proceed to step 12. To specify the network to connect to, tap No and proceed to the next step.
- A list of networks appears. Tap on the name of your network.
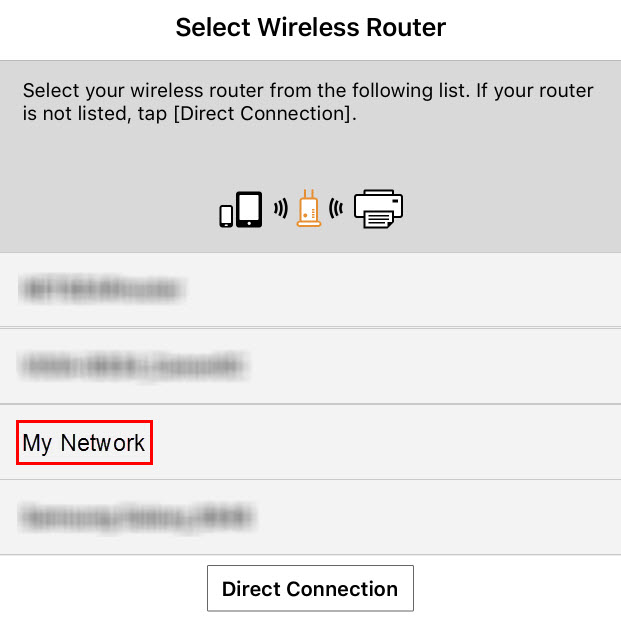
If your printer is too far away from your router, your device may attempt to establish a direct connection with the printer. If this happens, turn off the printer and move it closer to your router. Then, restart this process from step 3.
- If your network has a password on it, enter that password then tap OK. You can tap the Show password box to display the password as or after you type it in.
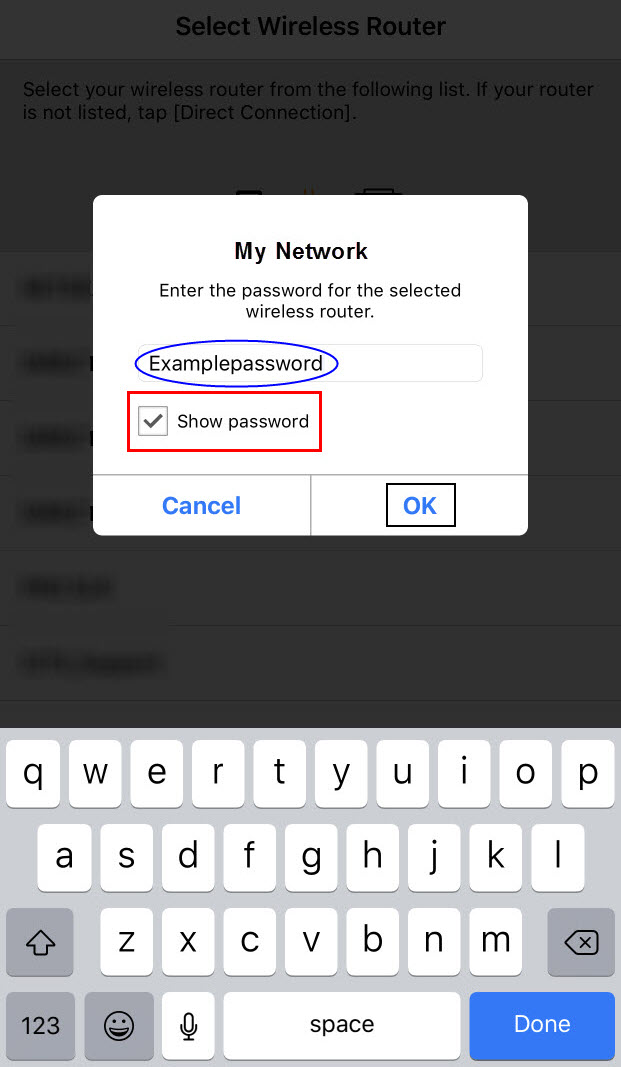
- The password for your wireless network is sent to the printer.

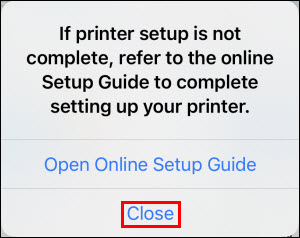
- Tap Close when this message appears.
- Tap Select images to choose a picture to print.
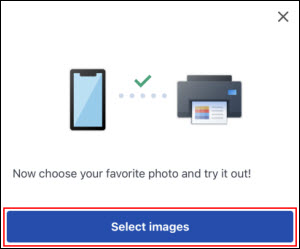
 If you don't want to print, tap the X at the upper right. If you don't want to print, tap the X at the upper right.
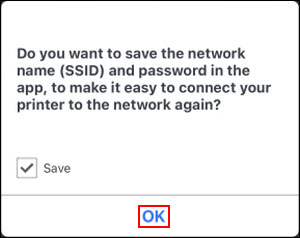
After finishing the wireless setup, you may see a prompt similar to the following. If you want to save the network information in Canon PRINT to make it easy to reconnect this printer in the future, or to add a new printer, make sure the Save box is checked, then tap OK.
If this is your first time using the app, you will be asked to allow PRINT to use your location. Tap Allow While Using App.
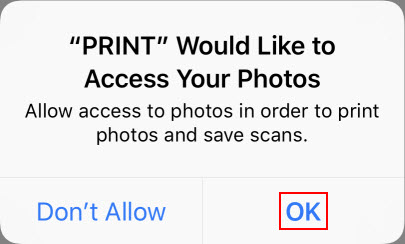
- If this is your first time to print from the app, you may be prompted to allow access to your photos. Tap OK.
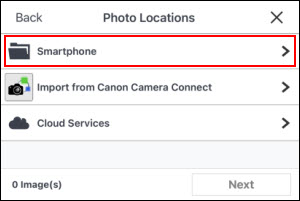
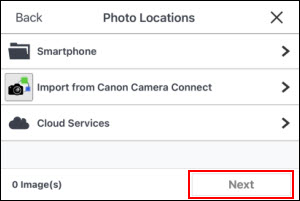
- You'll have the option to print images stored on your device, import images from Canon Camera Connect, or images stored on cloud services. In this example, images stored on the device will be used. Tap Smartphone.
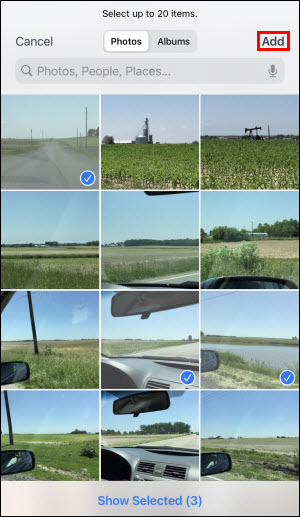
- The images stored on your device are shown. You can select up to 20 images. Tap on the image(s) you want to print, then tap Add.
You can select images stored in specific albums on your device by tapping Albums, then selecting the album and images.
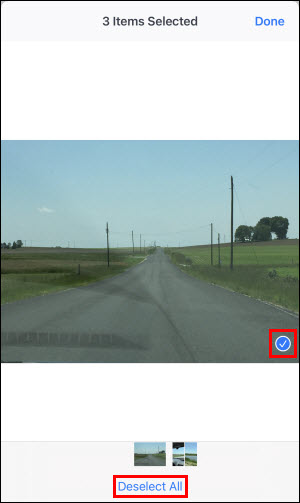
You can tap Show Selected to view the image(s) you selected for printing. You can swipe through the image(s), and if you don't want to print an image, you can either tap the check mark on the image, or tap Deselect All. Tap Done when finished.
- You'll return to the Photo Locations screen. Tap Next.
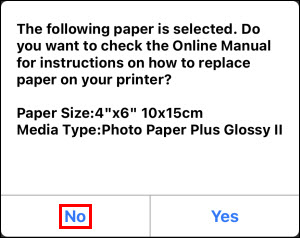
If you see a message similar to this, tap No.
-
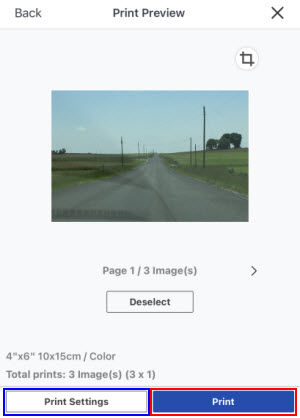
Tap Print settings to change any of the settings listed on the screen (number of copies, paper size, etc.), then tap Print.
If you already registered your printer with Canon PRINT and would like to change its name, follow the steps below.
-
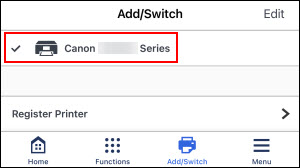
From the main screen of Canon PRINT app, tap the Add/Switch icon at the bottom.
- Tap and hold the name of the registered printer in the list.
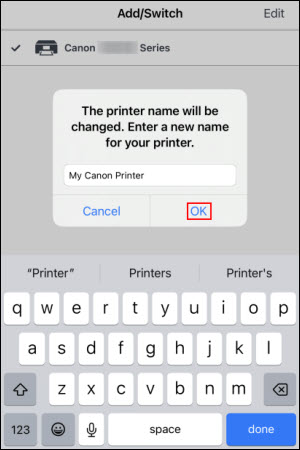
- When prompted, enter a name you would like to use for the printer, then tap OK.
- After you tap OK, tap Back at the upper left corner.
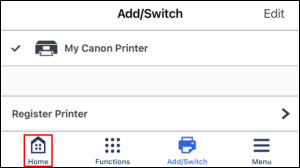
- The printer appears in Canon PRINT with the name you specified.
For support and service options, sign into (or create) your Canon Account from the link below.
My Canon Account
|
