Basic Methods for Sending E-Mails/I-Faxes
This section describes the flow of sending e-mails/I-faxes.
For information on the required settings to be made beforehand, refer to the related information.
note:
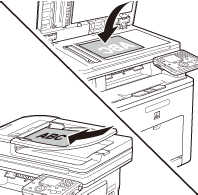
1. Place your originals.
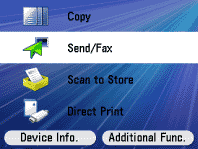
2. Press  (Main Menu).
3. Use [  ] , [
] , [  ] or
] or  (Scroll Wheel) to select <Send/Fax>, then press [OK].
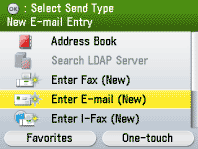
4. Use [ ] , [ ] or (Scroll Wheel) to select <Enter E-mail (New)> or <Enter I-Fax (New)>, then press [OK].
note:
You can specify the address using the Address Book or One-touch registered beforehand. For instructions on how to register the Address Book and One-touch, refer to the related information.
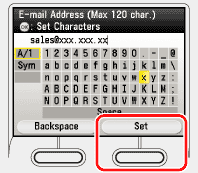
5. Use the software keyboard to enter the e-mail address or the I-fax address, then press the right Any key to select <Set>.
You can enter up to 120 characters for the e-mail address or the I-fax address.
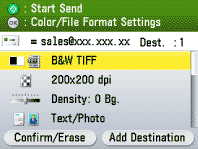
6. Make the scan settings you require.
7. Press  (Start).
- Scanning starts if the original is placed in the feeder, and the scanned data is sent to the specified destination when scanning is complete.
- To cancel scanning, press the left Any key to select <Cancel> or press
 (Stop).

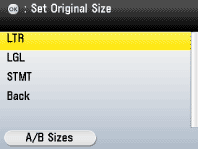
8. Use [ ] , [ ] or (Scroll Wheel) to select the original size, then press [OK].
9. Press (Start).
- Scanning starts.
- To cancel scanning, press the left Any key to select <Cancel> or press (Stop).

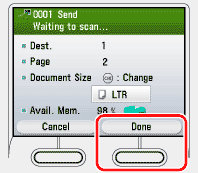
10. Follow the instructions on the display, then press (Start) once for each original.
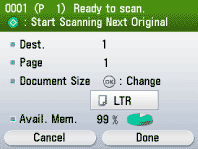
11. When scanning is complete, press the right Any key to select <Done>.
The scanned data is sent to the specified destination.