Performing Nozzle Test and Print Head Cleanings - Mac OS X
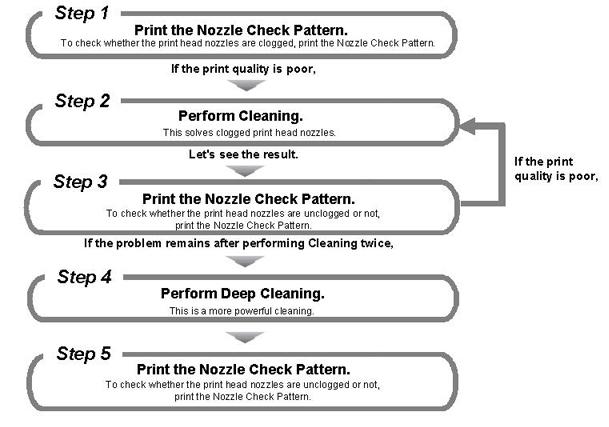
If the prints are faint or streaks are printed, the print head nozzles may be clogged. Those phenomena can be improved by performing print head cleaning or print head deep cleaning. Also, you can check the cleaning results by printing the Nozzle Check Pattern after cleaning.
Note: After confirming that the interface cable connects the printer to the computer and the printer is turned ON, please perform the following. Confirm that a print job is not in progress, then launch the IJ Printer Utility.
Note: In Nozzle Check Pattern printing after print head deep cleaning, if missing lines in the pattern are not improved, the ink cartridges may be defective.
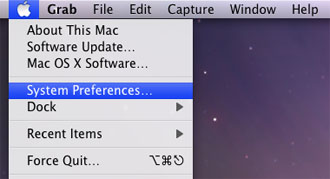
1. Launch the IJ Printer Utility. From the Apple menu click 'System Preferences'.
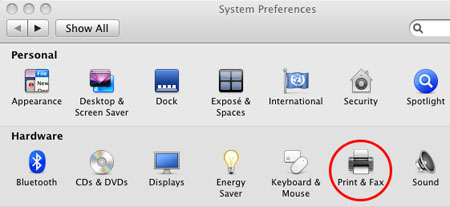
From 'System Preferences', open 'Print & Fax'.
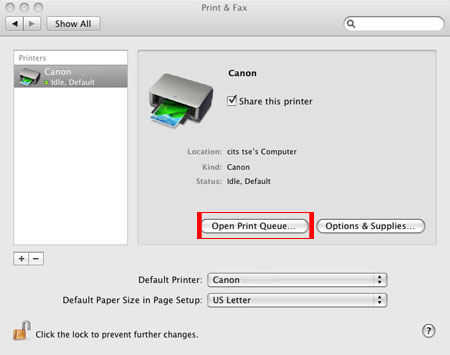
From the 'Print & Fax' window, select your printer on the left, and then click 'Print Queue'.
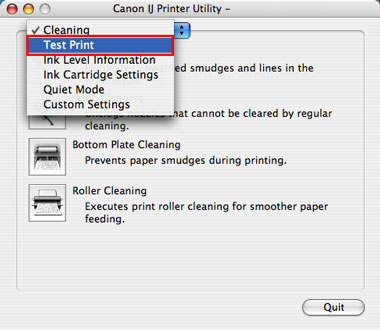
2. From the pop-up menu, select 'Test Print'.
3. Click the 'Nozzle Check' icon.

The layout of the Maintenance sheet varies depending on the printer you are using.
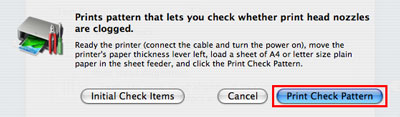
4. After Checking that A4 or letter size plain paper is set in the auto sheet feeder, click 'Print Check Pattern'.
Note: When Initial Check Items is clicked, the confirmation items before performing nozzle check pattern printing will be displayed.
5. Nozzle check pattern printing will start.
6. Examine the nozzle check pattern output.
When the output is normal:
Black ink: The grid pattern is regular without missing lines.
Color ink: White streaks are not visible in the pattern.
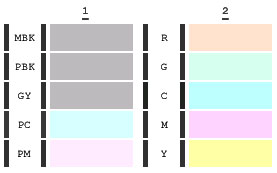
The output is not normal when:
- No color is printed. (Nothing appears on the output.)
- There is any color which is not printed at all.
- There are white streaks in any of the ink patterns.

7. Determine whether the Nozzle Check Pattern is normal or not, and perform the following based on the screen below:
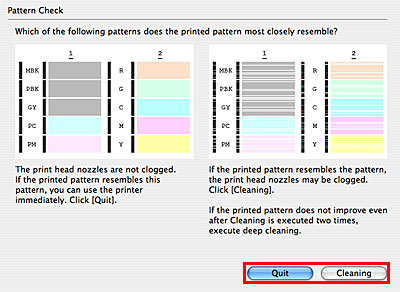
When the output is normal:
Click 'Quit' to finish the pattern check.
When the output is not normal:
Click 'Cleaning' to perform print head cleaning.
8. Select the target ink for Cleaning, then click 'OK'.
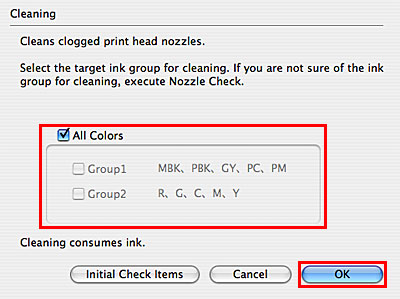
Note: Print head cleaning consumes a certain amount of ink. Do print head cleaning only when necessary. When Initial Check Items is clicked, the confirmation items before performing print head cleaning will be displayed.
9. Print head cleaning starts.
The Power lamp will blink and print head cleaning of the print head nozzles starts. The blink stops when print head cleaning is over. Until print head cleaning completes, do not try other operations. Print head cleaning will take about 60 seconds.
10. Print the Nozzle Check Pattern again to examine the print head status.
Confirm that sheets of A4 or letter size plain paper are loaded in the auto sheet feeder, and click 'Print Check Pattern'.
Note: When Initial Check Items is clicked, the confirmation items before performing nozzle check pattern printing will be displayed.
11. Nozzle check pattern printing will start.
12. Examine the printed Nozzle Check Pattern. (The examination method is the same as the step 6 and 7.)
13. Perform print head cleaning again. (Same as the steps 9 to 12.)
Note: If the pattern is still abnormal, perform print head deep cleaning. Print head deep cleaning consumes a larger amount of ink than normal cleaning. Perform print head deep cleaning only when necessary.
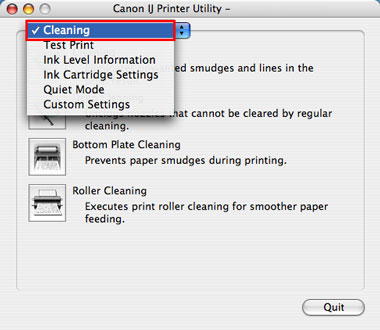
14. From the pop-up menu, select 'Cleaning'.
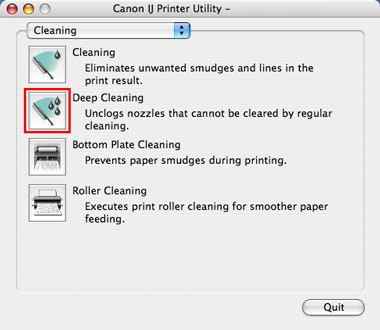
15. Click 'Deep Cleaning'.
16. Select the target ink for Cleaning, then click 'OK'.
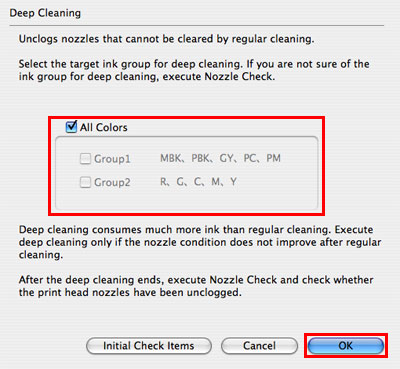
Note: When Initial Check Items is clicked, the confirmation items before performing nozzle check pattern printing will be displayed.
17. Print head deep cleaning starts.
The Power lamp will blink and print head cleaning of the print head nozzles starts. The blink stops when print head cleaning is over. Until print head cleaning completes, do not try other operations. Print head cleaning will take about 2 to 3 minutes.
18. To check whether the clogged print head nozzles were improved, print the Nozzle Check Pattern again.
19. If the printed pattern is still abnormal, finish the pattern check. The print head may not be working properly.
Note: Turn the printer off and letting it sit for 24 hours or more, then do Deep Cleaning again. The wait time may allow dried ink in clogged print head nozzles to liquify, and resolve the problem.
