Untitled Document
How to install / replace the ink tanks
The ink tanks suitable for the printer are as follows;
Note: There are two ink tank label designs.
Operation procedures are shown with label design A.
1. Check that the printer is powered on, and open the front cover. Wait until the print head moves to the center.
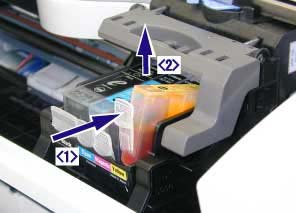
2. Remove the empty ink tank by pushing the tab on the ink tank.
Note: When doing this, do not remove the print head. When replacing multiple ink tanks, it is recommended to replace one at a time to avoid inserting them into the wrong slots.
(The image is an example using i850.)
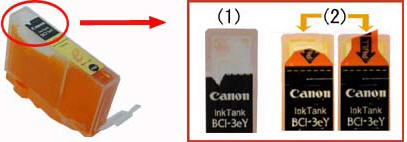
3. Remove the new ink tank from its package. Pull the orange tape in the direction of the arrow to remove it completely, and remove the shrink-wrap film.
Note: Remove the orange tape completely. If the tape remains, printing may not be performed properly.
Confirm that the orange tape is completely removed from the ink tank, as shown in image 1. If the tape is similar to the sample in image 2, remove the remaining portion of the tape so that it looks like the sample shown in image 1.
(2): Incorrect (where the arrow indicates)
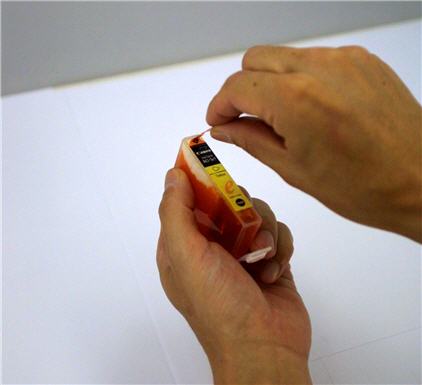
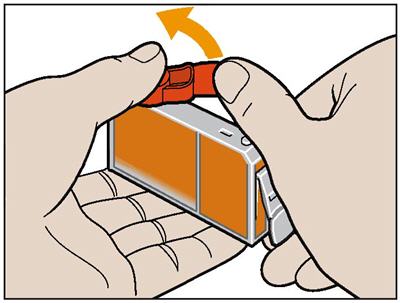
4. Slowly twist the orange protective cap in the direction that the arrow indicates, and remove it. To avoid ink adhering to your fingers, brace the orange protective cap while removing it.
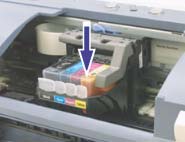
5. Insert the new ink tank to the print head by holding it at a slight angle.
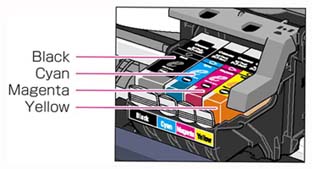
Note: Confirm that the ink tanks are installed in the right order according to the labels on the print head.
6. Press down on the top of the ink tank until a click sound is made.
7. Close the front cover. The next time the printer performs printing, it will automatically start print head cleaning. The power lamp will flash while cleaning is performed. Until cleaning completes, do not perform other operations.