If you're having trouble printing over Wi-Fi®, this information will help you change your wireless settings.
Printer not detected
-
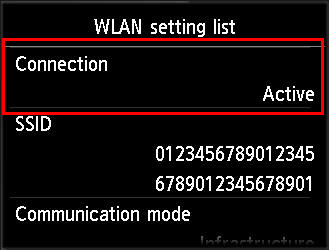
If your printer is not detected during wireless setup, check that the wireless LAN connection is Active.
-
If it is Active, but IPv4 address is blank, it's possible that an IP address has not been assigned even though the wireless connection is active (see example, below).
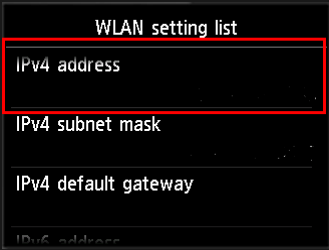
- If the connection is Active but there is no IP address listed, try following the steps below to disable IPv6 and Wireless DRX in the printer settings to see if it resolves the issue.
 DHCP should be enabled on your router. If you're not sure, check with your router manufacturer.
Print the settings
Before you begin, follow these steps to print the settings:
-
Press the Menu button (MX722 and MX922 only).
-
Select Setup, then press the OK button.
-
Select Device settings, then press the OK button.
-
Use the 
 arrow buttons to select LAN settings, then press the OK button.
-
Use the arrow buttons to select Confirm LAN Settings, then press the OK button.
-
Use the arrow buttons to select Print LAN Details, then press the OK button.
-
Use the arrow buttons to select Yes. The LAN Details sheet will be printed.
-
Press the OK button to clear the message on the screen and return to Confirm LAN settings.
Disable the Wireless LAN DRX Setting
If this setting is enabled, follow the steps below to disable it.
From the LAN Settings menu:
-
Use the arrow buttons to select Other settings, then press the OK button.
-
Use the arrow buttons to select Wireless LAN DRX setting, then press the OK button.
-
Use the arrow buttons to select Disable, then press the OK. This will return you to Other Settings menu.
Disable the IPv6 Setting
If this setting is enabled, you should disable it by following the steps below.
From the LAN Settings menu:
-
Use the arrow buttons to scroll to Other settings, then press OK.
-
Scroll to TCP/IP settings, then press OK.
-
Scroll to IPv6, then press OK.
-
Select Yes at confirmation screen (LAN communication may be disabled depending on your environment. Set this setting?), then press OK.
-
Scroll to Enable/disable IPv6, then press OK.
-
Select Disable, then press the OK button.
-
This will return you to IPv6 settings menu where you can press MENU to exit to the main menu.
If your product issue isn't resolved after following the steps above, or if you require additional help, please create or log in to your Canon Account to see your additional options.
