|
|
PowerShot V10: Live Streaming
| Article ID: ART183846 |
| |
Date published: 09/11/2023 |
| |
Date last updated: 09/28/2023 |
Description
Live Streaming
Solution
|
Live Streaming
You can live-stream images from the camera.
Check the streaming requirements and terms of service in advance on the streaming site.
Pairing with a Smartphone via Bluetooth
Go to step 11 if the smartphone and camera are already paired.
-
Prepare the smartphone ().
-
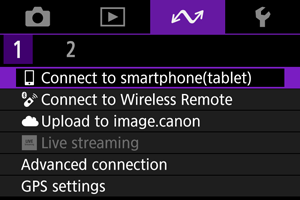
Select [ : :  Connect to smartphone(tablet)]. Connect to smartphone(tablet)].
-
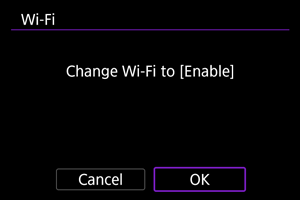
Select [OK].
- This screen is not displayed if the Wi-Fi setting is already set to [Enable].
-
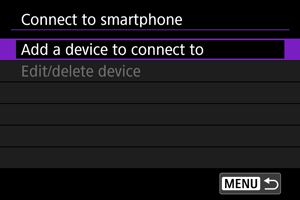
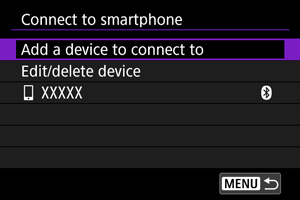
Select [Add a device to connect to].
-
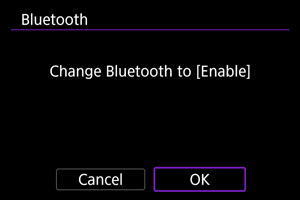
Select [OK].
- This screen is not displayed if the Bluetooth setting is already set to [Enable].
-
Press the  button. button.
-
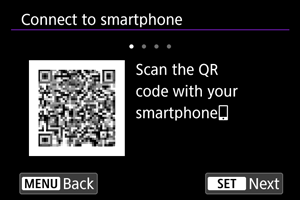
Start pairing.
- Press the button to start pairing.
- If Camera Connect is not installed, use the smartphone to scan the QR code on the screen, go to Google Play or App Store to install Camera Connect, then press the button to start pairing.
-
Start Camera Connect.
- Following the instructions in the app, select the camera for pairing.
-
Establish a Bluetooth connection.
- Press the button.
- When a message appears on the smartphone, use the smartphone as indicated.
-
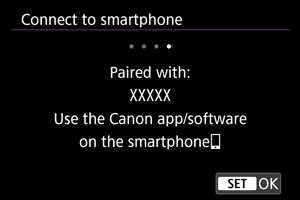
Complete the pairing process.
- Press the button to finish pairing.
- The name of the connected device is displayed.
- Press the
 button. button.
-
Select [Live streaming].
Connecting to an Access Point via Wi-Fi
- The camera automatically reconnects to access points used previously.
- These instructions are for connecting via WPS (PBC mode). To connect a different way, see Basic Communication Settings ().
-
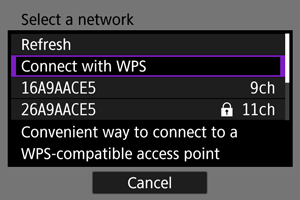
Select [Connect with WPS].
-
Select [WPS (PBC mode)].
-
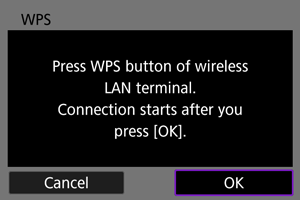
Connect to the access point.
- Press the access point's WPS button. For details on where the button is and how long to press it, refer to the access point user manual.
- Select [OK] to initiate connection with the access point.
- The following screen is displayed once the camera is connected to the access point.
-
Select [Auto setting].
- Select [OK].
- If an error is displayed for [Auto setting], set the IP address manually ().
-
Complete the streaming settings in Camera Connect.
- Select the streaming platform you will use, then configure the settings accordingly.
- You can enter a URL on the screen to select a streaming site.
- As the streaming quality, select 6 Mbps or 3.5 Mbps, depending on the communication environment.
-
Start streaming.
- [STBY] is shown on the recording standby screen.
- Use Camera Connect to start and stop streaming. You can also stop streaming by pressing the Start/Stop button on the camera.
Caution
- Video and audio may be noisy during streaming, depending on the communication environment. Test streaming in advance and check the video and audio quality.
- Try the following if video and audio is noisy or skips. These steps may improve the quality.
- Bring the camera and access point (wireless router, tethering smartphone, etc.) closer together, change their relative positions, and keep the space between them free of people and objects.
- Indoors, set up the access point and camera in the same room.
- Set up away from devices that use the 2.4 GHz band, such as microwave ovens or cordless phones.
- If noise from an external microphone is distracting, try placing the microphone on the side of the camera with the external microphone IN terminal as far from the camera as possible.
- Although selecting 3.5 Mbps as the streaming quality in Camera Connect may enable more stable streaming than with 6 Mbps, image quality will be lower.
- The camera will become warmer during streaming. Use the stand or a tripod, or take other measures to avoid handheld recording. Once the camera becomes hot, [
 ] appears on the screen as a warning. ] appears on the screen as a warning.
- Note that Canon is in no way responsible for third-party services.
- No image is recorded to the card during streaming (but a card must be in the camera).
- Test streaming in advance to make sure the image is straight and in the correct orientation, and adjust the orientation as needed.
- Be sure to read Wireless Communication Precautions.
|
SIMS Doc Id
1691433378139737505
|