Refer to the following steps to verify the ink tanks are seated correctly:
1. Lift the scan unit until it locks into place .
- When the machine is ON, the paper output tray automatically opens when the scan unit is lifted . If the paper output tray does not open, press the Open button to open the paper output tray.
The print head holder moves to the middle.
2. Open the inner cover.

CAUTION:
- Do not try to manually move or stop the print head holder.
- Do not touch any metal parts.
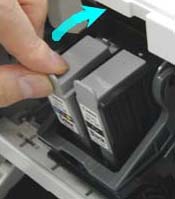
3. Press on each ink tank until a click is heard.
3. Close the inner cover.
CAUTION: Press the center of the inner cover until the cover locks into place. Printing with the inner cover open may result in injury.
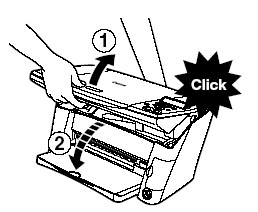
4. Close the scanning unit until it locks into place.
The LCD displays the following message:

5. Press the [>] key on the operation panel.
NOTE: When not replacing an ink tank, be sure to press [>], and no other key.
