|
|
Uninstalling / reinstalling the MP495 / MP499 drivers (Mac OS X)
| Article ID: ART107477 |
| |
Date published: 05/11/2015 |
| |
Date last updated: 08/15/2015 |
Description
Uninstalling / reinstalling the PIXMA MP drivers on a Mac OS X computer.
Solution
Uninstalling and Reinstalling the MP Drivers
If the MP Navigator or the MP drivers are no longer required, or if they are not installed correctly, uninstall them. Reinstall the drivers if error messages occur or if the device does not operate correctly.
Note:
- When multiple Canon inkjet printer drivers or Canon scanner drivers such as ScanGear MP or ScanGear CS are installed in the computer, perform the following to delete them ALL. (You cannot choose which one to delete or which one to keep.) Install the printer driver with the CD-ROM prepackaged with the printer or download it from the Canon website to reinstall.
- Login with a user name with the Computer administrator account type to delete the MP drivers. Regarding Administrator users, please refer to the Mac OS X owner's manual.
If you are using Mac OS X v.10.6.x or Mac OS X v.10.5.x -
- Open System Preferences, and select Print & Fax.
- Delete the Canon IJ printer from the printer list.
From the printer list, select all the registered Canon IJ Printers to be deleted, and then click - (minus button).
- One by one, double-click the volume icon, Library folder, Printers folder, and Canon folder to which you installed the printer driver, and place the BJPrinter folder into the Trash.
- One by one, double-click the volume icon, Library folder, and CFMSupport folder to which you installed the printer driver, and place the "BJExtDDI.cfm" file into the Trash.
- Restart the computer
If you are using Mac OS X v.10.4.11 -
- Launch the Printer Setup Utility.
- Delete the Canon IJ printer from the printer list.
From the printer list, select the Canon IJ Printer to be deleted, and then click  Delete. Delete.
- One by one, double-click the volume icon, Library folder, Printers folder, and Canon folder to which you installed the printer driver, and place the BJPrinter folder into the Trash.
- One by one, double-click the volume icon, Library folder, and CFMSupport folder to which you installed the printer driver, and place the "BJExtDDI.cfm" file into the Trash.
- Restart the computer.
Note: Even if a Canon IJ Printer is deleted from the printer list, you can re-register it automatically by connecting the machine to your computer.
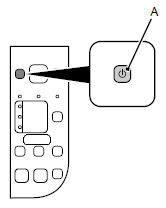
- Press the ON button (A) to TURN OFF THE MACHINE.
Operating noise may continue for up to 40 seconds until the machine turns off.
Important: Do NOT connect the USB cable to the computer and the machine yet. If you have already connected the cable, disconnect it now.
- Turn on the computer, then insert the Setup CD-ROM into the CD-ROM drive.

-
Double-click the Setup icon
 of the CD-ROM folder to proceed to the following screen. Enter your administrator name and password, then click OK. of the CD-ROM folder to proceed to the following screen. Enter your administrator name and password, then click OK.

- If the CD-ROM folder does not open automatically, double-click the CD-ROM icon
 on the desktop. on the desktop.
- If you do not know your administrator name or password, click the help
 button, then follow the on-screen instructions. button, then follow the on-screen instructions.
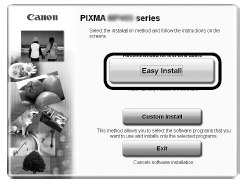
- Click Easy Install.
The drivers, application software, and on-screen manuals are installed.
Note: If you want to select particular items to install, click Custom Install.
- Click Install.

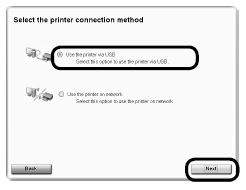
- Select Use the printer via USB, then click Next.
Follow any on-screen instructions to proceed with the software installation.
Important Information for the Installation
USB Port
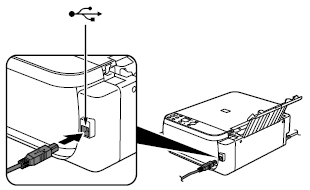
When the Printer Connection screen appears, connect the machine to the computer with a USB cable.
The USB Port is located on the right side of the machine.
Note: The supplied wireless LAN setup cable can be used as well.
Necessary Information for the User
Registration
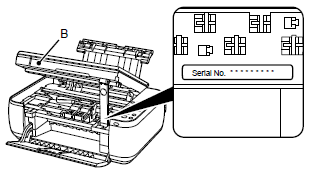
When the serial number is not displayed on the registration screen automatically, input the serial number located inside the machine (as shown in the illustration).
Important: If the power is on, the FINE Cartridge Holder will move when the Scanning Unit (Cover) (B) is opened.
If the Extended Survey Program screen appears

If you can agree to Extended Survey Program, click Agree.
If you click Do not agree, the Extended Survey Program will not be installed. (This has no effect on the machine's functionality.)
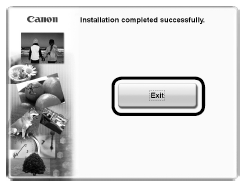
- Click Exit to complete the installation.
Note: It is necessary to restart the computer before scanning using the Operation Panel on the machine for the first time.
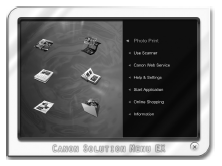
- Solution Menu EX starts when clicking OK in the Canon Solution Menu EX dialog.
Remove the Setup CD-ROM and keep it in a safe place.
Note: The buttons displayed on Solution Menu EX may vary depending on the country or region of purchase.
|
