Perform Print Head alignment - mini260
| Article ID: ART126817 |
| |
Date published: 05/12/2015 |
| |
Date last updated: 08/14/2015 |
Solution
Untitled Document
Print Head Alignment
- Ensure that the printer is powered on and open the paper support.
- Load two sheets of 4" x 6" sized Matte Photo Paper or Photo Plus Glossy in the auto sheet feeder.
- Press the <Home> button.
- Use the Easy-Scroll Wheel or the <
 > or <
 > cursor buttons to select 'Settings'
  , and then press the <OK> button.
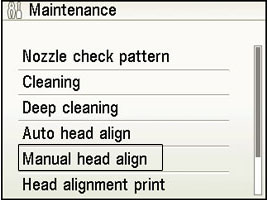
- Use the Easy-Scroll Wheel or the <> or <> cursor buttons to select 'Maintenance' and press the <OK> button.
- Use the Easy-Scroll Wheel or the <
 > or <
 > cursor buttons to select 'Manual head alignment' and press the <OK> button.
- Press the up / down cursor button to select 'Yes', and then press the <OK> button to start the alignment. The printer prints the head alignment pattern.
Note: Do not do other operations until the alignment is completed.
- When the print head alignment pattern is correctly printed, use the Easy-Scroll Wheel or the up / down cursor button to select 'Yes', then press the <OK> button.
When the print head alignment pattern is not correctly printed, use the Easy-Scroll Wheel or the up / down cursor button to select No, then press the OK button to print the head alignment pattern again.
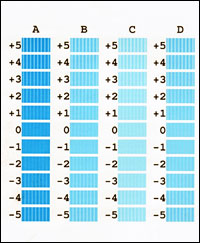
- From each column on the print out, select the pattern which has the least visible streaks.

Least visible streaks

Most visible streaks
- Use the Easy-Scroll Wheel or the up / down cursor button to select the column to be adjusted.
- Use the right / left cursor button to select the pattern number.
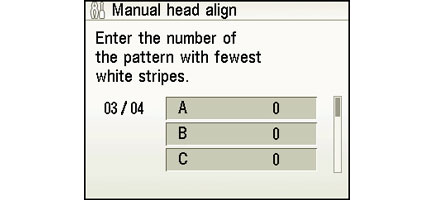
- After setting all the columns (A to D), press the OK button once and again in the next window. The following page is printed.
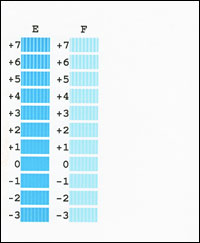
- From each column, select the pattern which has the least visible streaks. Use the Easy-Scroll Wheel or the up / down cursor button to select the column to be adjusted.
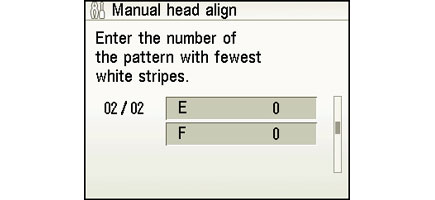
- After setting all the columns (E to F), press the <OK> button to complete the alignment.
