If scanned images contain streaks or scanned documents become dirty, the scanning glass and rollers inside the scanner may be dirty. Use this procedure to clean them on a regular basis.
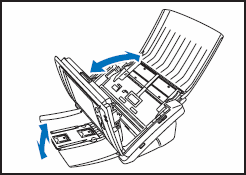
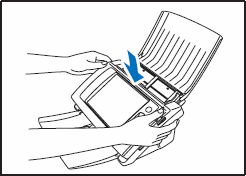
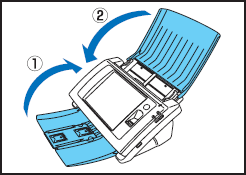
- Pull the lock lever toward you and then fully open the panel unit.
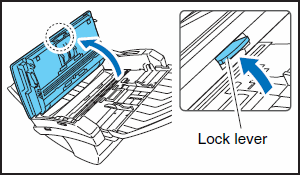

The opne/close movement of the panel unit is linked to the up/down movement of the document eject tray. Do not press on the document eject tray when you open the panel unit.
- Use commercially available air blower to remove any dust and paper particles that have accumulated inside the scanner.
- Use a clean, dry cloth to wipe any dirt off the scanning glass.
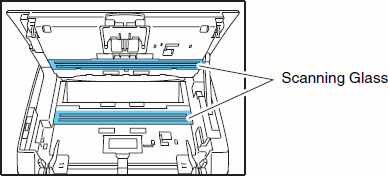

There is one scanning glass for the front side of documents, and another for the back side. Wipe of them clean.
Do not spray water or detergent directly on the scanner. Doing so may damage precision mechanisms, such as the light source.

Scratches on the scanning glass may cause streaks on scanned images, as well as feeding errors.
-
Remove any dirt from the rollers using a cloth that has been soaked in water and thoroughly wrung out.

Rotate the rollers on the panel unit side while cleaning them. Do not rotate the rollers on the opposite side, and remove dirt on the visible portions only. Forcefully rotating the rollers on this side may cause feed errors.
- Remove any dirt from the document holding guide using a cloth that has been soaked in water and thoroughly wrung out.

- Open the Retard roller cover.
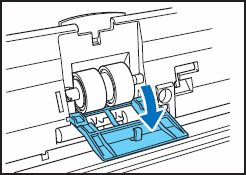
Do not use excessive force when removing or attaching the retard roller. Doing so may cause the roller to become deformed, resulting in feed errors.
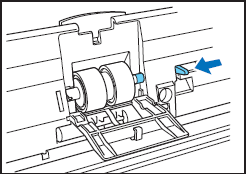
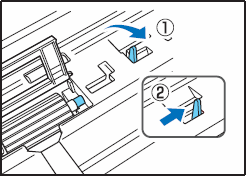
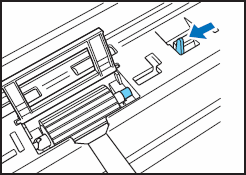
- Lift up the roller lock lever
 , and slide it in the direction of the arrow
  .
.
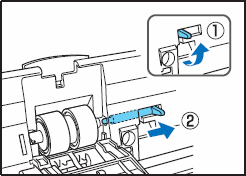
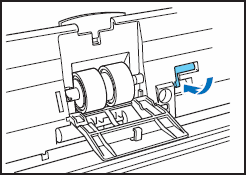
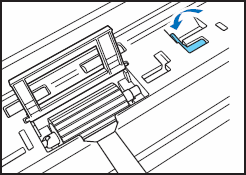
- Move the retard roller in the direction of the arrow , and then remove it from the shaft .
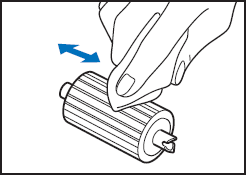
- Remove any dirt from the roller using a cloth that has been soaked in water and thoroughly wrung out.

- Replace the roller in the roller compartment inside the roller cover, and then align the notch in the roller with the shaft of the scanner.
- Slide the roller lock lever in the direction of the arrow, and then insert it into the hole of the retard roller.
- Lower the lever to lock the shaft of the retard roller into position.
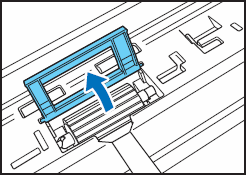
- Close the roller cover. Make sure that you hear a click, which indicates the cover has returned to its original position.
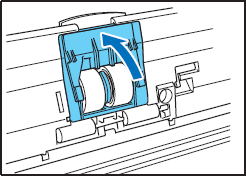
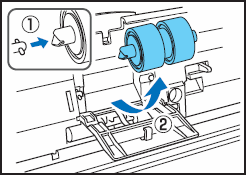
- Open the Feed roller cover.
Do not use excessive force when removing or attaching the feed roller. Doing so may cause the roller to become deformed, resulting in feed errors.
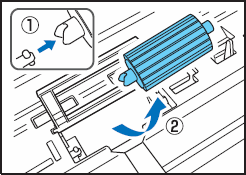
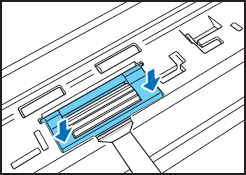
- Lift up the roller lock lever , and slide it in the direction of the arrow .
- Move the feed roller in the direction of the arrow , and then remove it from the shaft .
- Remove any direct from the roller using a cloth that has been soaked in water and thoroughly wrung out.
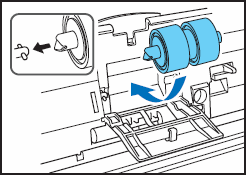
- Align the notch in the shaft of the roller with the shaft of the scanner, and place the feed roller into position.
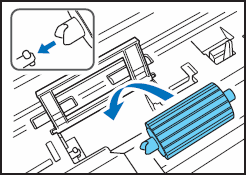
- Move the roller lock lever in the direction of the arrow, and then insert it into the hole in the feed roller.
- Lower the roller lock lever to lock the feed roller into position.
- Close the roller cover. Make sure that you hear a click, which indicates the cover has been returned to its original position.
- Gently close the panel unit. Press on sides of the unit until you hear a click, which indicates the unit is locked.
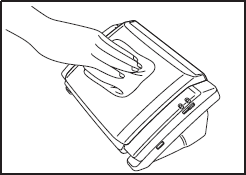
- Clean the touch panel using a soft, dry cloth to gently wipe the surface of the panel without applying pressure.

- Gently close the document eject tray.
- Clean the surface of the scanner unit using a cloth slightly dampened with water and well wrung out, to remove any dirt, and then use a clean, dry cloth to wipe the scanner.