Install the print head and inks correctly i70 / i80.
Article ID: ART159004
|
Date published: 06/09/2015
|
Date last updated: 08/18/2015
Description
Install the print head
Solution
Install the print head
Install the print head by following the procedure below.
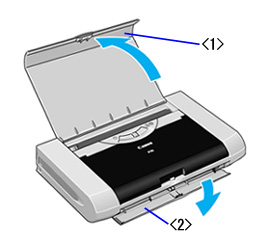
Open the paper support and paper output slot cover of the printer.
<1> Paper Support <2> Paper Output Slot Cover
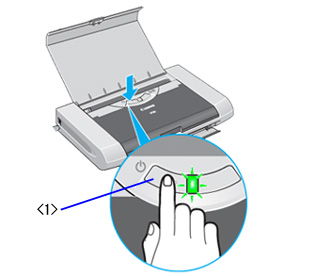
Power the printer on.
<1> Power Button
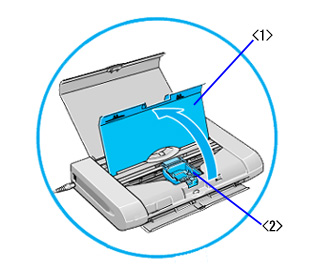
Open the print head cover. The print head holder moves to the center.
<1> Print Head Cover <2> Print Head Holder
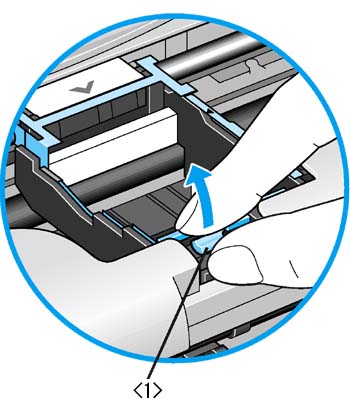
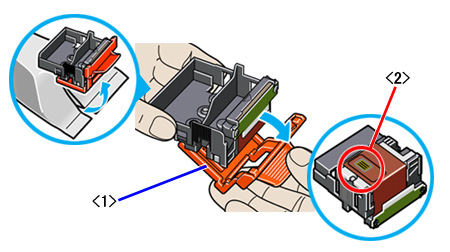
Pinch and lift the print head lock lever at the front of the print head holder.
<1> Print Head Lock Lever Note: If the print head cover remains open for more than 10 minutes, the print head holder moves to the right. In such a case, close the print head cover and open it again.
Remove the print head from its package and remove the orange protective cap that covers the bottom of the print head.
<1> Protective Cap <2> Print Head Face
Note: To avoid print problems, never touch the face of the print head.
Insert the print head into the print head holder so that the "^" mark faces the "V" mark.
<1> Print Head Arrow <2> Ink Supply Filter
Note: To avoid printing problems, never touch the print head ink supply filter.
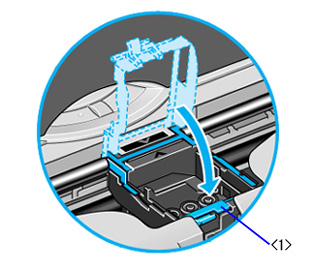
Lower and close the print head lock lever fully until you hear a click.
<1> Print Head Lock Lever
Next, set the ink tanks.
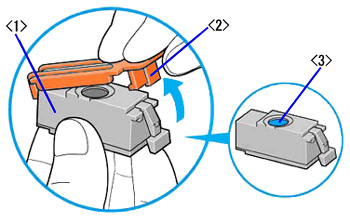
Remove the black ink tank (BCI-15 Black) from its package. Hold the ink tank as shown in the illustration, and remove the orange protective cap, while lifting in the direction of the arrow.
<1> Black Ink Tank (BCI-15 Black) <2> Protective Cap <3> Ink Outlet
Note: To avoid ink supply problems, never touch the ink outlet.
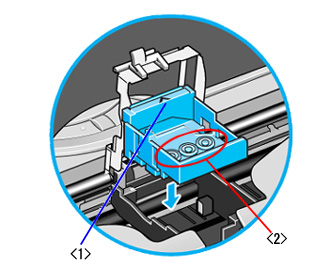
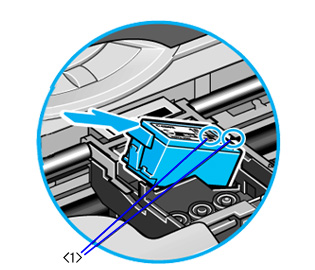
Set the Black ink tank at an angle in the back so that the ">" mark on the ink tank faces the "<" mark on the print head lock lever.
<1> Ink Tank and Print Head Lock Lever Marks
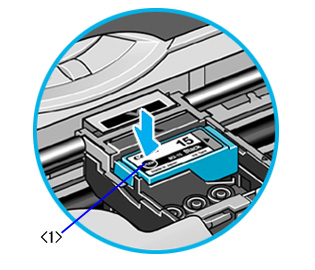
Press down on the <PUSH> mark on the ink tank until you hear a click.
<1> <PUSH> Mark
Insert the color ink tank (BCI-15 Color) in the same way.
<1> Black Ink Tank (BCI-15 Black) <2> Color Ink Tank (BCI-15 Color)
Note: Only use the BCI-15 Ink Tanks. Use of other ink tanks may adversely affect color hue.
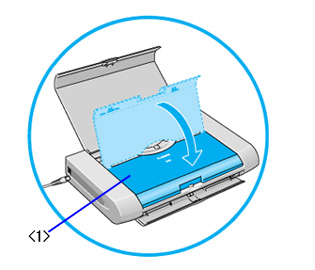
Close the print head cover. The print head moves to the right.