
Uninstalling / reinstalling the MX372 drivers
| Article ID: ART135216 | | | Date published: 05/13/2015 | | | Date last updated: 11/04/2015 |
Solution
Click here for Windows uninstall instructions
Click here for Macintosh uninstall instructions
Click here to skip to Installation instructions
Windows
The MP Drivers which you no longer use can be deleted.
When deleting the MP Drivers, first exit all programs that are running.
The procedure to delete the unnecessary MP Drivers is as follows:
- When There is an Uninstaller
1. Start the uninstaller
Select the Start menu -> All Programs -> "Your model name" -> MP Drivers Uninstall.
The window for checking the model to uninstall appears.
In Windows 7 or Windows Vista, a confirmation/warning dialog box may appear when starting, installing or uninstalling software.
This dialog box appears when administrative rights are required to perform a task.
When you are logged on to an administrator account, click Yes (or Continue, Allow) to continue.
Some applications require an administrator account to continue. When you are logged on to a standard account, switch to an administrator account, and restart the operation from the beginning.
2. Execute the uninstaller
Click Execute. When the confirmation message appears, click Yes.
When all the files have been deleted, click Complete.
The deletion of the MP Drivers is complete.
Printer driver, XPS printer driver, and scanner driver (ScanGear) will be deleted when you uninstall the MP Drivers.
- When There is No Uninstaller
When there is no uninstaller in the Start menu of Windows 7 or Windows Vista, follow these steps:
1. Select the printer to be deleted
- If you are using Windows 7, select the Start menu -> Devices and Printers.
Click the model to delete, then press the Alt key on your keyboard. On the File menu, click Remove device.
- If you are using Windows Vista, select the Start menu -> Control Panel -> Hardware and Sound -> Printers.
Click the model to delete, then press the Alt key on your keyboard. On the File menu, click Delete.
- If you are using Windows XP, select the Start menu ->Control Panel ->Printers and Other Hardware ->Printers and Faxes.
Click the model to delete, then press the Alt key on your keyboard. On the File menu, click Delete.
2. Delete the printer
- If you are using Windows 7, when the confirmation message appears, click Yes. Then when the User Account Control dialog box appears, click Yes.
The icon is deleted.
- If you are using Windows Vista, when the User Account Control dialog box appears, click Continue. Then when the confirmation message appears, click Yes.
The icon is deleted.
3. Select the printer driver to be deleted
- If you are using Windows 7, click any icon in Printers and Faxes.
On the command bar, click Print server properties, and then click the Drivers tab. If the Change Driver Settings button is displayed, click that button.
When the User Account Control dialog box appears, click Yes.
In the Installed printer drivers list, click the printer to delete.
- If you are using Windows Vista, press the Alt key. On the File menu, select Run as administrator, and then click Server Properties....
When the User Account Control dialog box appears, click Continue.
Click the Drivers tab. In the Installed printer drivers list, click the printer to delete.
4. Delete the printer driver
When you click Remove..., Remove Driver And Package dialog box is displayed.
Select Remove driver and driver package., and then click OK.
In the confirmation dialog box, click Yes.
When data collection is completed in the Remove Driver Package dialog box, click Delete.
5. Click OK
The deletion of the printer driver is complete.
You may not be able to delete the printer driver properly from the Installed printer drivers list.
If this happens, restart your computer, and then try again.
Macintosh
A Canon IJ Printer that you no longer use can be deleted from the printer list. Before deleting the Canon IJ Printer, disconnect the cable that connects the printer to the computer.
The procedure to delete the unnecessary Canon IJ Printer from the printer list is as follows:
You cannot delete the Canon IJ Printer unless you are logged in as an user with the administrative right. For information about an administrative user, refer to the Macintosh manuals.
1. Open System Preferences, and select Print & Fax
2. Delete the Canon IJ printer from the printer list
From the printer list, select the Canon IJ Printer to be deleted, and then click the minus sign " - ".
Even if a Canon IJ Printer is deleted from the printer list, you can re-register it automatically by connecting the printer to your computer.
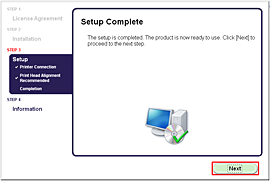
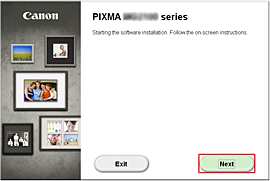
Install the Software and Drivers
CAUTIONDo not connect the USB cable yet.
You will be prompted to connect it during the installation using the Setup CD-ROM.
IMPORTANT
- Quit all applications before installation.
- Log on using an administrator account.
- Internet connection may be required during the installation. Connection fees apply.
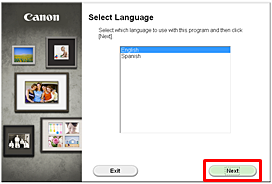
Screens are based on Windows 7 operating system Home Premium and Mac OS X v.10.7. Actual screens may differ depending on the OS version.
Windows
IMPORTANTIf the USB cable is already connected, unplug it. If a message appears on the computer, click Cancel.
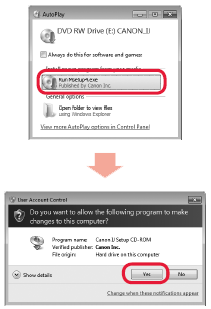
REFERENCEIf the CD-ROM does not autorun:Double-click (My) Computer > CDROM icon > MSETUP4.EXE.

REFERENCE
- Easy-WebPrint EX
Easy-WebPrint EX is Web print software that is installed on the computer when installing the supplied software. Internet Explorer 7 or later (Windows) is required to use this software. An Internet connection is required for installation.
- USB Port

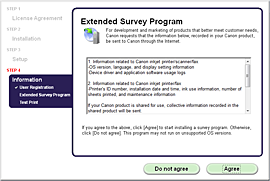
- If the Extended Survey Program screen appears
- If the Test Print screen appears

REFERENCE
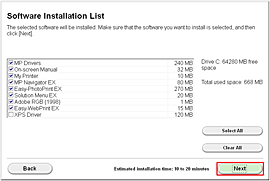
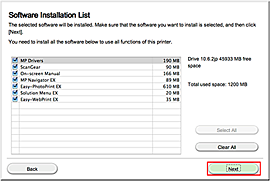
- Installing the XPS Printer Driver
In Windows 7 and Windows Vista SP1 or later, the XPS Printer Driver can be installed additionally.In order to perform the installation, select [XPS Driver] in the step 5 of [Windows].
Macintosh
IMPORTANTIf the USB cable is already connected, unplug it. If a message appears on the computer, click Cancel.
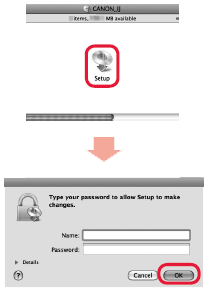


REFERENCEIf the CD-ROM does not autorun:Double-click the CD-ROM icon on the desktop.
- USB Port
- If the Extended Survey Program screen appears
- If the Test Print screen appears