Print on wide paper (Records at a 16:9 width-to-height aspect ratio. Portions not recorded are left black.)
The Postcard Print mode is not available in and .
Compression
Purpose
Superfine
Shoot higher quality images
Fine
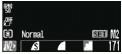
Shoot normal quality images
Normal
Shoot more images
Movies can be shot with the following resolution.
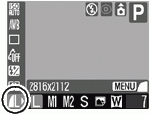
Resolution
640 X 480 pixels
320 X 240 pixels
160 X 120 pixels
Changing the Resolution and Compression
Turn the shooting mode dial to the desired Shooting mode.
Press the <FUNC./SET> button.
Select L* using the or button.
(PowerShot A540 shown) * The current setting is displayed.
Select the resolution you wish to set using the or button. (Excluding )
Press the <MENU> button.
Select the compression you wish to set using the or button.
- You can shoot the image right after selecting settings by pressing the shutter button. This screen will appear again, once the image is shot.
Press the <FUNC./SET> button.
Shoot the image.
Some settings are not available with certain Shooting modes.
The resolution and compression settings are affected by the Shooting mode selection as follows (only the resolution in mode).
Initial Shooting Mode
Next Shooting Mode
Resolution and Compression after Change
Settings change to those of the next mode
Settings do not change
Settings change to those of the next mode
Settings do not change
Settings change to those of the next mode
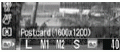
Postcard Print Mode
You can shoot images with settings appropriate for postcard size printing.
* When printing standard image data to postcard size, sometimes the top, bottom and sides may not get printed. By shooting images in the Postcard Print mode, you can check the printing area (vertical/horizontal ratio of 3:2) beforehand. In addition, the resolution locks to M1 (1600 x 1200) and the compression locks to the (Fine) setting, rendering smaller file sizes.
Press the <FUNC./SET> button.
Select L* using or .
* The current setting is displayed.
(PowerShot A540 shown)
Select (Postcard) using or .
You can shoot the image right after selecting settings by pressing the shutter button. The menu displays again after the shot, allowing you to change the settings easily.
Press the <FUNC./SET> button.
Shoot the image.
When you press the shutter button halfway, the area that will not get printed grays out.
Shooting procedures are the same as for the mode.
Selecting cancels the [On] setting of the digital zoom.
When [Date Stamp] is set to [Date] or [Date & Time], appears on images in step 2 and 3.

 (Fine).
 (PowerShot A540 shown)