If you have other printers, it is possible that the other printer may be set as the default printer and is prioritized when printing.
Follow the instructions below to set the printer that you normally use with the [Set as Default Printer] command, and then print again.
attention:
The following instructions are intended for Windows Vista. The screen images and operations may differ slightly in Windows XP.
As the actual locations of buttons / switches on cameras vary depending on the camera model, the illustrations that appear on this page may differ from your camera.
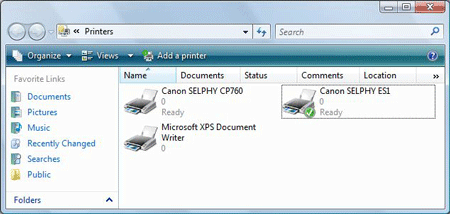
Note: The images below use the CP760 as an example.
Click [Start] () > [Control Panel] > [Hardware and Sound], and then click [Printer].
The following screen appears.
Right-click the icon of the printer that you wish to set, and then click [Set as Default Printer].
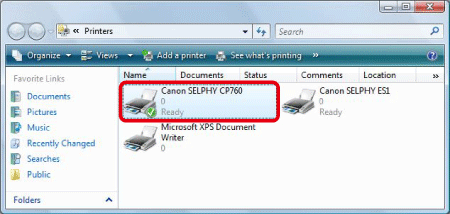
The following screen appears. If the printer that you selected has a check mark (), it has been set as the default printer.

 ) > [Control Panel] > [Hardware and Sound], and then click [Printer].
 the icon of the printer that you wish to set, and then click
  [Set as Default Printer].
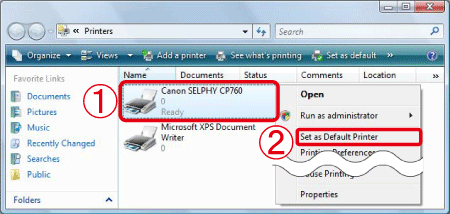
 ), it has been set as the default printer.