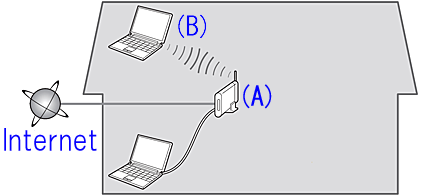
The environment necessary for the wireless connection
Before connecting this printer to the network, confirm the following two items, (A) and (B).
(A) Wireless router (supporting IEEE802.11b/g/n)
Your wireless router is the device that connects the network devices in your home (computer, printer, and so on) to the Internet and allows communication between those devices on your home network. A wireless router is necessary for the procedure described here. To use your printer over a wireless connection, your wireless router must already be set up.
(B) The computer to be used with the printer must be connected to the network.
In order to confirm whether the computer to be used with the printer is connected to the network, try to browse the Internet website from the computer.
- Select the wireless setup method
To use the printer with a wireless connection, you must first connect it to a wireless router.
The correct connection method to use depends on the type of wireless router.
Refer to [ How to connect the printer and router via wireless LAN ] and connect the printer to the wireless router.
When the connection between the printer and the wireless router is complete, refer to [ 2. Install the software ] on this page and install the software.
If you have a Mac, please click here.
- Install the Software (Windows)
 Important
- Quit all applications before installation.
- Log on using an administrator account.
 Note
Note
- If the computer is equipped with a CD-ROM drive, you can use CD-ROM for installation.
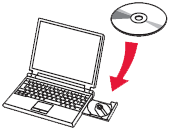
Click [ Run Msetup4.exe ] on the AutoPlay screen, then click [ Yes ] or [ Continue ] on the User Account Control dialog box.
If the CD-ROM does not autorun:
Double-click [ (My) Computer ] > CDROM icon > [ MSETUP4.EXE. ]
Go to Step 7 and follow the instructions.
- Visit http://canon.com/ijsetup/.
- Click Set Up.
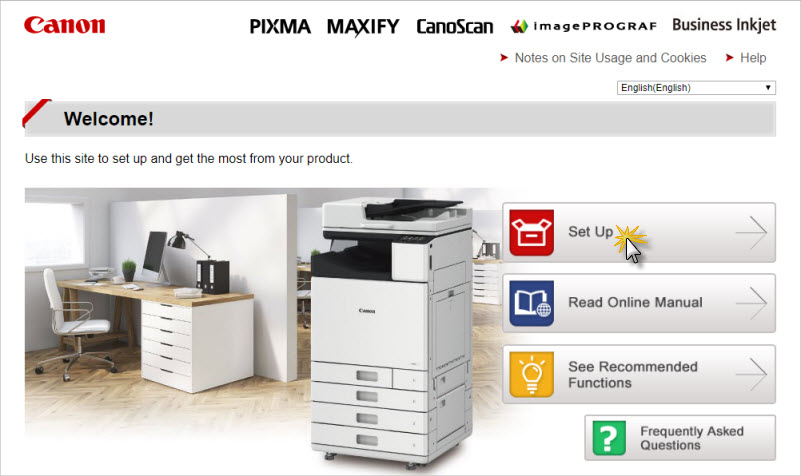
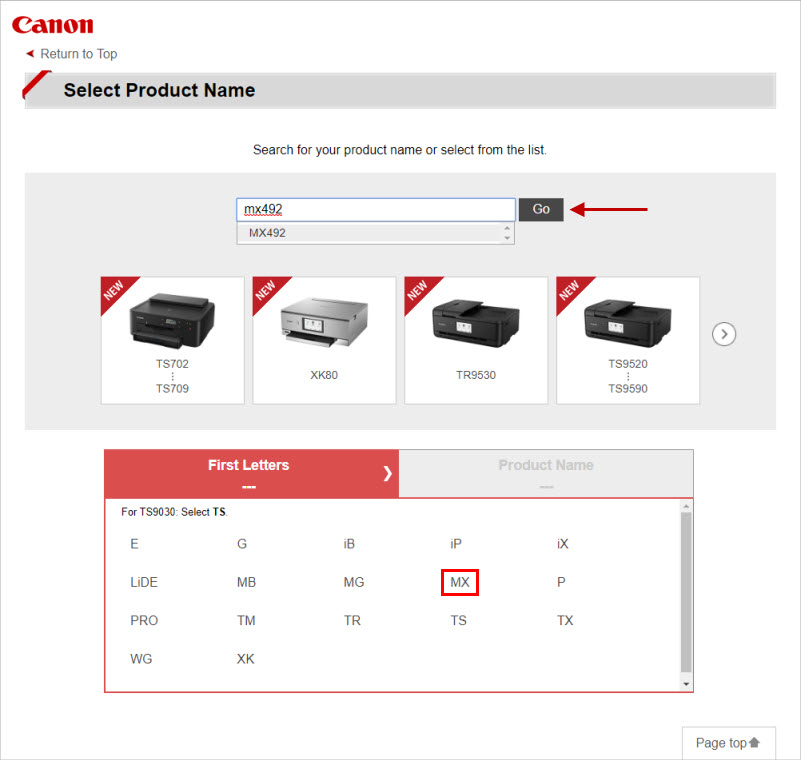
- Type in the name of your printer in the box near the top and click Go. Or, click MX under First Letters, then MX492.
- On the next page, specify your region.
- Click Download.
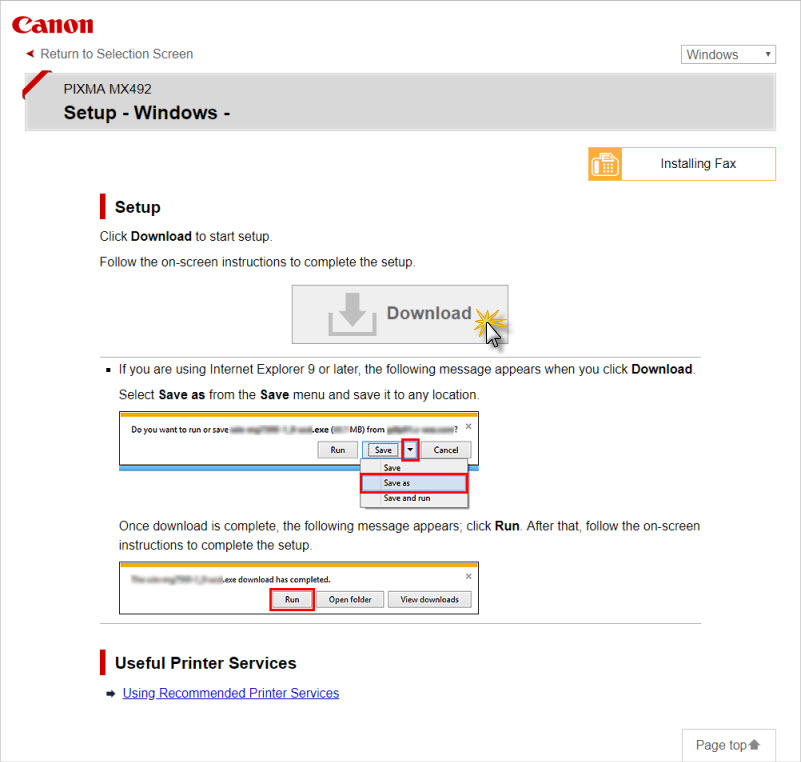
- Save the file to your computer. After it has been saved, double-click the downloaded .exe file.
The setup will start automatically. Follow the on-screen instructions to complete installation.
- Click [ Change Connection Method ].
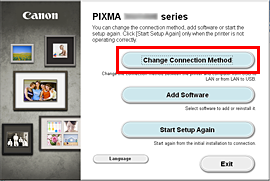
Follow the instruction until the screen below is displayed.
Note
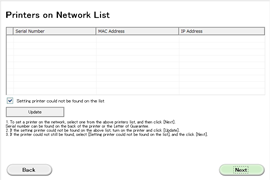
- The setup guide will be displayed and the printer connection method explained, but because the connection between the printer and the wireless router was completed in [ 1. Select the wireless setup method ], the printer operations recommended by the setup guide are unnecessary.
Just select the same connection method as you have done in [ 1. Select the wireless setup method ], and skip the subsequent instructions by clicking Next until you see the screen below.
- If the printer itself has not been set up, it will not appear in the list of printers on the network.
When you click [ Next ], the setup guide will be displayed. Follow the instructions on the screen to finish setting up the printer.
- Click [ Next ].
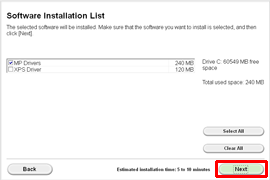
Follow any on-screen instructions to proceed with the software installation.
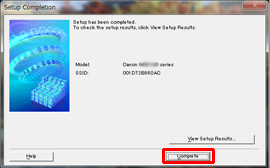
- When the Setup Completion dialog box appears, click Complete.
- Click [ Next ].

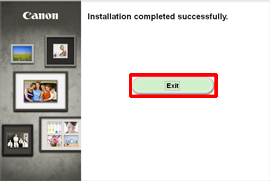
- Click [ Exit ] to complete the installation.
Now the printer connection method is changed from USB to wireless.
- Configure the Printer for Wireless Use and Add it to the Printer List (Mac)
To configure your printer for wireless use, there are a few different ways that you can do this.
- WPS Push Button
- WPS PIN Code
This will require entry of the printer's WPS PIN code into your router's internal settings. Please refer to your router's documentation for instructions.
- Using the IJ Network Tool
This requires the use of a USB cable.
If you do not have the IJ Network Tool installed on your computer, click here to go to the support page for your printer.
Click the Software tab.
Click the Select button to the right of the IJ Network Tool.
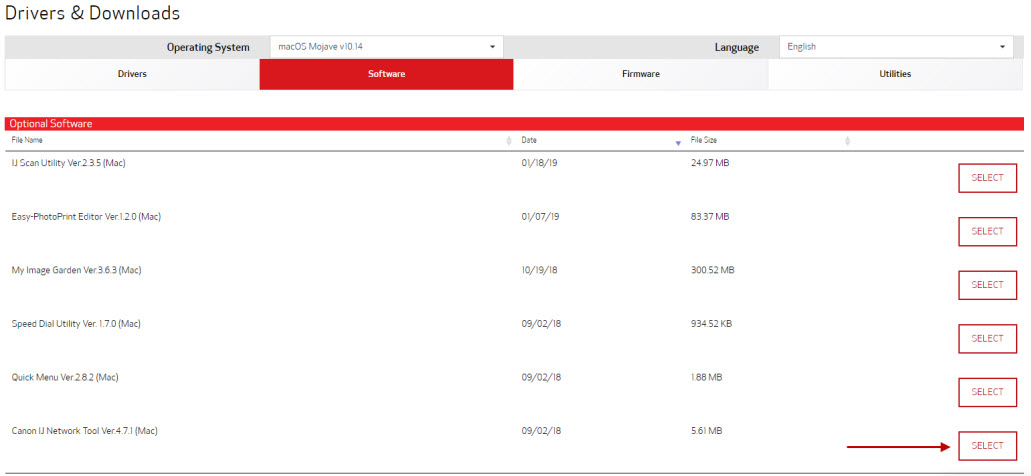
Click the Download button that will appear. Save the file to your computer and open the .pkg file that appears. Follow all on-screen instructions to install the IJ Network Tool.
- Using Canon PRINT Inkjet/ SELPHY from a mobile device (iOS or Android)
- Standard setup
This method will allow you to manually connect the printer to the network via its operation panel
After the printer has been connected to the wireless network, follow the steps below to add it to your printer list.
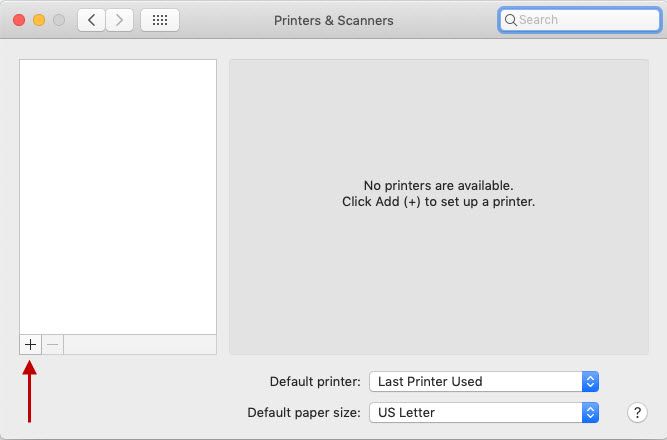
- Click the Apple menu and go into System Preferences.
- Click Print & Fax / Print & Scan / Printers & Scanners (the name will depend on which version of macOS you are running).
- Click the + towards the lower left.
- The Add window will appear. After a few moments, a listing for your printer will appear. The Kind will be Canon IJ Network.
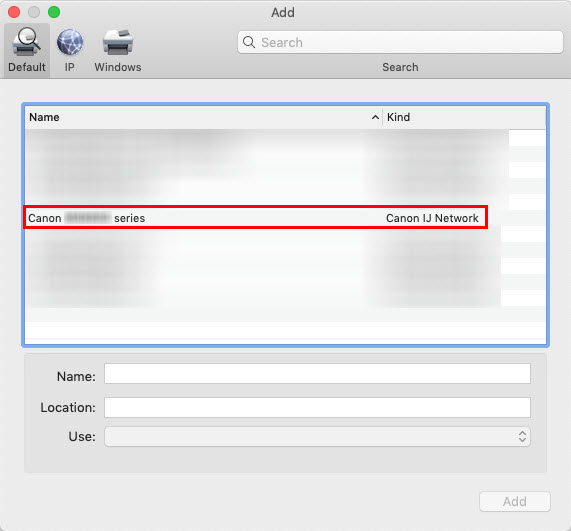
Click this listing.
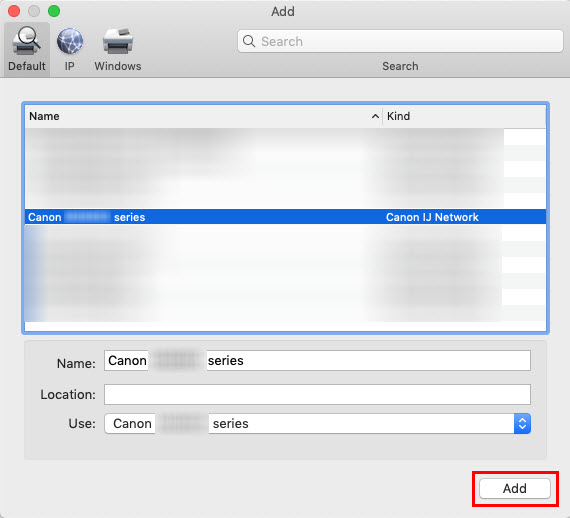
- After clicking this listing, make sure that the name of the printer shows for Use:. Then, click Add.
The printer is ready for use with your Mac.
Note
- When adding the printer to your printer list, if you wish to keep the USB listing for the printer, you may want to specify a name for the wireless version of the printer. This will make it easier to distinguish between the USB and wireless versions of the printer.
MX490 / MX492 Page
Now the printer connection method is changed from USB to wireless.